|
|
Post by Lee Martin on Jan 29, 2017 21:27:29 GMT -5
So did you mill the top AND the bottom of the window? Sorry, I'm new to the process of making a conversion. Very fascinated by it. Yes, 0.030" off the top and bottom. 0.060" total. -Lee www.singelactions.com"Chasing perfection five shots at a time" |
|
cmillard
.375 Atomic
   MOLON LABE
Posts: 1,996
|
Post by cmillard on Jan 30, 2017 7:25:31 GMT -5
very nice lee
|
|
|
|
Post by Rimfire69 on Jan 30, 2017 7:40:25 GMT -5
Fantastic as usual.
|
|
|
|
Post by DiamondD on Jan 31, 2017 3:09:32 GMT -5
"However, some radius is recommended. Remember, a curved edge is stronger than a straight 90 degree. Ever wonder why airplane windows are oval and not square?" Interesting I am learning a lot from this thread.
|
|
|
|
Post by Lee Martin on Feb 8, 2017 20:42:36 GMT -5
 Small flat, round, and square files were used to dress the inner surfaces. I had to go slow throughout. The corners must be consistent and tight enough to clear the cylinder. When the entire window isn’t consumed and the cylinder isn’t fully recessed, it’s not as critical. I relied on eyeball and hand to do this. Remove too much steel and you’ll distort the edges. While that won’t obstruct function, it wrecks the look of the gun. 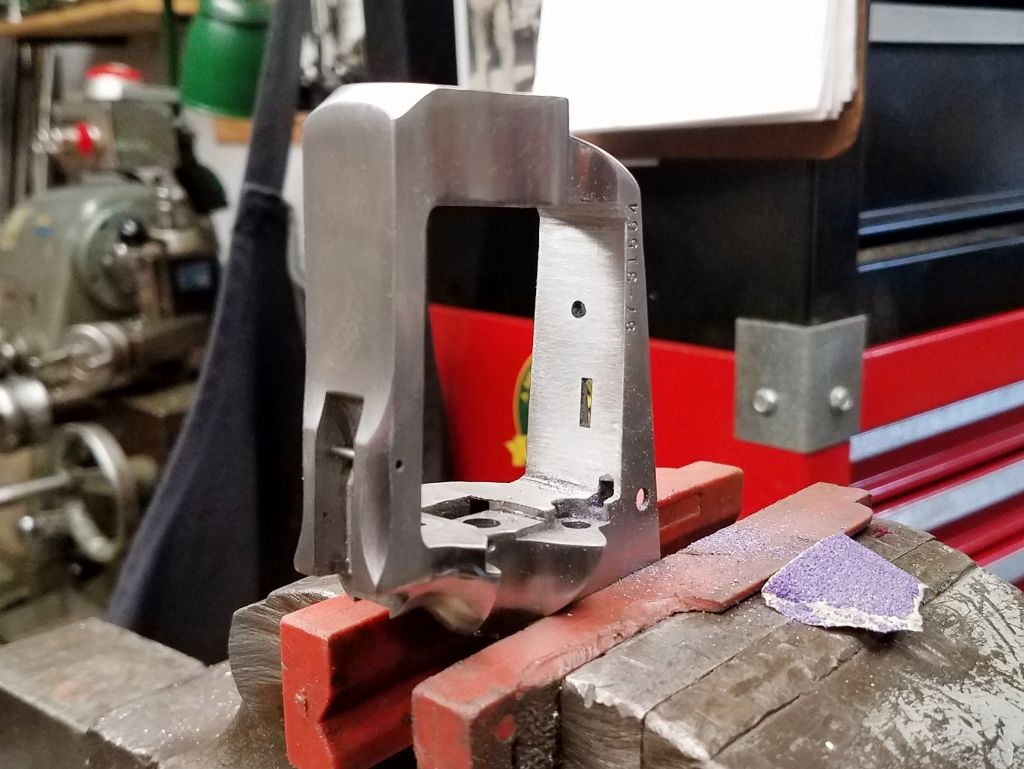 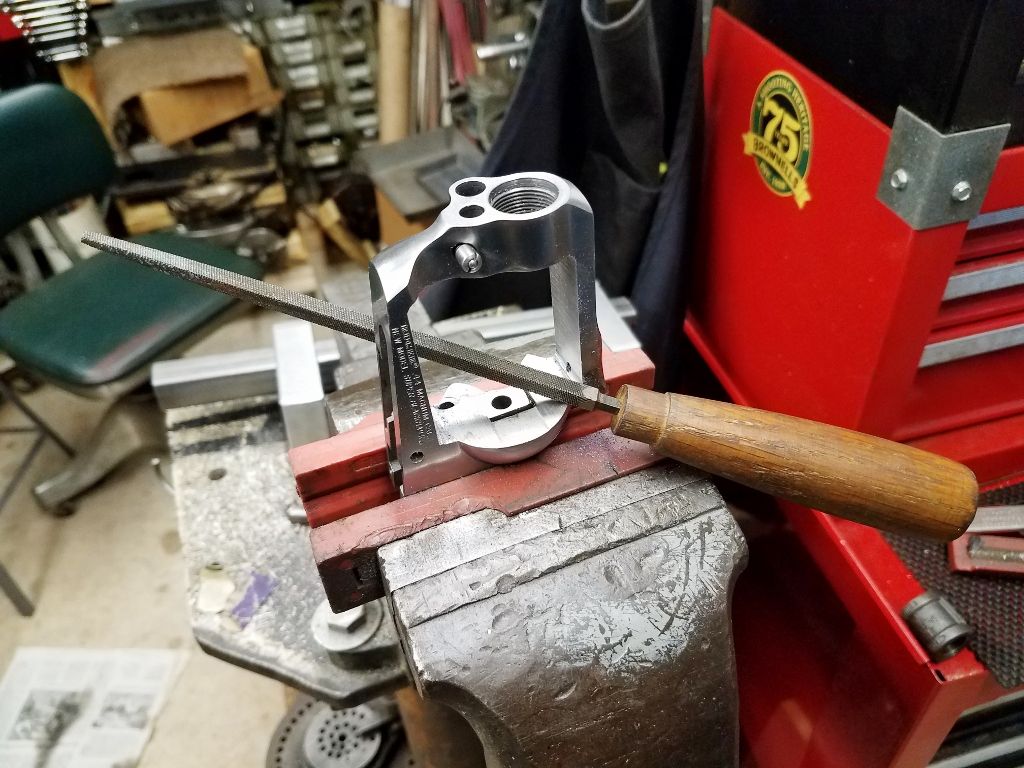 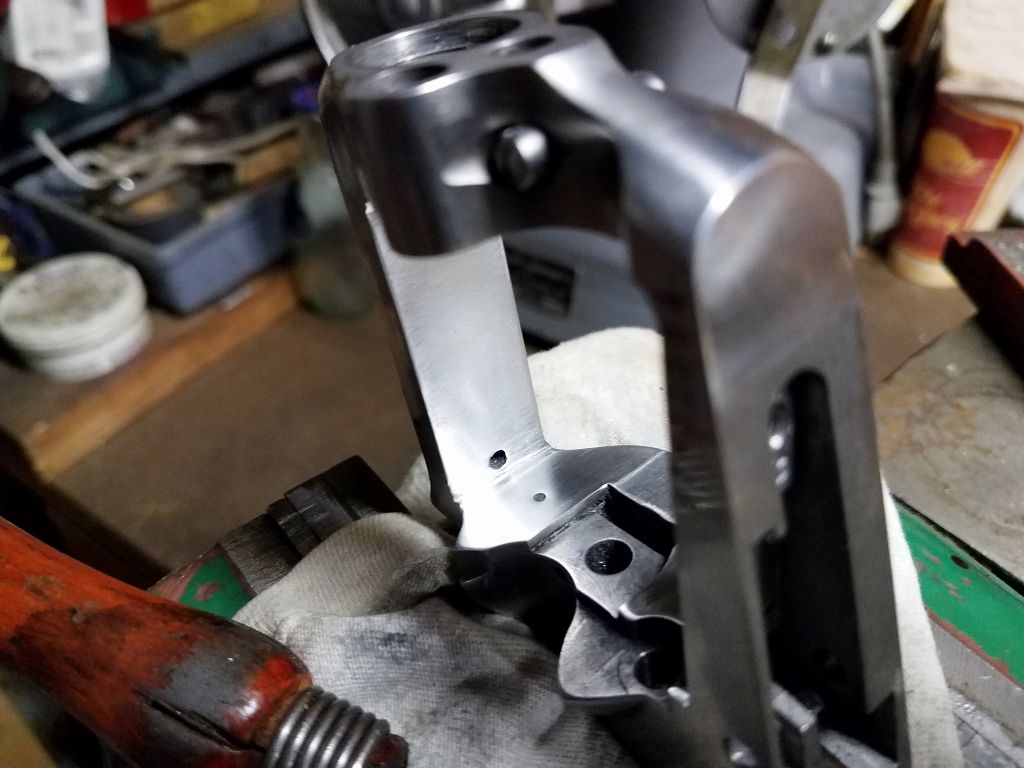 On our conversions, I also polish the inside of the frame. This removes the cast texture and machine marks left from milling. The top, bottom, and breech face are worked with 220, 320, and finally 400 grit sandpaper. If mirror finish is your thing, lightly hit it with 800 grit. 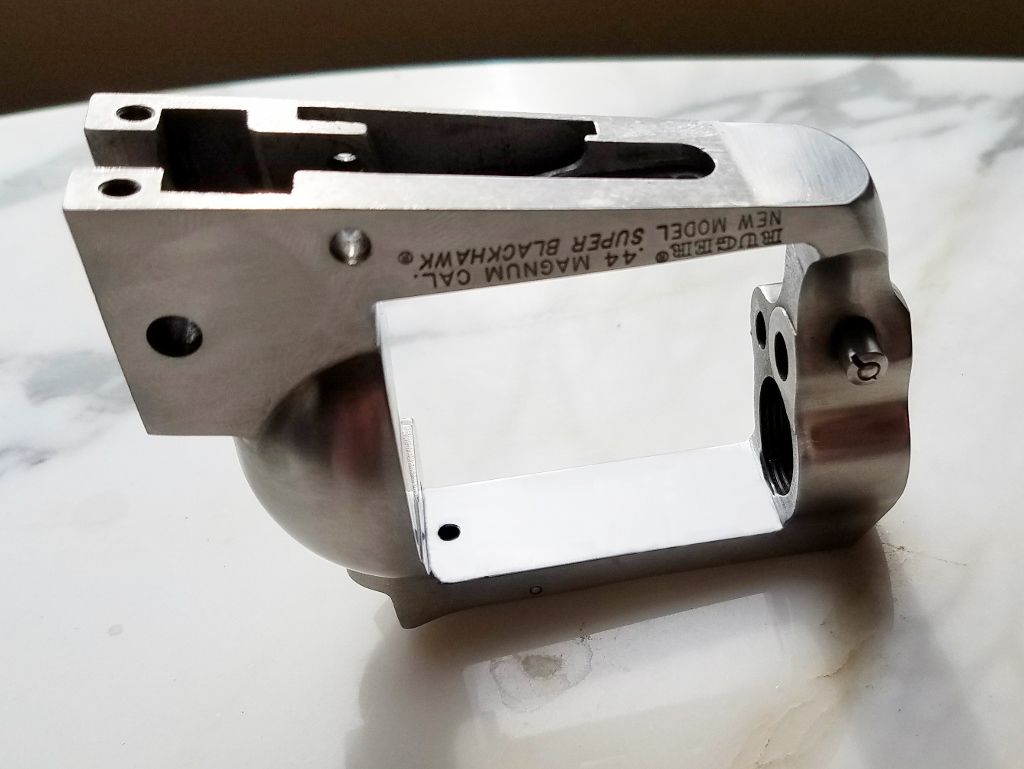 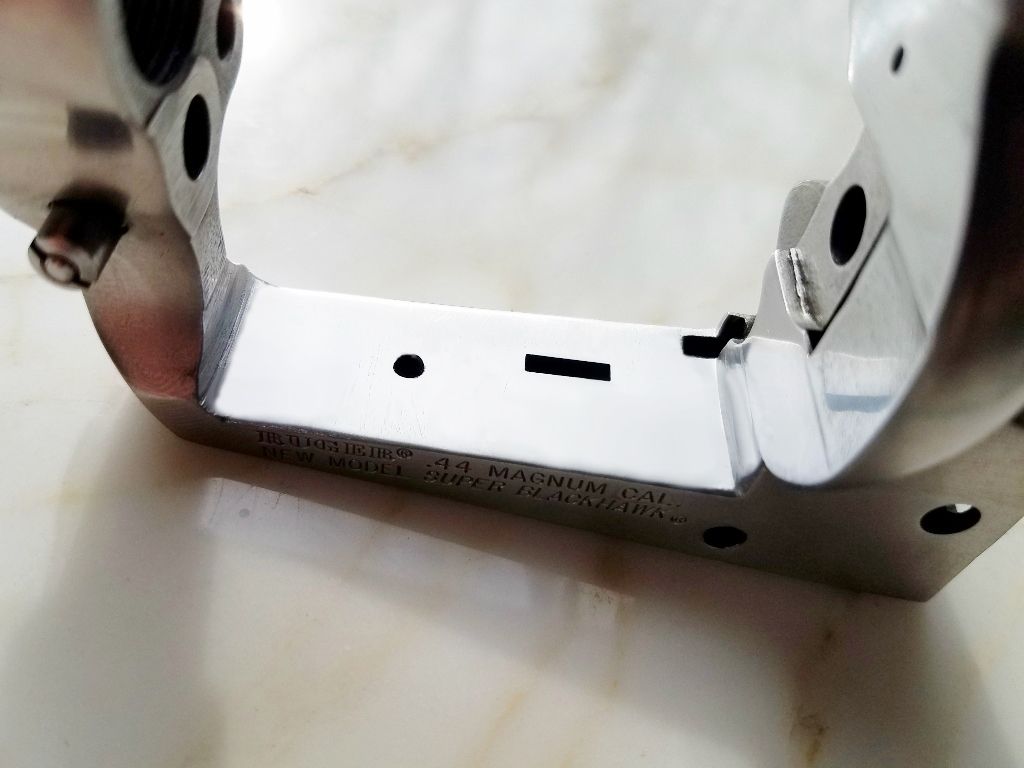 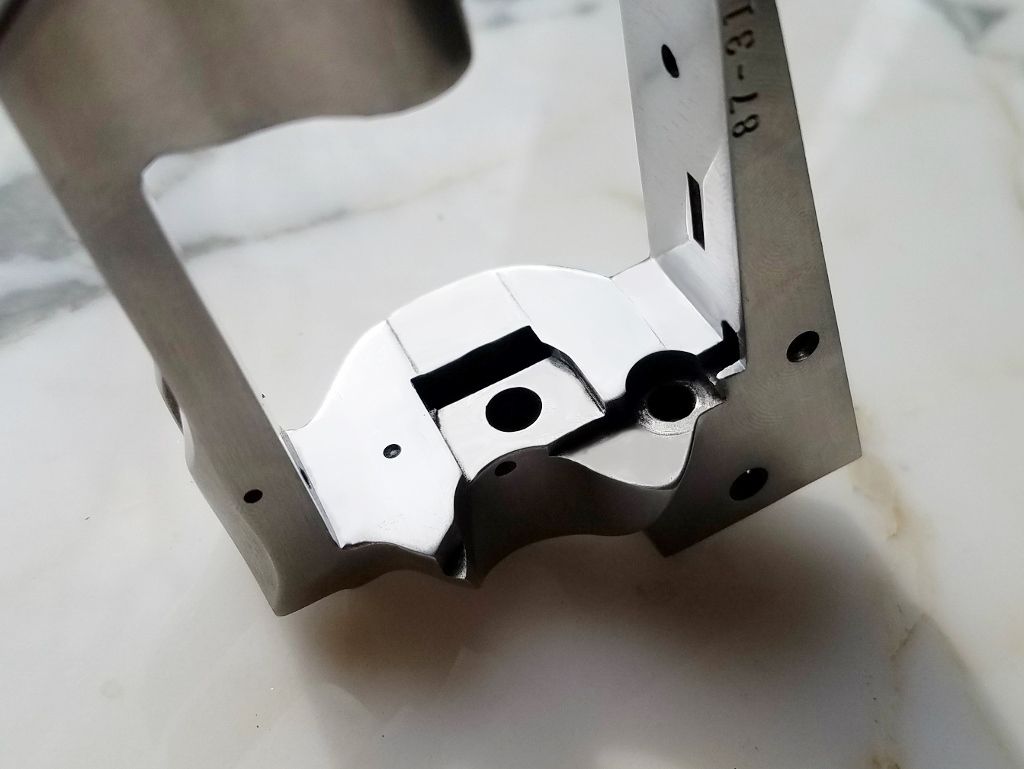 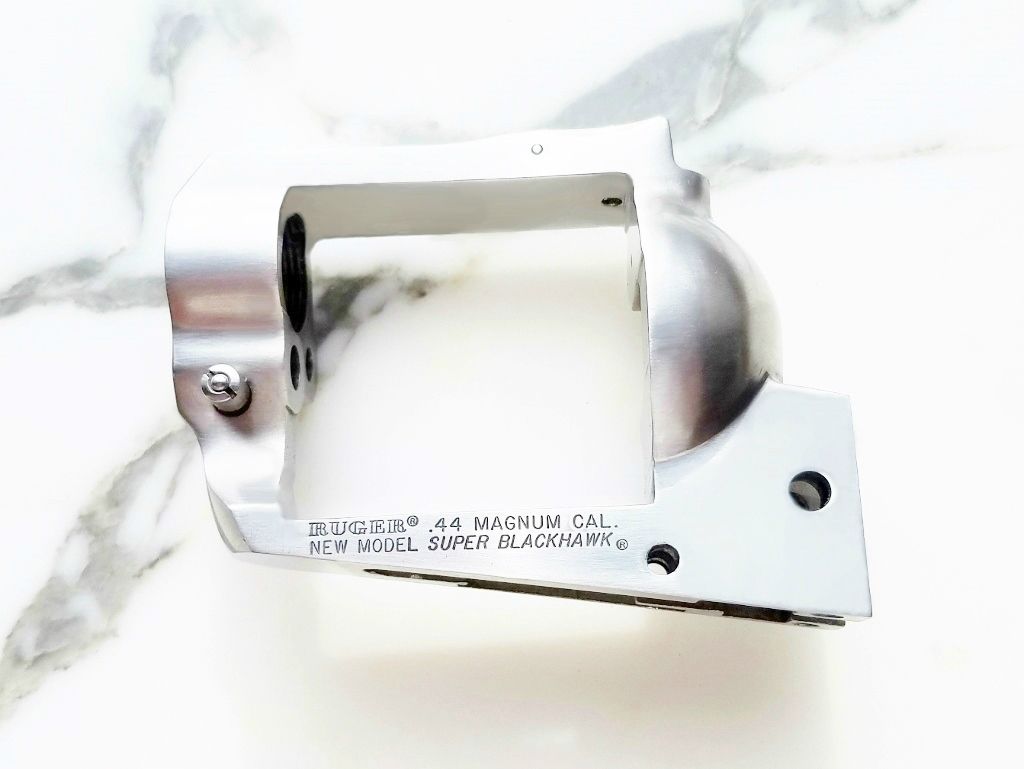 Recap of hours spent so far: Backstrap fitting = 3.0 Frame milling = 2.0 Frame window dressing = 2.0 Total = 7.0 This weekend I’ll fit the oversized bolt to the frame. -Lee www.singleactions.com"Chasing perfection five shots at a time" |
|
|
|
Post by Quick Draw McGraw on Feb 8, 2017 21:08:10 GMT -5
I am loving this thread!
|
|
|
|
Post by Rimfire69 on Feb 9, 2017 7:41:21 GMT -5
Yes, its fantastic to see the step by step process through Lee's great pictures. Next best thing to standing there looking over his shoulder.
|
|
|
|
Post by Quick Draw McGraw on Feb 9, 2017 16:22:39 GMT -5
I lack the heavy machinery and know how to do this sort of thing. But wish I had both. I would thoroughly enjoy making conversions.
|
|
steve
.375 Atomic
  
Posts: 1,547
Member is Online
|
Post by steve on Feb 9, 2017 20:50:54 GMT -5
Lee, are you going to re-letter the frame on this one? I also love these build threads! Thanks!
|
|
|
|
Post by Lee Martin on Feb 9, 2017 21:32:34 GMT -5
Lee, are you going to re-letter the frame on this one? We normally don't Steve, but maybe I will on this one. Since we don't do this as a business, the caliber designation means little to me. Whether it has 44 or 500 on the side doesn't show-up on paper. If I do however, it'll be very crisp. Our engraving machine is a rotary, as opposed to a drag bit. It produces that nice deep lettering. -Lee www.singleactions.com"Chasing perfection five shots at a time" |
|
|
|
Post by Lee Martin on Feb 9, 2017 21:37:05 GMT -5
 Prior to the cylinder build and re-timing, there are parts to amass. I won't do a conversion until I have the final components. Below you'll find: 1) Power Custom oversized bolt - I'll have to custom fit this 2) Power Custom heavier gate spring - again, minor fitting required 3) Belt Mountain #5 basepin 4) Bowen Classic Arms target rear sight - doesn't play into fit and tolerances, but I still want it ahead of time. 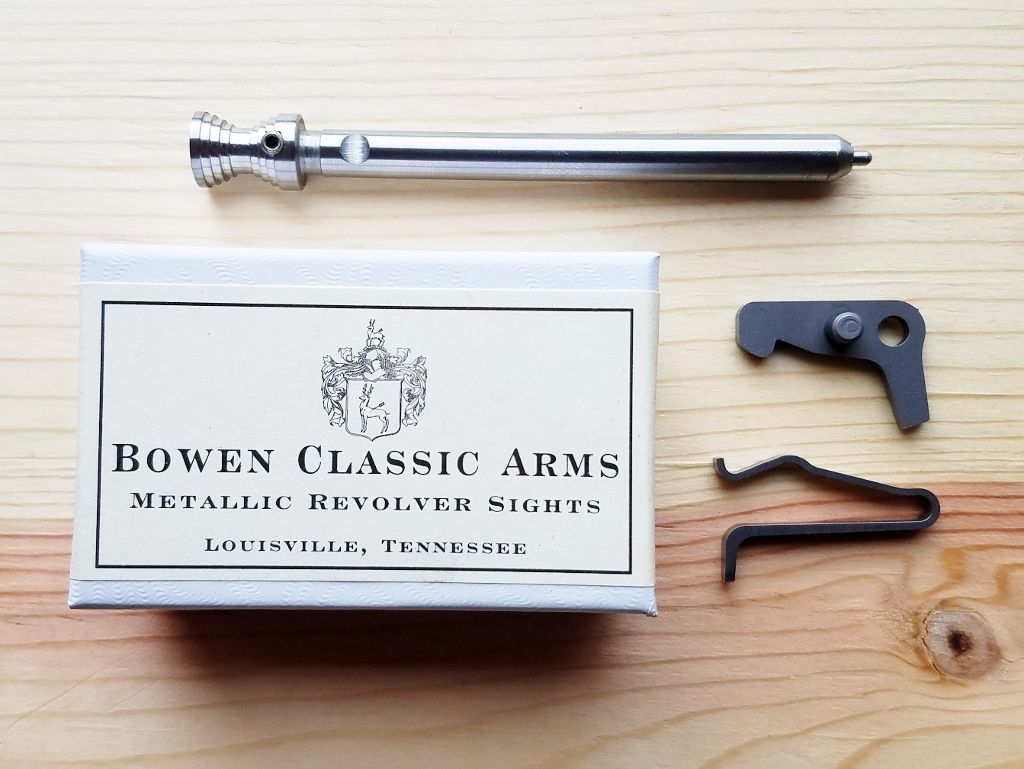 -Lee www.singleactions.com"Chasing perfection five shots at a time" |
|
Joe S.
.401 Bobcat
  
Posts: 2,517
|
Post by Joe S. on Feb 9, 2017 21:40:23 GMT -5
I can see the benefit of the heavier gate spring on big recoiling guns but what about the bolt. What does it do? Does it affect timing on stock guns?
|
|
|
|
Post by Lee Martin on Feb 9, 2017 21:56:08 GMT -5
I can see the benefit of the heavier gate spring on big recoiling guns but what about the bolt. What does it do? Does it affect timing on stock guns? Tighter fit in the frame slot Joe. Ruger bolts mic 0.092" on width. My slot is 0.096". The Power Custom comes oversized at 0.100". I'll surface grind the new one to 0.095" for 0.0005" clearance per side. In other words, it'll be real tight. Our key cutter, which is used to make the bolt stops, also matches the bolt width. Alterations to the bolt will be made to accommodate the milled window (timing). But I'll get into that in the next installment. One hint though....the top has to be ground. -Lee www.singleactions.com"Chasing perfection five shots at a time" |
|
Joe S.
.401 Bobcat
  
Posts: 2,517
|
Post by Joe S. on Feb 9, 2017 22:27:03 GMT -5
Lookin forward to it!
|
|
|
|
Post by Quick Draw McGraw on Feb 9, 2017 22:58:23 GMT -5
I'm on pins and needles!
|
|