|
|
Post by foxtrapper on Jan 10, 2017 7:34:08 GMT -5
Got my files and crescent wrench out ready to follow along! Lol Love these builds!
|
|
|
|
Post by DiamondD on Jan 11, 2017 16:56:01 GMT -5
Got my files and crescent wrench out ready to follow along! Lol Love these builds! You need files too? |
|
|
|
Post by dougader on Jan 11, 2017 18:50:37 GMT -5
What am I going to do with these metric sockets?  |
|
|
|
Post by 2 Dogs on Jan 11, 2017 19:54:14 GMT -5
Well Lee, I can tell you for a fact that few here are as interested in this new thread as I am. You almost have 700 hits and you haven't even turned a screw yet. You can start an avalanche! No question about it!
I hope I get to meet you in person soon. I'm quite sure I am going to be well impressed.
|
|
|
|
Post by Rimfire69 on Jan 14, 2017 8:19:43 GMT -5
I can't wait, your close up pics of the machine process is second to none.
|
|
|
|
Post by Encore64 on Jan 14, 2017 8:35:08 GMT -5
Hope I know which walnut will be used for the panels.
|
|
|
|
Post by Lee Martin on Jan 14, 2017 11:54:31 GMT -5
 For the second straight Saturday, freezing rain halted my shooting plans. It seems my shoulder is the only thing happy about the conditions; I was all set to photograph and chrono my .585 Nyati from the bench. Instead, I finished fitting a Bisley gripframe to the donor gun. I’d like to get this to Huntington to allow time for the reshape and wood carving. We’ll use a spare Bisley frame as a mock-up during the build. I started with your basic stainless conversion kit: 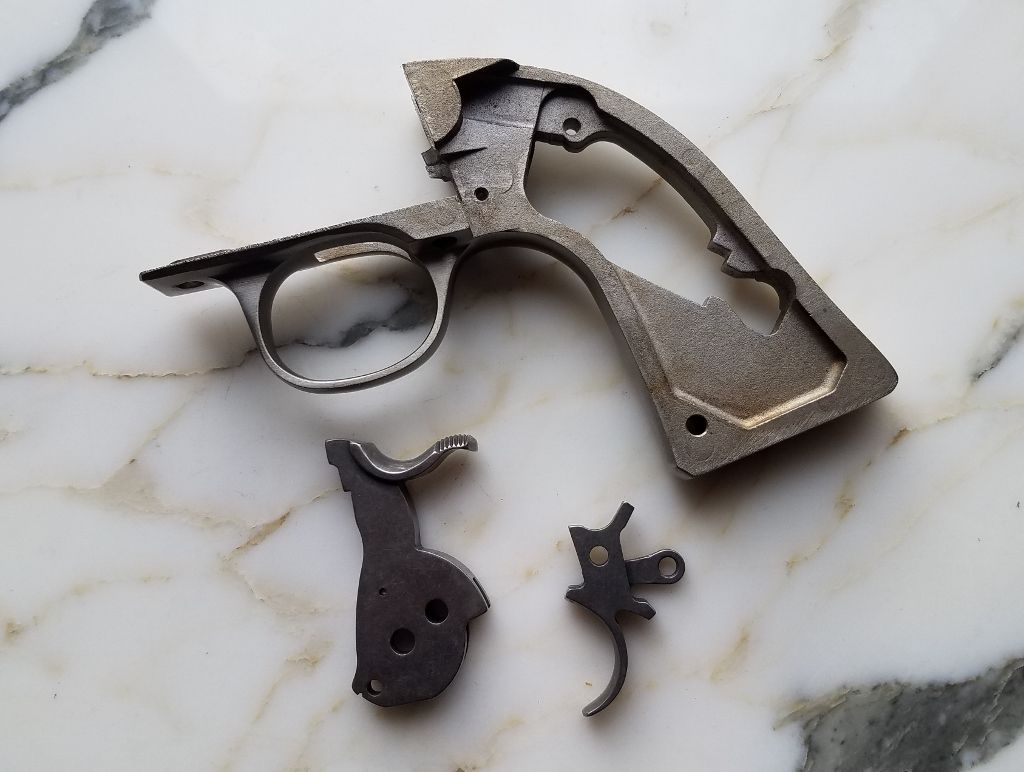 I won’t inundate you with pictures on how to fit these. Many of you have done this yourself. As we all know, Ruger ships the frames oversized. Mating them to the frame entails bolting it up, marking the high spots, and a lot of filing and sanding. For those that haven’t done this, here are the main areas to focus on: 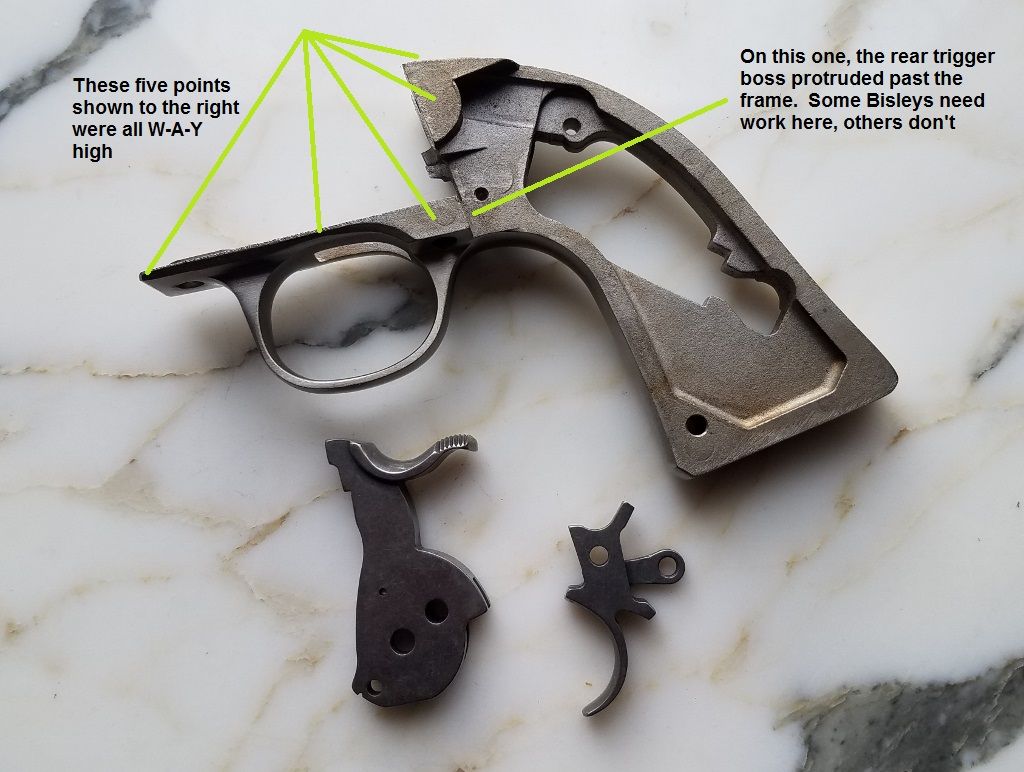 I went real slow, filing the overhang, assessing it against the frame, and then marking additional points to relieve. 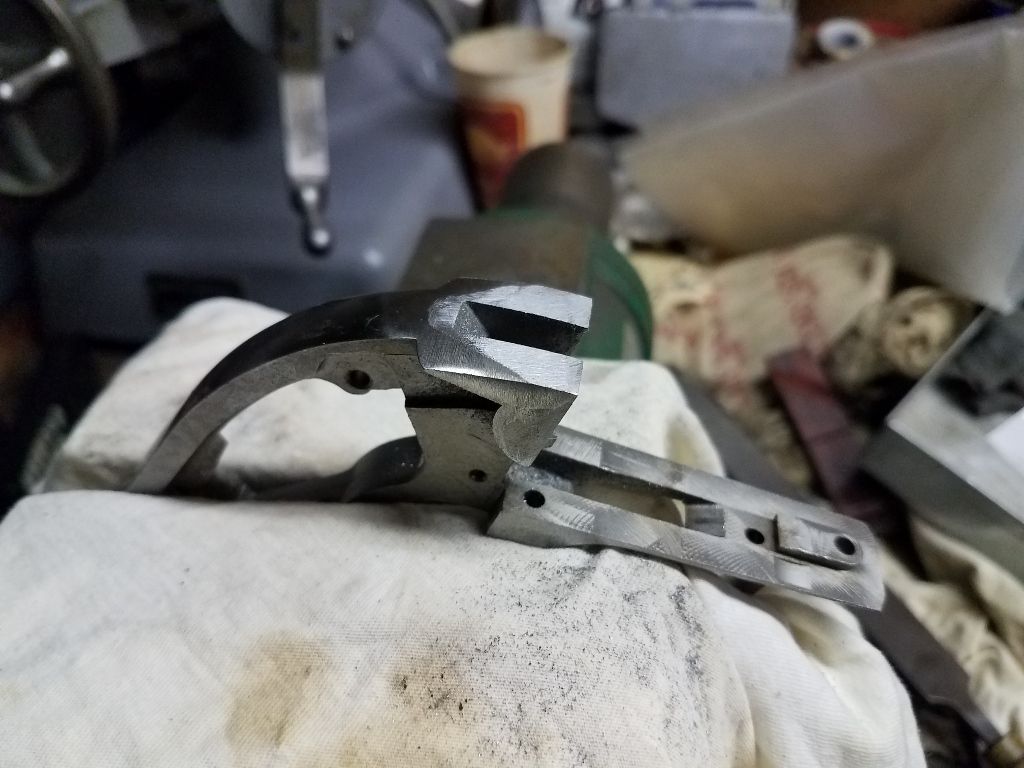 Once filing was complete, I sanded with 100 grit to blend the two. This was followed by 220, 320, and 400 grit sanding. And here’s a quick tip – if you ever want to replicate Ruger’s brushed stainless, start with 320 and then lightly scuff with 400. 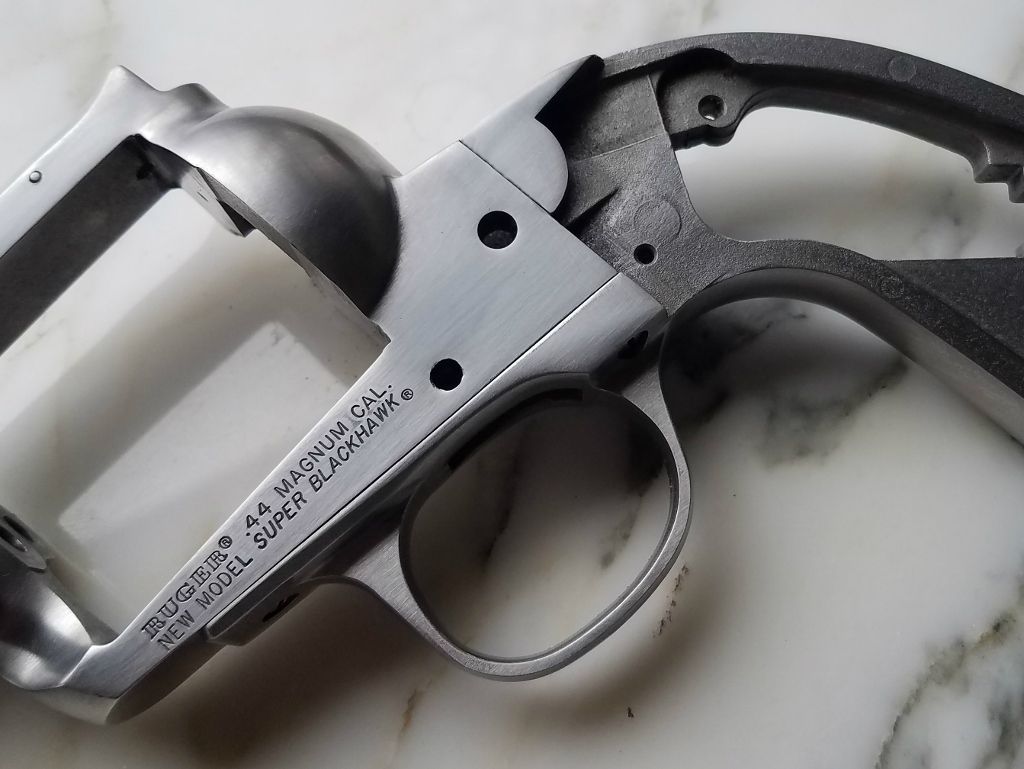 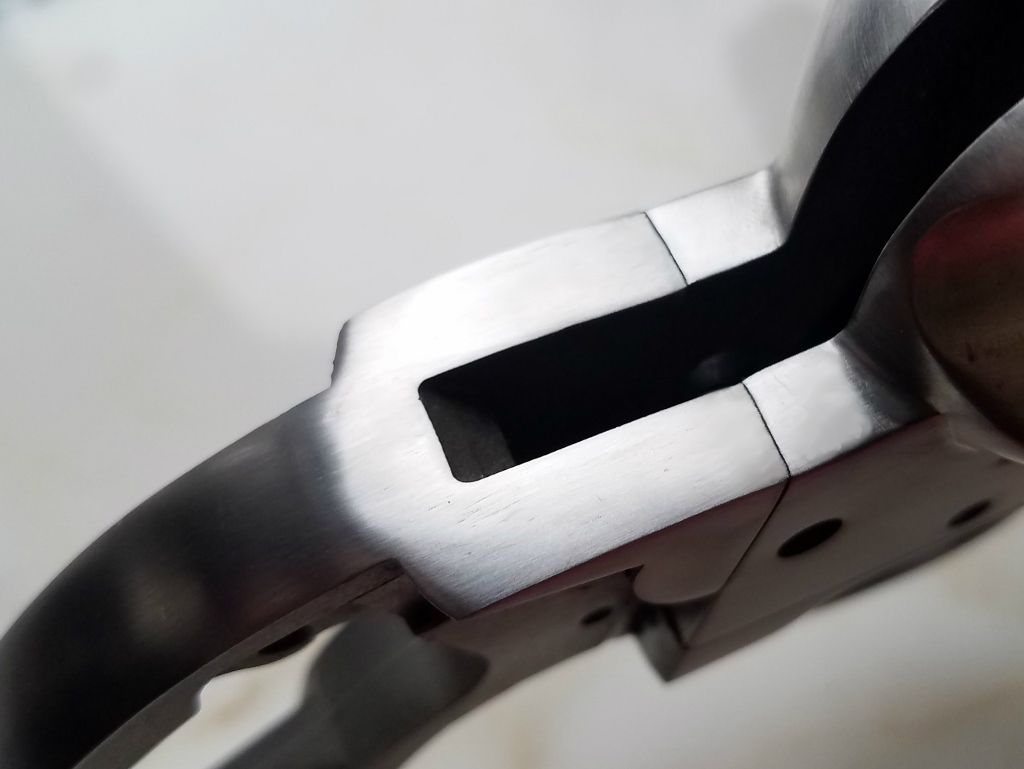 Throughout this thread, I’ll callout the time spent for each task. This should give you an idea of how long it takes for builders to complete these customs. In the case of the Bisley fitting, it took three hours. -Lee www.singleactions.com"Chasing perfection five shots at a time" |
|
|
|
Post by kings6 on Jan 14, 2017 12:04:08 GMT -5
|
|
paulg
.375 Atomic
  
Posts: 2,420
|
Post by paulg on Jan 14, 2017 12:04:29 GMT -5
I really like the idea of calling the time invest. Where this was 3 hours for you I now know I would need to set aside at least 8-10 hours. :-)
|
|
|
|
Post by Quick Draw McGraw on Jan 14, 2017 14:23:41 GMT -5
I really like the idea of calling the time invest. Where this was 3 hours for you I now know I would need to set aside at least 8-10 hours. :-) Me too!!! Wow, nice work, Lee. I'm following your .585 Nyati post too, so today was a no lose proposition for me. |
|
|
|
Post by Markbo on Jan 14, 2017 18:52:58 GMT -5
Yeay!
|
|
|
|
Post by dougader on Jan 15, 2017 10:36:55 GMT -5
Fantastic from the first frame. I love these pictorials.
|
|
|
|
Post by DiamondD on Jan 15, 2017 21:51:32 GMT -5
Great thread!
|
|
magpouch
.30 Stingray

Posts: 439  Member is Online
|
Post by magpouch on Jan 23, 2017 20:45:07 GMT -5
Thank you very much for sharing this with us.
|
|
|
|
Post by bushog on Jan 23, 2017 21:19:49 GMT -5
Thanks Lee.
Great start!
|
|