|
|
Post by Lee Martin on Apr 3, 2014 15:47:25 GMT -5
One more thing. Hopefully this thread shows why a $1,500 to $2,000 BR action is a deal. These receivers take any inordinate amount of time to machine. And unlike so many other guns, they're forced to prove their worth on the line. George Kelbly once said if it weren't for his scope base and ring business, they'd never stay afloat enough to even offer the Panda (and that's with CNC). -Lee www.singleactions.com"Building carpal tunnel one round at a time" |
|
|
|
Post by Markbo on Apr 4, 2014 11:41:20 GMT -5
I gotta tell you... looking at those pics of the receiver machining has a certain pucker factor. I have no machining ability whatsoever. I use hand tools. After reading it I was tickled how tense I had gotten... like when watching an intense 'who-dun-it' movie.  |
|
|
|
Post by Lee Martin on Apr 10, 2014 14:05:52 GMT -5
Benchrest Legends – Arnold Jewell _____________________________________ For a quarter century two things have dominated benchrest rifles. The first is pretty obvious. The 6 PPC is THE cartridge and accounts for 90%+ of comp chamberings. The other is Arnold Jewell’s trigger. No other components are so universally accepted. Query the varmint classes and you won’t find a part comprising even 30% of the field. That includes barrels, scopes, stocks, and actions. Earlier I covered why the PPC rules the roost, but what about the Jewell? How did one trigger corner so much of the market? The story of Jewell’s trigger began haphazardly. Arnold’s background was in aeronautics and dates to the mid-1950’s. He piloted corporate jets such as the King Air, DH125, and Falcons for many years. But the multi-talented Jewell also wrenched them and that contributed to his design. His understanding of levers, springs, and mechanical geometry worked into one the finest triggers you’ll lay your hands on (or should I say index finger). Arnold Jewell  When Jewell took-up benchrest in 1981 he used a modified Remington trigger. Back then, Canjars, Kenyons, and altered 700/40-Xs were the norm. They were good but had their limitations. Of the three, Karl Kenyon’s damn near matched the forthcoming Jewell. The Kenyon was basically hand crafted using files and a hacksaw over the course of 9 hours per. Not surprisingly, supply was scant so they ran in very small circles. Canjars were also competitive but their quality tanked after Matt Canjar died. The family carried on for a spell using existing stock but it fell short. Soon thereafter they closed the shop. I plan on getting into Kenyons and Canjars separately; until then they should be viewed as having influenced the Jewell. Keynon trigger schematic 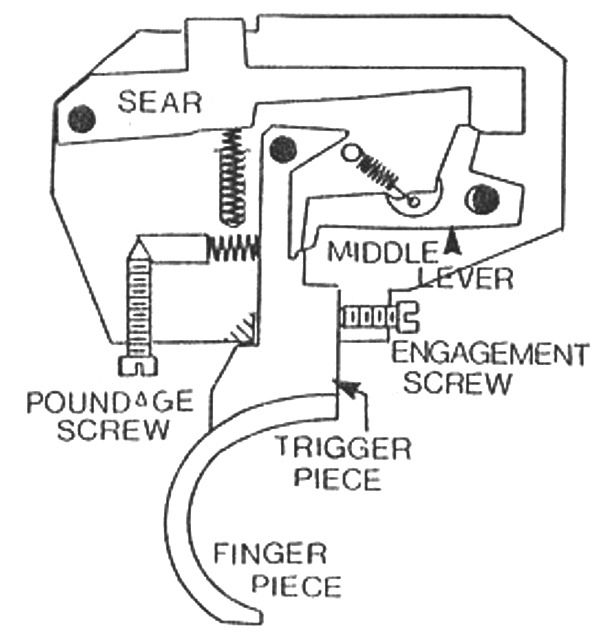 Karl Kenyon (1918 – 2011)  Canjar 700 trigger 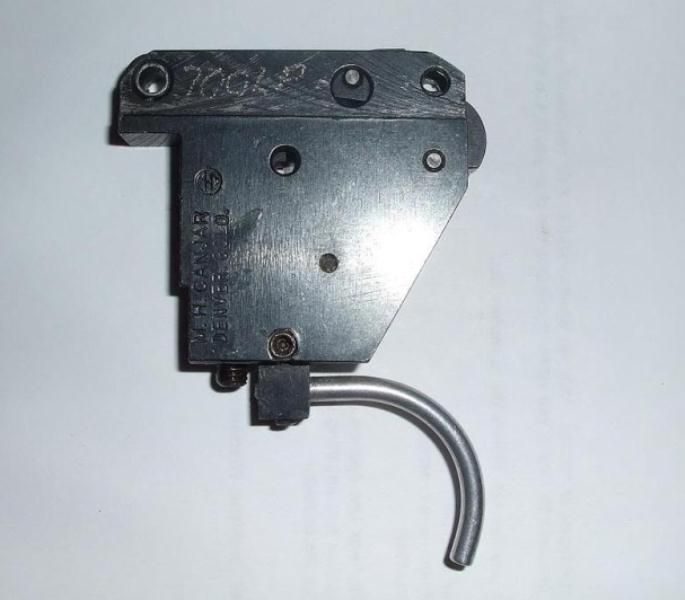 Within a year of starting his benchrest career, Arnold experienced a malfunction on the line. That mishap was a blessing of sorts, without it who knows if we’d have the Jewell. In his own words: “I’ll make a long story short. I was out at the range one day during a registered match. At that time, I was shooting a Remington 40X with a Burns trigger. The Burns is a standard Remington trigger that was modified by Benny Burns to pull at 2 ounces by adding a third lever to it. In the course of fire, I couldn’t keep my bolt cocked; Allen Hall happened to be shooting to the left of me. He said to push the trigger forward when I worked the bolt, which I did, but it wouldn’t stay cocked. So he loaned me his rifle to finish the group, but of course I blew it because I wasn’t used to his gun. I took it over to Harold Braughton, who has been a friend of mine since I started shooting. He had to take the trigger out of the action, and it took him over an hour just to get the trigger adjusted so the bolt would cock. It felt like crap, but at least it would cock. So I thought there must be a better way”. Jewell returned from that match and hacksawed and filed prototype parts. I don’t know the number of variations before the final design. Suffice it to say, for just under $200 you can now buy the ultimate BR trigger. What sets the Jewell apart from other triggers is the sear isn’t fully loaded by the cocking piece. Take a Remington for example. The trigger pivots on one end and rests on the other. Overcoming the burden of the cocking piece itself is the only way to move the trigger. The third lever upgrade, popular in the 60’s and 70’s, reduced pull by placing the trigger arm towards the pivot point. It required less force to break over but they weren’t as durable. Premature wear was common and led to the failure cited above. Jewell’s geometry is so simple I’m shocked it wasn’t used sooner. The inspiration came from the drag link on an airplane strut. Arnold observed how much weight could be supported by a small bearing surface. Slight movement of the drive gear allowed the assembly to unlock. In other words low travel could topple the link but undisturbed it was positive. Could the principle be applied to triggers? 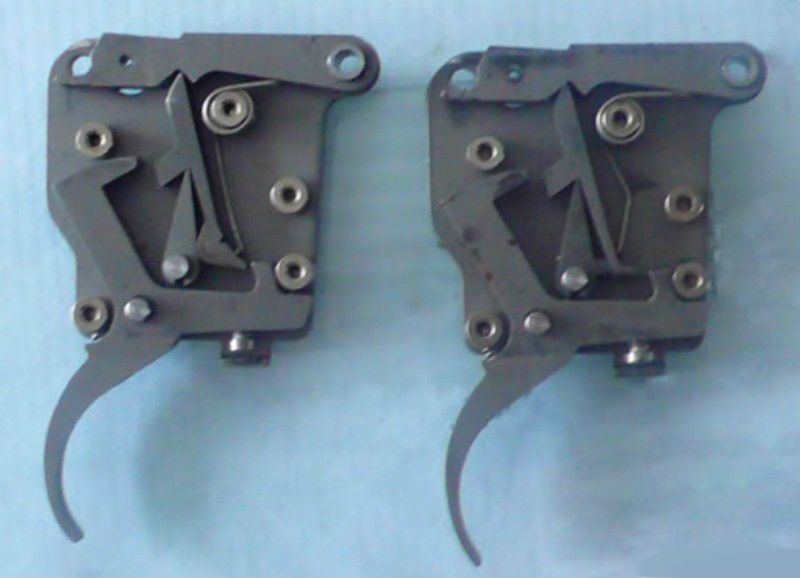 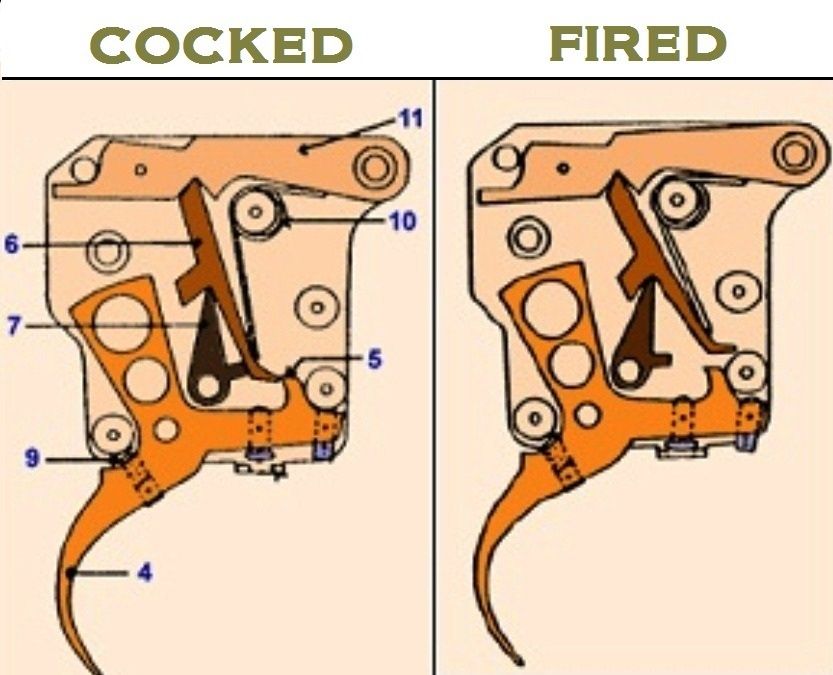 Take a close look at the above schematic. Notice the alignment of the upper lever (6) and the lower transfer arm (7)? Two things standout: First, the contact point of the upper lever on the sear is tiny. Secondly, the firing pin block (11) is held cocked by the vertical alignment of upper lever (6) and lower arm (7). Pulling the trigger releases the sear, allowing the levers to collapse. That drop is 100% due to the exerted spring force (10). And that’s the key to the Jewell trigger. The load on the sear is almost nothing. All of the pull is due to the trigger shoe spring and not part geometries. So if there’s no spring present, the sear would break on its own. Arnold used the prototype in his benchrest rifle for a few years. A fellow competitor liked it and talked him into doing another. Five or six of more followed before a friend convinced him to file for patent. Unpredictably, Jewell didn’t get one patent, he got seventeen. His trigger was that advanced (for reference the core patent is # US4671005A. Filed May 9, 1985, published June 9, 1987). Jewell was also wise in his arrangement of the claim. Without getting into the particulars, he holds a utility patent on the geometry. A couple of companies tried marketing offshoots but Jewell held firm. He had his day in court with both and won. Materials – Jewell’s earliest triggers were made from A2 tool steel and used 4130 side plates. In high humidity the internals would sometimes mildly corrode. That pressed a switch to all stainless in the late 1980’s; 440 internals and 304 series sides to be exact. The entire assembly is hardened to C-scale 59 so wear isn’t a concern. Jewell offers three spring tensions for the Remington style trigger. Pull weight by version: Spring A = 8.0 ounces to 5 pounds Spring B = 2.0 ounces to 1 pound Spring C = 1.5 to 3.0 ounces Benchresters order the C and adjust them to two ounces or less. My Jewell trigger: 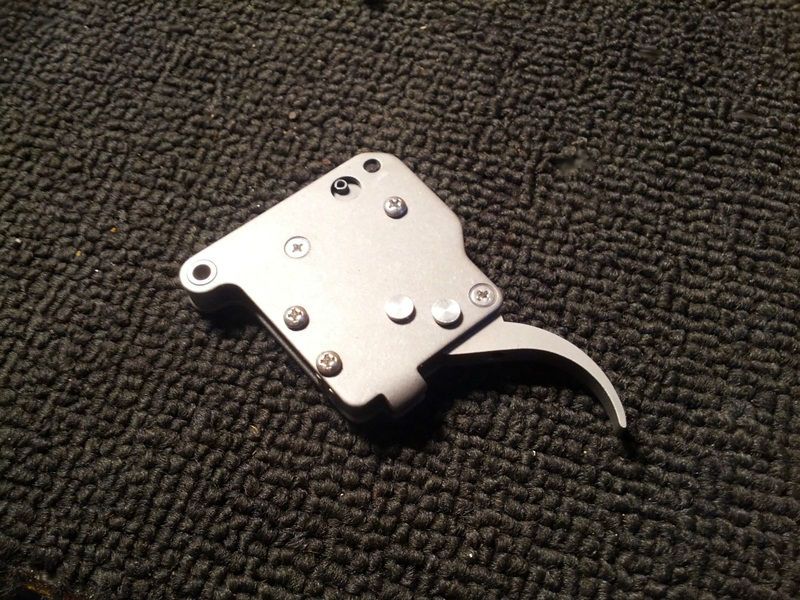 Adjustments are made with a small Allen wrench at three positions: 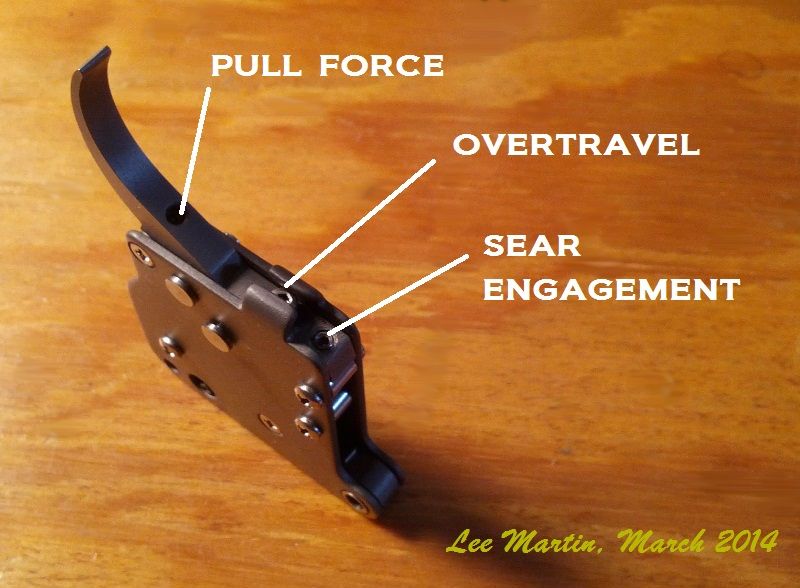 More on how they’re adjusted when the gun is completed. Before I forget though, let me note the over-travel screw. Too many guys set it to stop exactly at the break. In this scenario there’s the possibility of bottoming the trigger shoe and influencing the gun before the bullet exits. For that reason most BR shooters purposely bake some free travel into their triggers. In 1997, the then 59 Jewell turned much of the operation over to his son Brian. At last check they churn out 400 triggers a month so availability isn’t a problem. We’ve used Kenyons, Canjars, and Jewells in our benchrest rifles. After 25 years of shooting all three I’m sold on the Jewell. Their let-off, and equally their adjustments, are unmatched. Dad has one of Arnold’s early triggers from around 1988. Twenty-six years of service and thousands of rounds without incident shows proper vetting. They’ve never even hinted at a reason to switch. But I will say the Kenyon is a close second. In 1989 we purchased Colonel Maurice Kaiser’s 1,000 yard rig. The rifle is chambered in 30-350 Rem Mag minus the belt and is fit with a Kenyon. There’s some history with this one since it briefly held the 1,000 yard record in the 1970’s. Having shot it a lot I grew to like many aspects of the Kenyon, some of which equal the Jewell. More on that further into the thread, but I wanted to callout their quality. If you run across one reasonably priced, buy it. They hold lure and are treasured by the benchrest set. In the past 5 or 6 years new competition triggers have sprung-up. Two noteworthy models are the Farley and Kelbly BR. I’ve yet to use either but will review their mechanics in time. Outwardly though, they’ve descended from the Jewell. To the end, Arnold should be viewed as a benchrest pioneer. -Lee www.singleactions.com"Building carpal tunnel one round at a time" |
|
|
|
Post by squawberryman on Apr 10, 2014 20:13:44 GMT -5
Here's an interesting observation. I really appreciate William Birdsong Black-T coatings, look it up if you're not familiar. When you send them a firearm for complete coverage they completely (READ Completely) disassemble the firearm, plate, reassemble, and test for function. No matter the gun, no matter the number of parts. The one thing they will not disassemble? A Jewell trigger. Go figger.
|
|
|
|
Post by Lee Martin on Apr 17, 2014 12:49:29 GMT -5
Step 38 – Heat Treating the Bolt Head _______________________________________________ The bolt body was machined from pre-hardened 4130, Rockwell ~32. We like 40 – 41 on the lugs so we heat-treated just the head. At 32 C scale there’s no need to quench the entire bolt. Doing so only introduces the possibility of warpage. The bolt head was thoroughly mic’d prior. Dimensions, as well as overall fit in the receiver, were recorded. Our standard heat-treating process involves drawing the metal to temp in a furnace. Since we’re isolating just one end, a torch was used instead. The head was first heated cherry red, ~1,600 F: 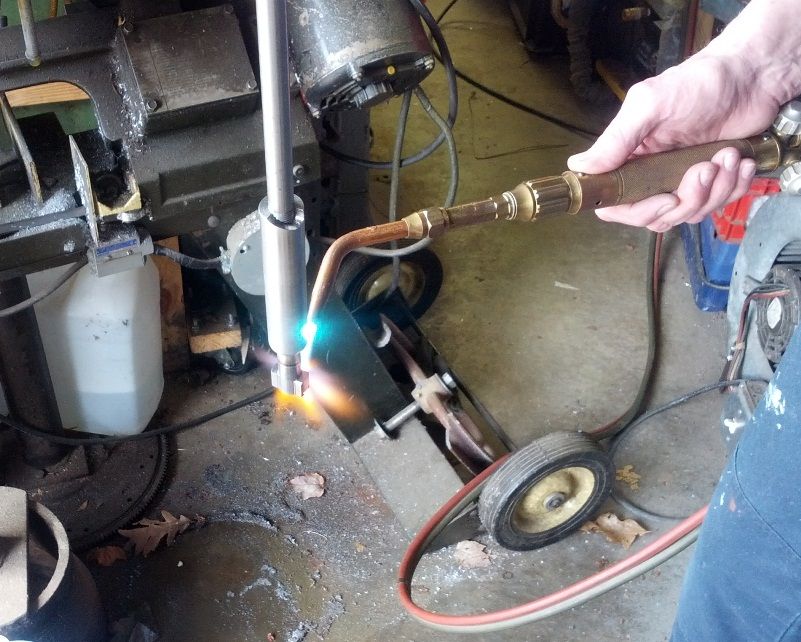 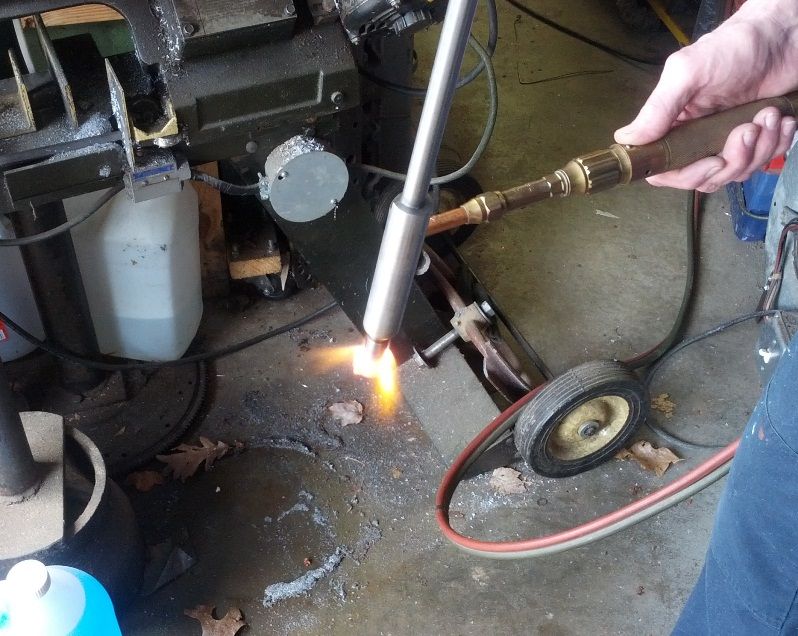 It was then immediately submersed in oil. Care has to be taken to lower it straight into the bath. Anything less than perpendicular can cause it to warp. My dad has been heat-treating for almost 40 years. There’s definitely an art to it and he’s quite accomplished: 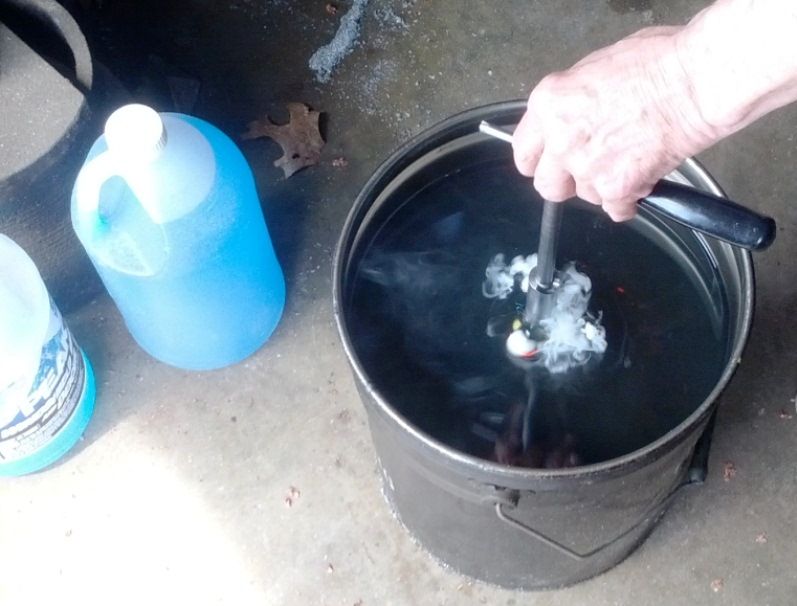 The bolt is left in the oil for 2 to 3 minutes, then removed and cleaned. Some scale will appear on the surface but it’s easily removed with a wire-wheel. What we have now is an extremely hard and very brittle part. You wouldn’t want to drop it on concrete, stress fractures may result. To anneal the bolt to the desired hardness, it is placed in a furnace. Temperature is raised to 800 degrees and held there for 30 minutes. Lastly, the plug is pulled and the bolt cools overnight: 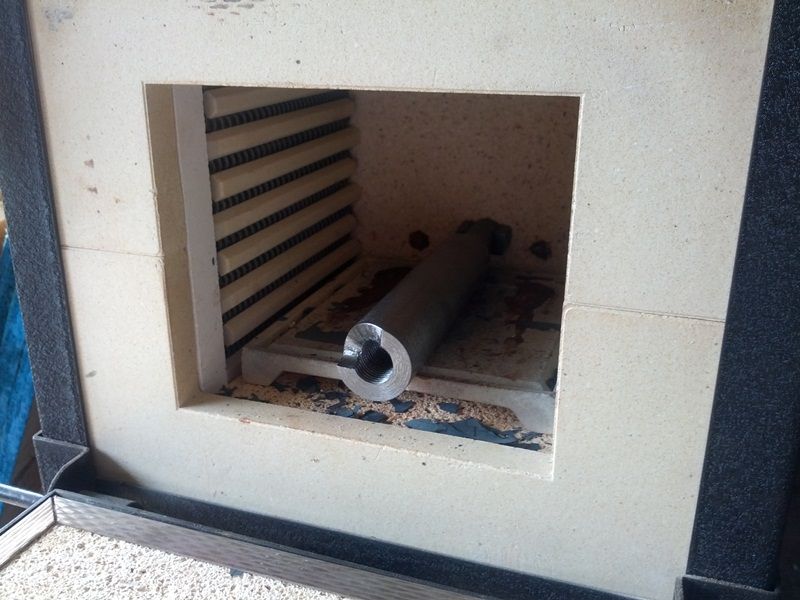 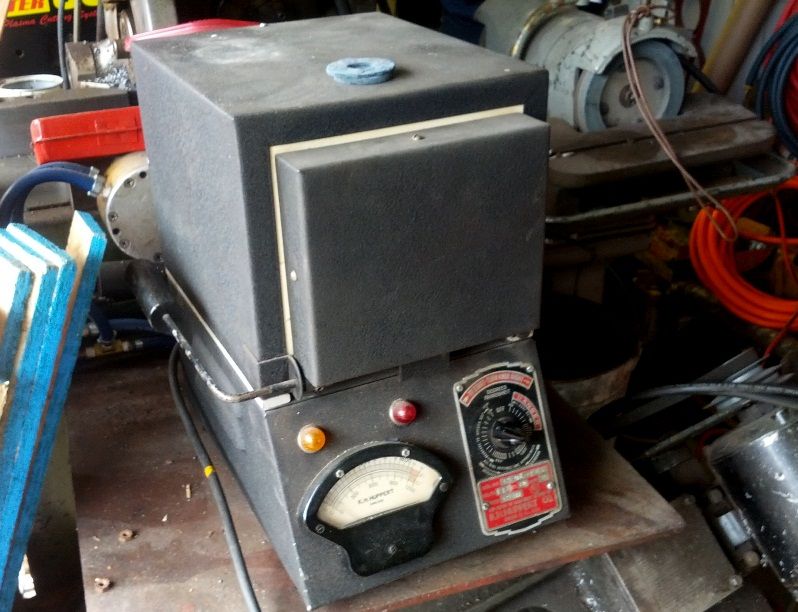 Our furnace at 800 degrees F: 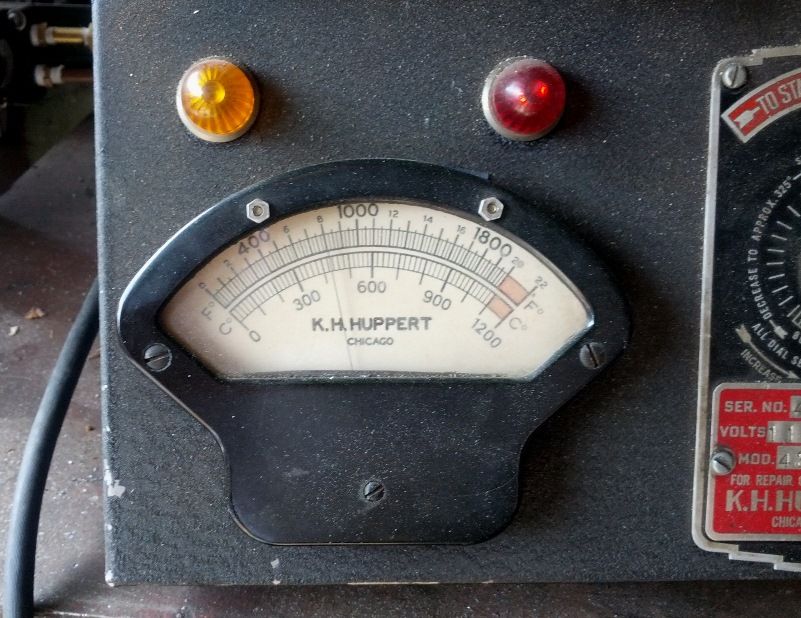 The next day the bolt was mic’d and tested in the action. No material change was observed, no warpage was found, and 40 C was achieved. BTW, a lot of people talk about shrinkage post heat-treating. It does occur but if done properly it can be held to 0.0001” – 0.0004”. A couple of ten-thousandths is negligible, regardless of the firearm application. It’s also important to know dimensional changes are not consistent or unidirectional. Some areas shrink while others expand. Take tool steel for example. Tests proved this when a 2.0” length of bar stock was austenitized at 1,800 degrees and vacuum quenched. The length expanded by 0.02% and the width and thickness shrunk by a similar amount. Variables Affecting Dimensional Change • Material grade • Variation in material properties (chemistry, homogeneity, grain size, number and type of inclusions, and hardenability) • Part orientation versus grain orientation • Starting microstructure • Manufacturing process and sequence of operations • Residual stress state (from manufacturing) • Heat treatment after component manufacturing • Hardness range (initial, final) Variables Related to Heat Treating • Type of process selected - annealing, hardening, nitriding, carburizing, etc • High-heat process - anneal, normalize, austenitize, temperature, and quench times • Low-heat process - age, temper, stress relief, temperature,and quench times • Furnace temperature uniformity • Furnace repeatability • Quenchant type • Quench rate • Part size • Load size • Load configuration • Part orientation/fixturing • Furnace atmosphere • Deep freezing or cryogenic processing • Number of tempering cycles We’ll revisit all this when we heat-treat the receiver. -Lee www.singleactions.com"Building carpal tunnel one round at a time" |
|
|
|
Post by Lee Martin on Apr 17, 2014 12:51:36 GMT -5
Step 39 – Milling the Cocking Piece Slot _________________________________________ The action was placed in a vertical mill and leveled. You have to make sure the receiver is perfectly parallel to the table. Once confirmed, a 3/16” end-mill is used to create the slot: Aligning the action: 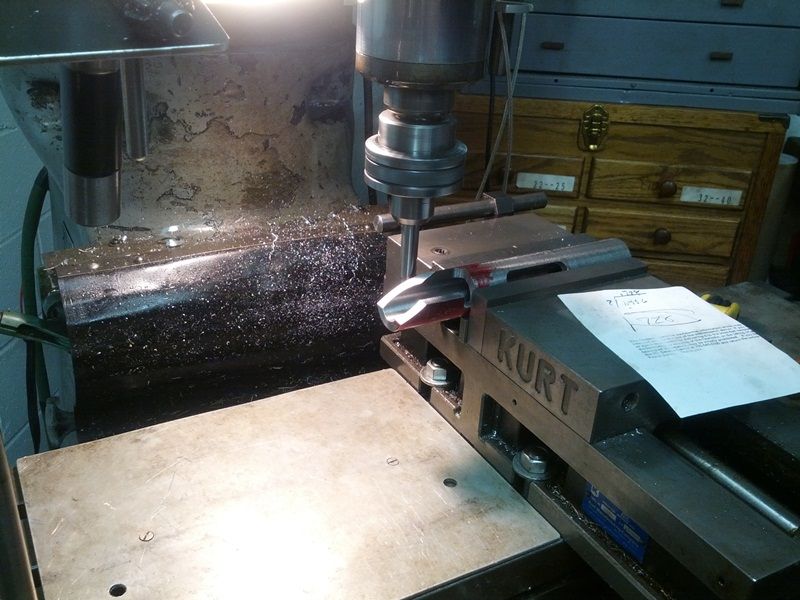 Milling the slot: 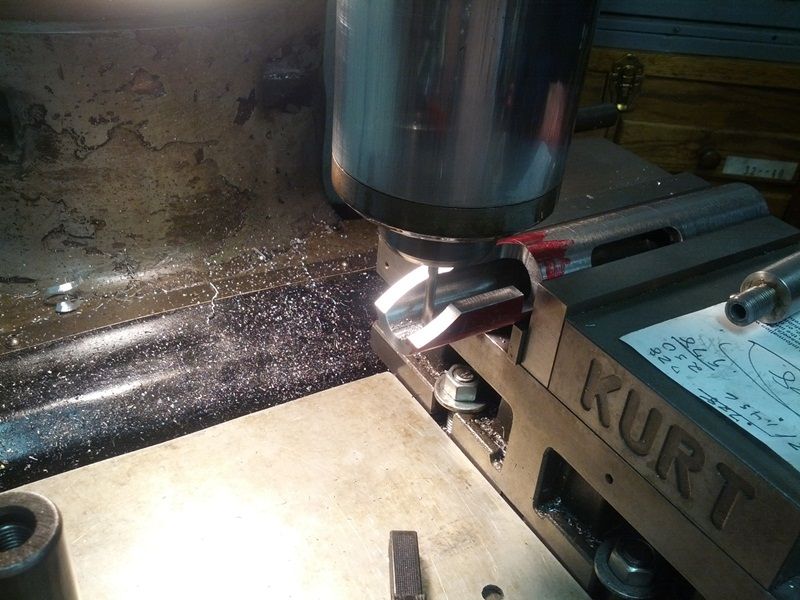 Testing the cocking piece and shroud: 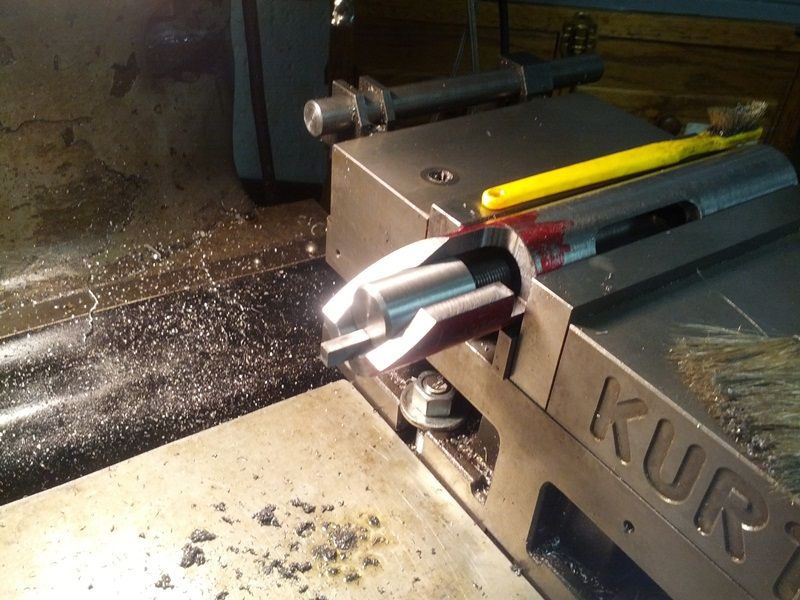 Since TDC was already indicated, we drilled and tapped for our scope rail: 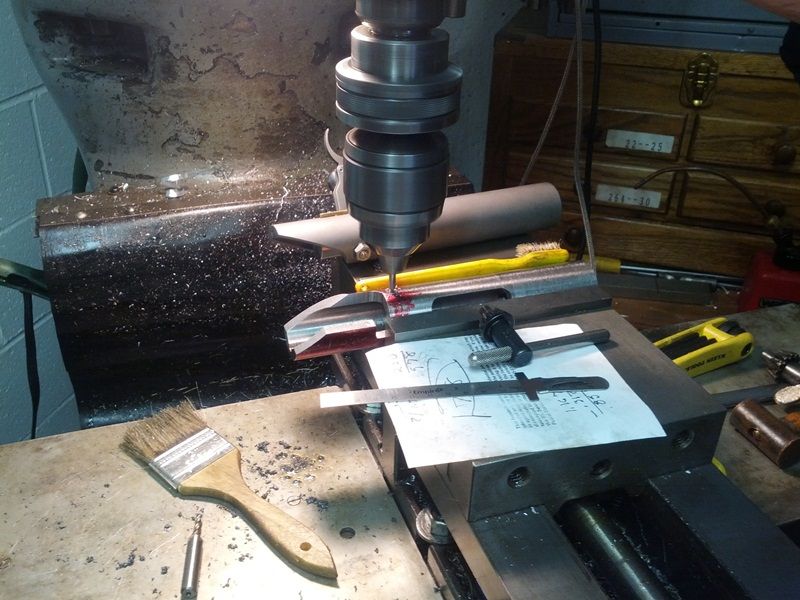 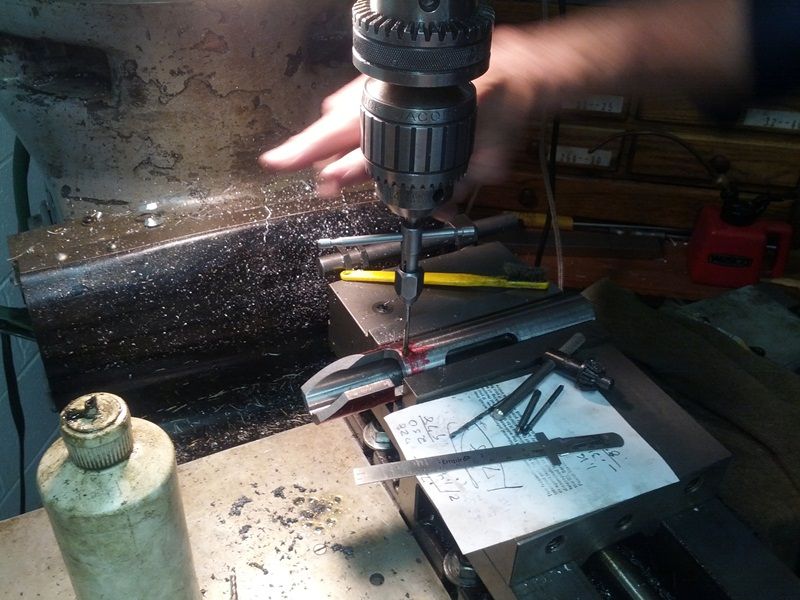 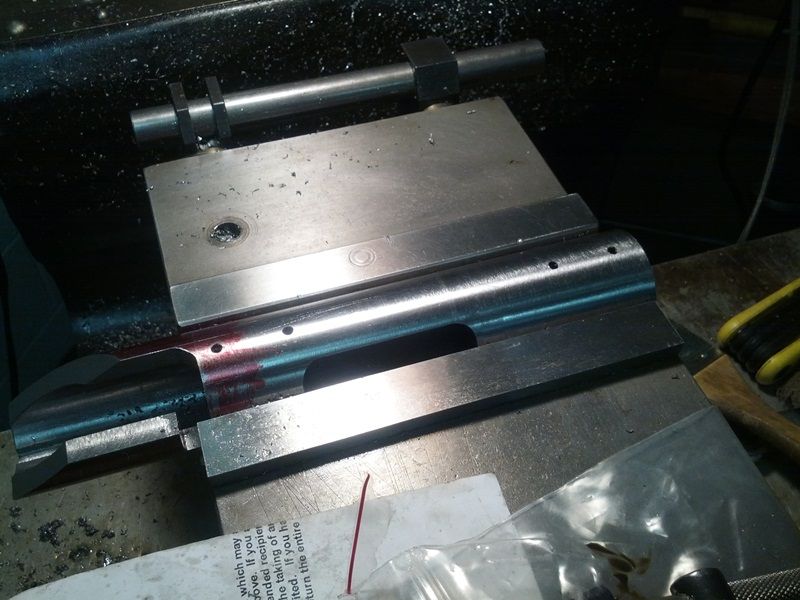 The spacing coincides with Weaver bases. We’ll make our own 1-piece dovetail from aluminum, but it’s nice to have the option to use commercial (for test purposes, etc). -Lee www.singleactions.com"Building carpal tunnel one round at a time" |
|
cmillard
.375 Atomic
   MOLON LABE
Posts: 1,996
|
Post by cmillard on Apr 17, 2014 19:04:59 GMT -5
I like. keep it coming and keep up the outstanding work!
|
|
|
|
Post by Lee Martin on May 1, 2014 12:28:18 GMT -5
Step 40 – The Bolt Handle ______________________________________ Unfortunately, there’s no step-by-step here. We do make our own bolt handles from 1” 4140 but dad already had a few blanked. In brief though, the shaft is lathe turned, an end mill creates the affixing flat, and a radius cutter machines the knob: 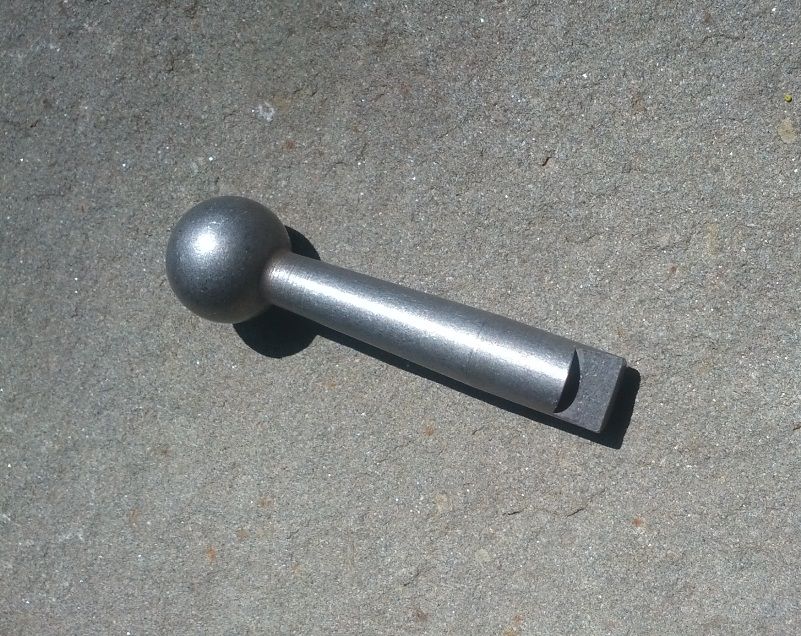 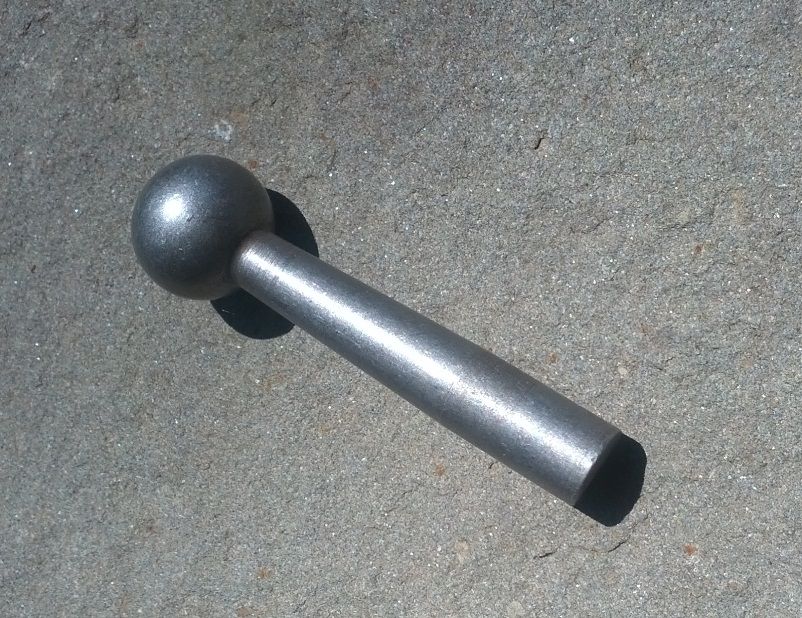 After heating the bolt, the receiver is again finely honed: 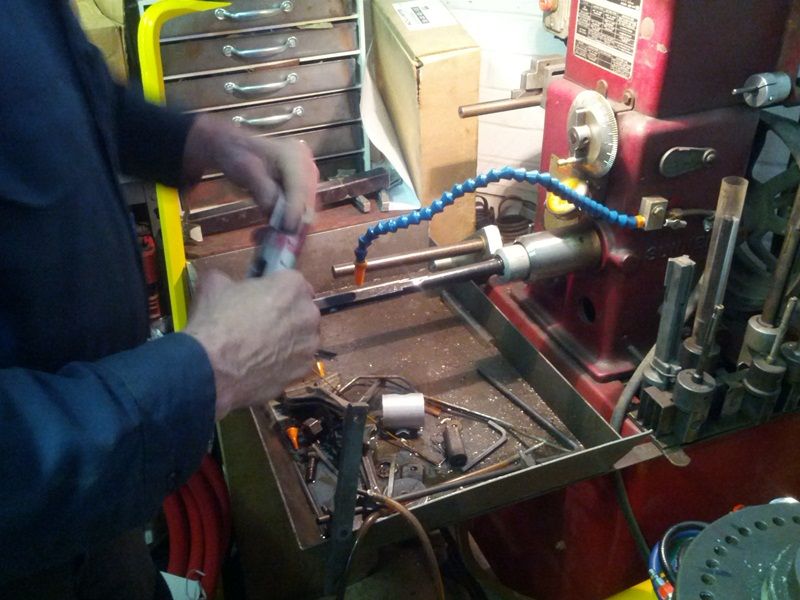 The bolt is installed, the lugs are seated hard against the raceway, and the shaft is marked for the handle tab: 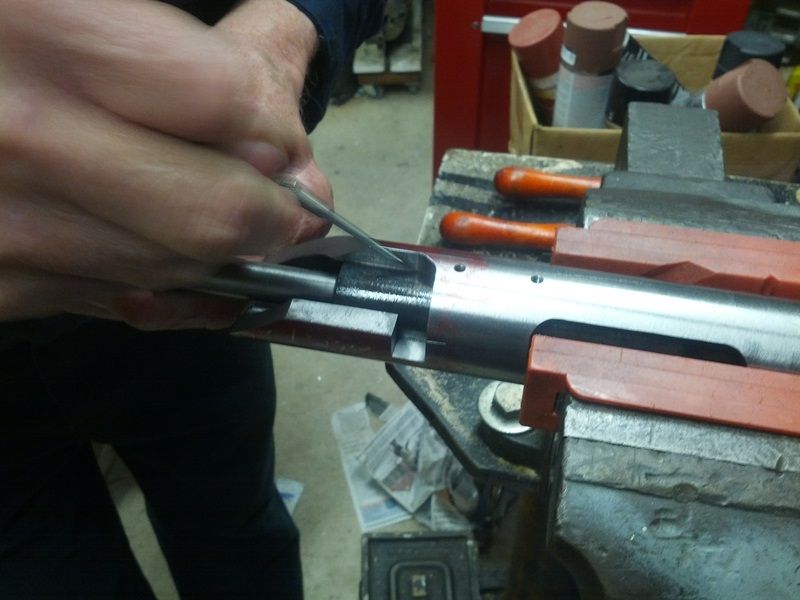 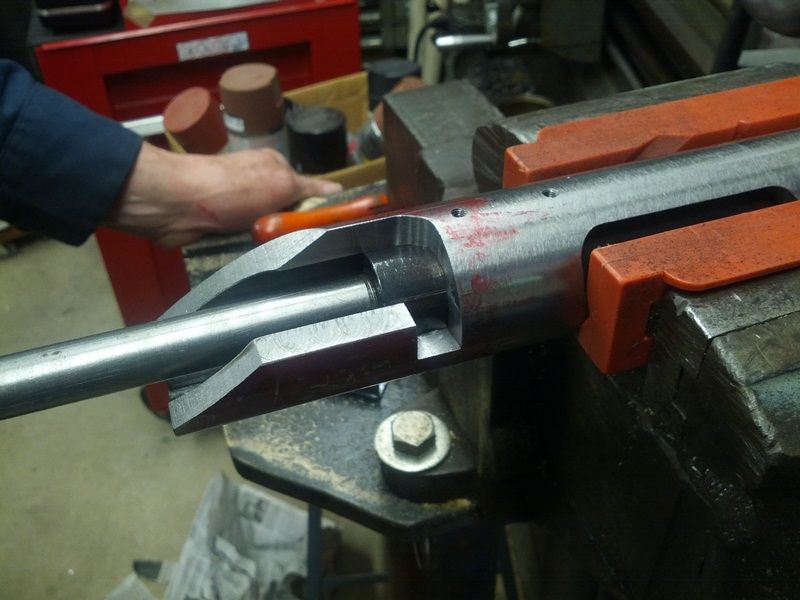 You’ll notice the bolt blued post-heat treating. This is a result of oil quenching but the finish is pretty shallow. We’ll buff it back to white once the handle is attached. A scribe is used to mark two locations. Both of which are vital to correct bolt timing: 1) The front and rear edge of the handle tab, and 2) The action’s cam angle. 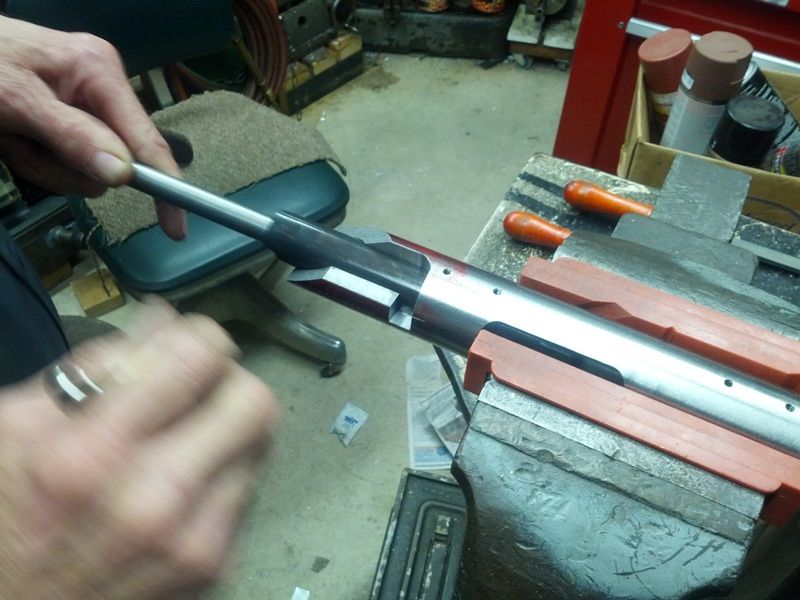 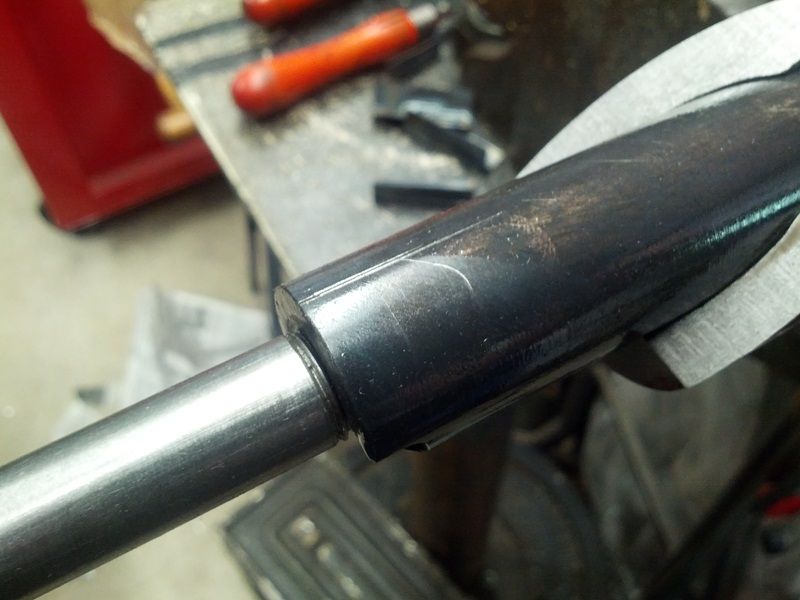 Labeled accordingly: 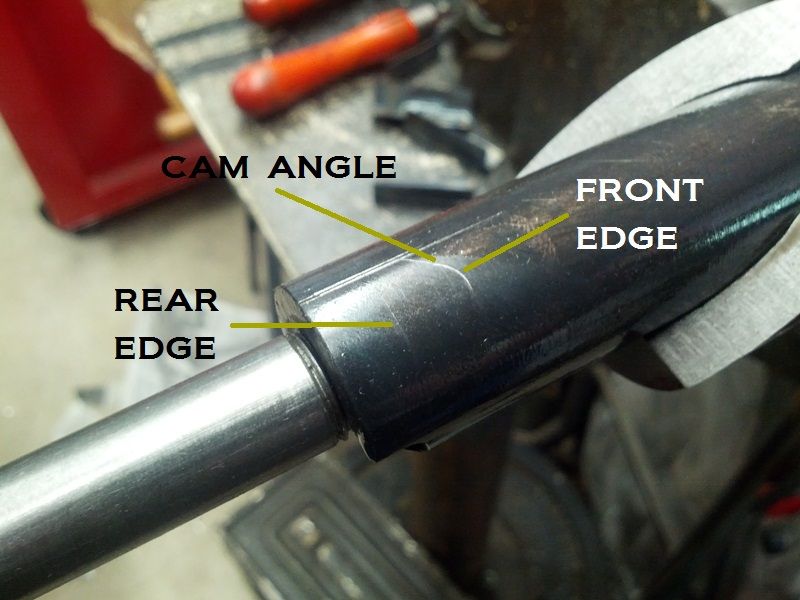 Here’s a shot of our mock barrel shank. This spud screws into the action at a depth approximating the installed blank. With hunting rifles we allow 0.008” – 0.010” in bolt face clearance. On a BR rig we hold much tighter, typically 0.004” (note – you don’t want any less than that. Grit or brass shavings can bind the gun in extremely close quarters; say 0.001” – 0.002”). 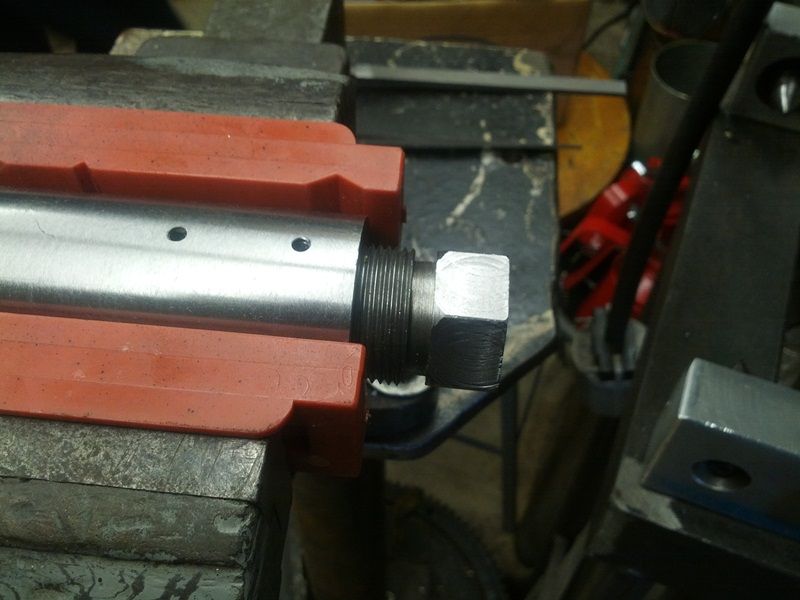 The handle tab is done from 3/8” square stock. Step one is to radius an end 0.875” for the bolt shaft: 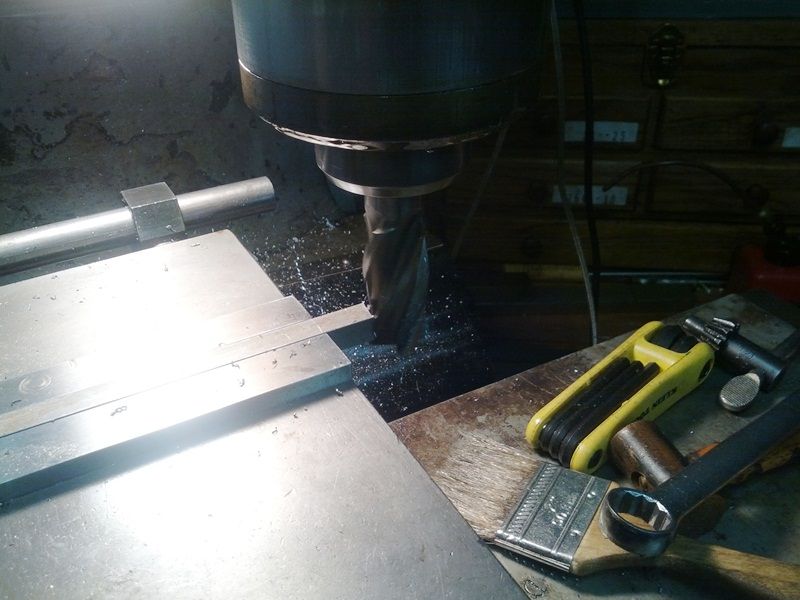 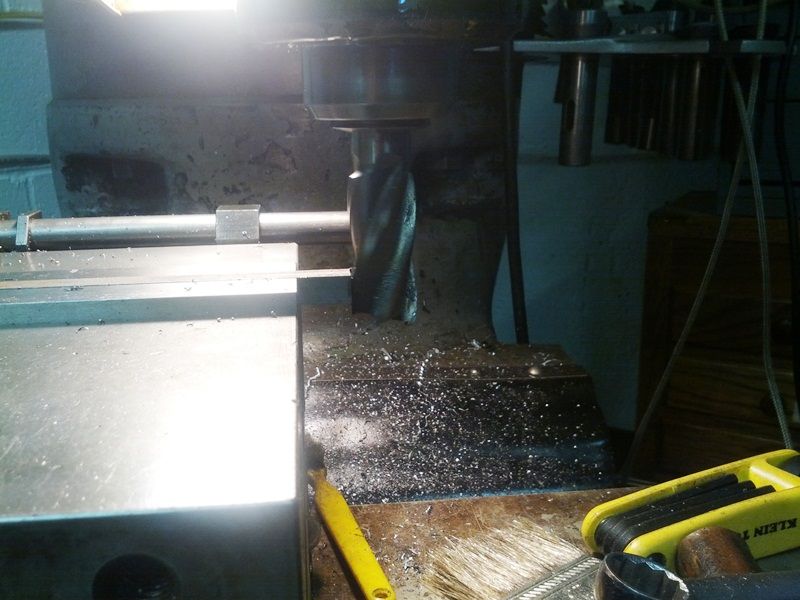 The uncut piece is tested in the action and marked for length: 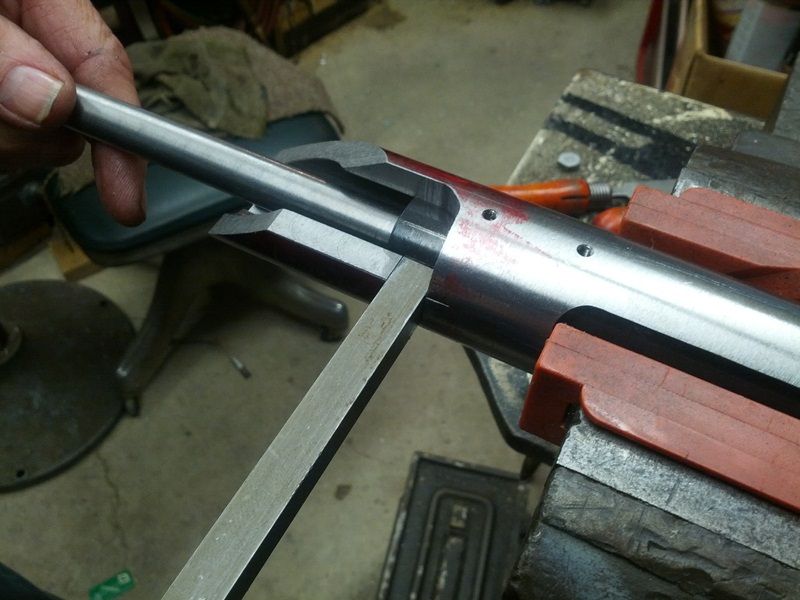 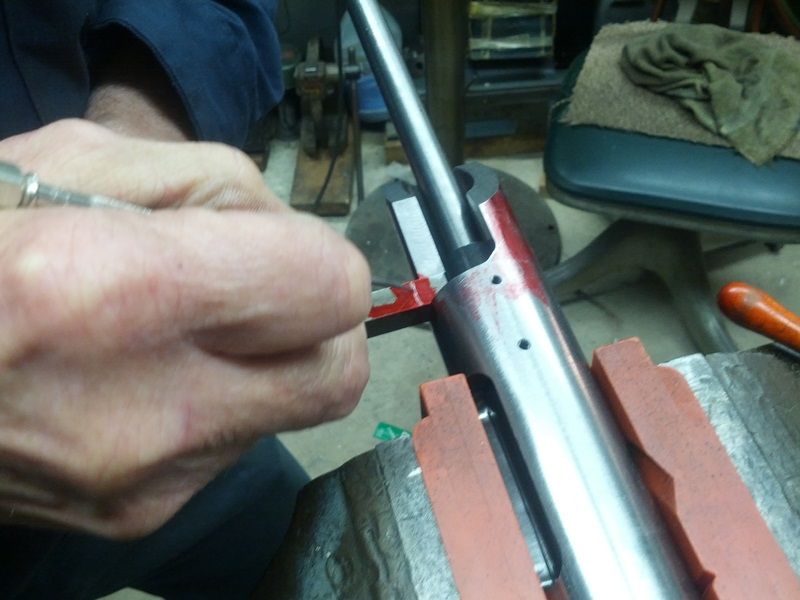 Primitive as it may be, the easiest way to chop the tab is with a hack-saw (in our shop it takes longer to get the mechanical band saw plugged in): 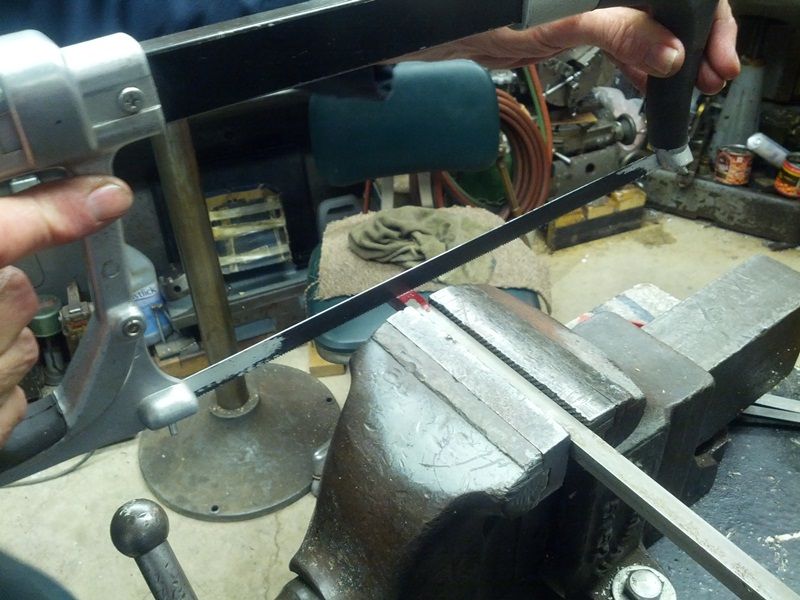 The sawed face is trued in a mill: 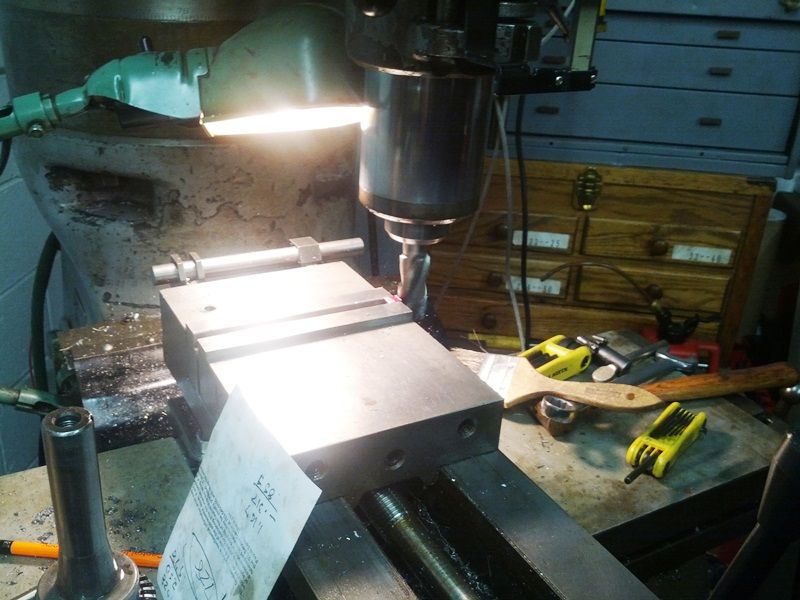 -Lee www.singleactions.com"Buiding carpal tunnel one round at a time" |
|
|
|
Post by Lee Martin on May 1, 2014 12:31:02 GMT -5
Step 41 – Welding the Handle to the Tab _____________________________________________ The tab is ground to better match the desired pitch: 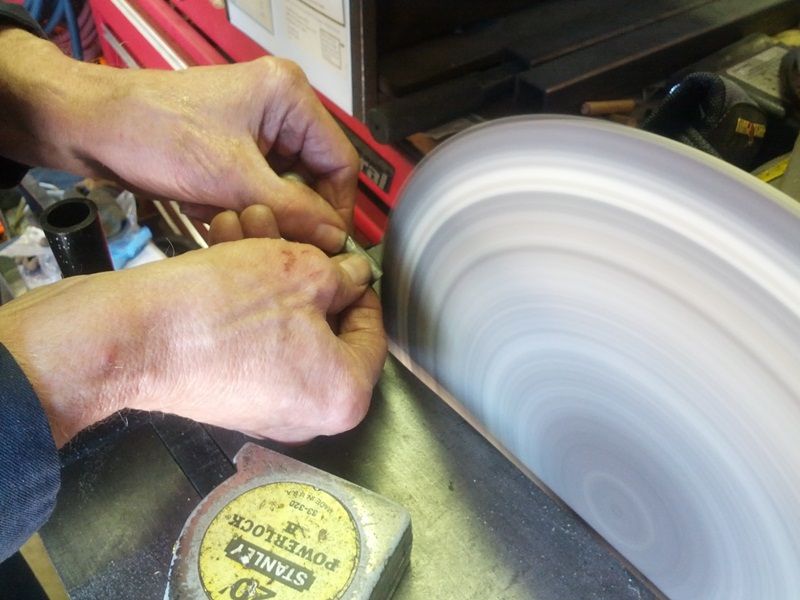 Visualizing it in the action: 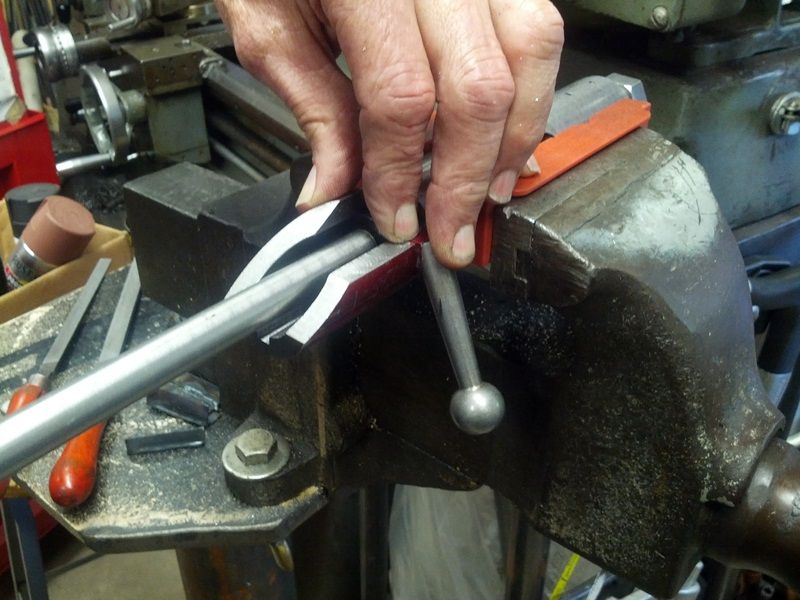 The two are then TIG (tungsten inert gas) welded at 72 AMP. 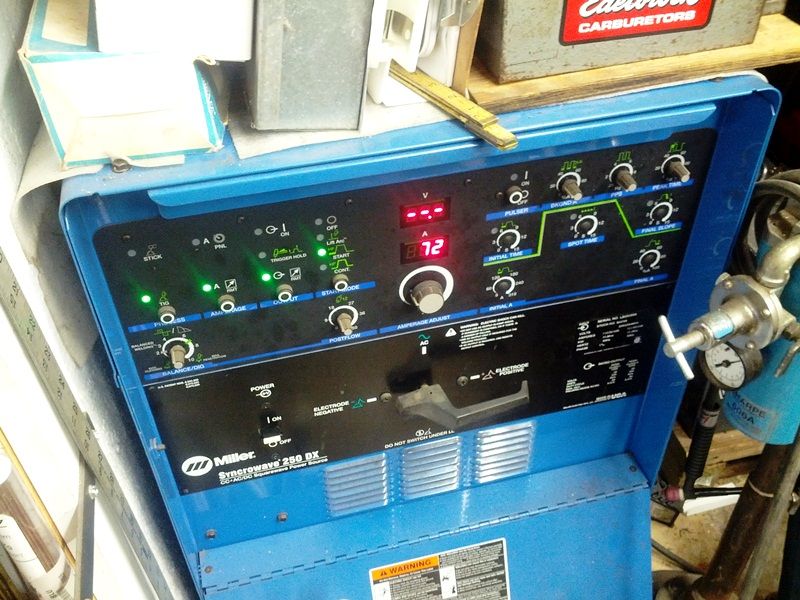 Our machine is a Miller Syncrowave 250. Optioned out these run $4-grand but there’re damn fine welders. The tab and the handle are set in a vise: 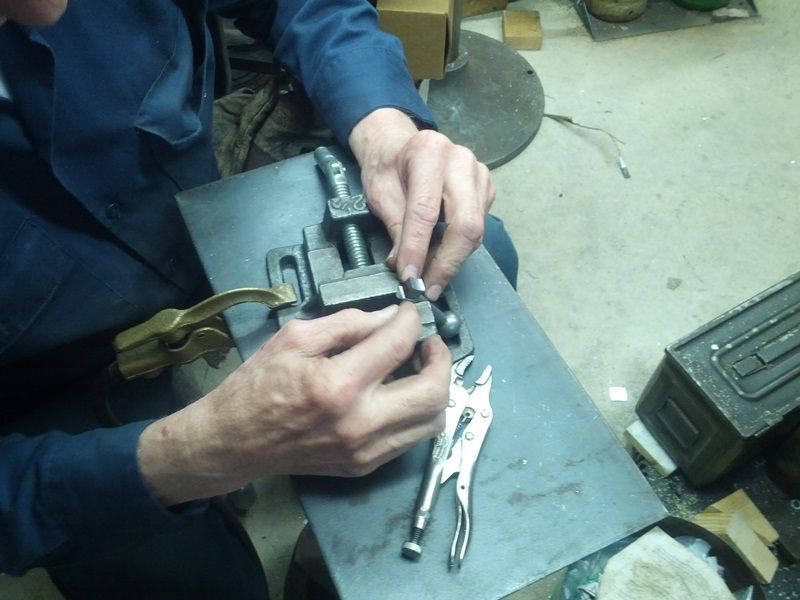 Video of dad welding: As the weld cools: 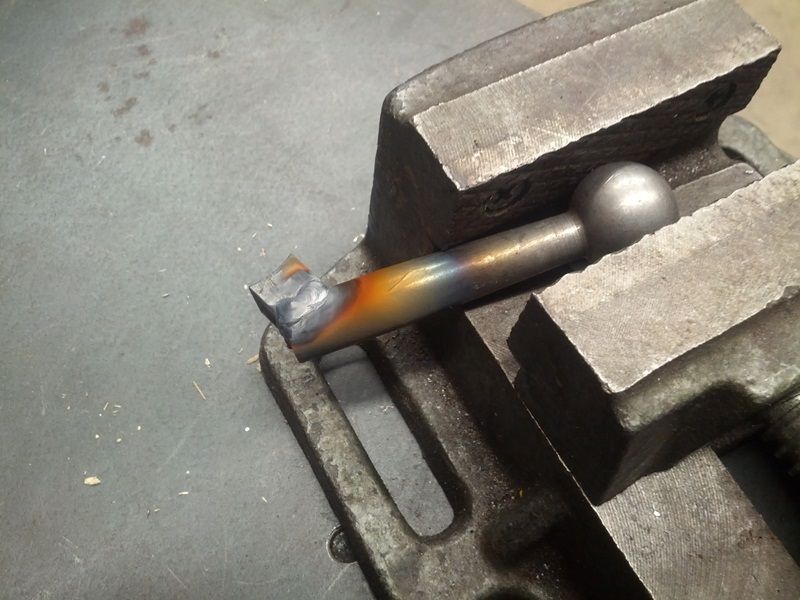 We started to grind the welds but have more to do: 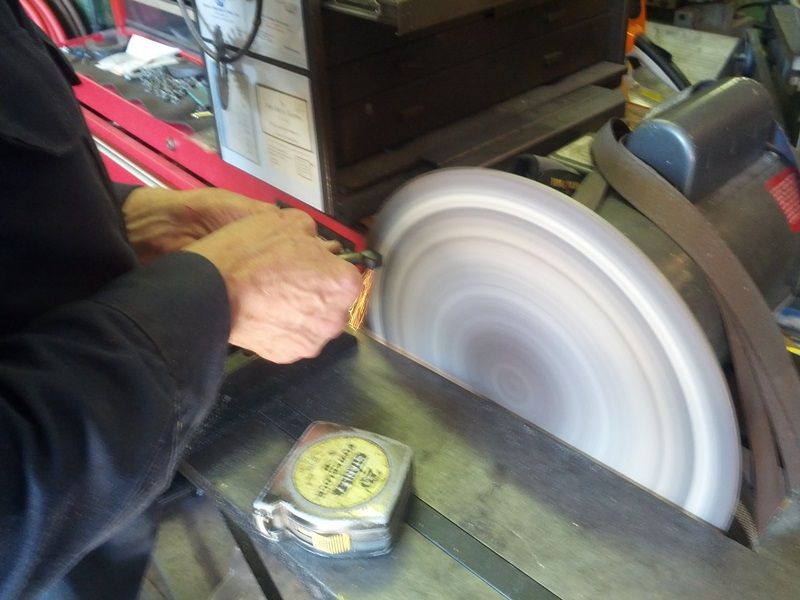 -Lee www.singleactions.com"Building carpal tunnel one round at a time" |
|
|
|
Post by bradshaw on May 4, 2014 11:24:27 GMT -5
Continuing great dope by Lee Martin. Going inside the build, the action, the trigger, the imperative to do it better----build, load, perform----this is what the new student must set himself, herself, to learn; and for the old shooter remember each time he or she aims.
As an example of what I intend in associating bench rest principles with hind leg marksmanship, Lee brings up the never-ending challenge to SQUEEZE CLEANLY. Lee brings up squeeze from the mechanical standpoint. Specifically, whether the trigger should stop immediately after firing pin fall, or continue rearward while cartridge combusts and bullets exits muzzle.
The subject is every bit as germane to revolver marksmanship as it is to bench rest. Only the shooter can decide by shooting as consistently, with both systems, on the same day under the same conditions. IHMSA All-American Russ Troup and I had this conversation decades ago. Russel Troup record of perfect scores certainly must run over six hundred. That is serious shooting with hand cannons. Troup asked whether I considered a trigger stop screw important on the Freedom Arms M83. My answer: "Yes."
Did I consider the consider the Super Blackhawk in need of a trigger stop. Answer: "No."
The Smith & Wesson Model 29? "Yes."
While my answer may sound hard, ultimately, follow through is an aspect trigger squeeze, and just as some shoot the single action grip well and others do not, the smoothness of one's finger at break determines how steady they hold during the bullets during the bullet's vicious acceleration from sound sleep to olympic sprint.
Consider the fantastic offhand quality of the M1 Garand, along with its offspring, the M-14. No trigger stop. Beaucoup follow through. Lockwork is part of the equation.
Writers used to call trigger over-travel "backlash." I could never wrap my youthful skull nor my adult mind around that inaccurate and misleading term. Rearward movement of the trigger after hammer fall is over-travel, country simple. Whether we need it, or not, it is up to the particular firearm, and its shooter, to find out.
David Bradshaw
|
|
|
|
Post by Lee Martin on May 15, 2014 14:48:19 GMT -5
Step 42 – Ordering the Barrel ____________________________________________________ The who, what, and why of barrel selection can be daunting. Visit any precision shooting forum and you’ll find threads spanning hundreds of posts on the topic. I’ll bubble it up to this - core to any good BR rifle is the barrel. No amount of load tuning, bench technique, or wind management can undo a poor blank. On the contrary, a hummer barrel can partially overcome some of those deficits. So what’s the definition of a hummer? If you’re looking for a measureable answer you’re in for a letdown. Hummers can’t be tied to a rating scale or degree of likelihood. Instead, they bleed into the unexplainable. But inherent to the hummer are two unique performance qualities: 1) They have very wide tune windows; meaning they’ll shoot dots over various charge weights, seating depths, and neck tensions, and 2) They defy wind better than other barrels. Point #2 seems crazy, but talk to long-time competitors and they’ll swear hummers shoot through wind (at least better than they should be able to. No barrel is completely condition-immune). Why they do what they do whereas similar blanks won’t is the great unknown. I won’t rehash how barrels are made, lapping techniques, and cryogenic treatments. All of that is laid out in Page 5 of this post. My choice of blank really came down to past experience with one of the renowned makers. Since the very early 80’s my dad and I have shot Shilens, and not just on BRs. Many of our Ruger conversions wear them as do our hunting rifles (even the big ones like 8mm Rem Magnums, 375 ThunderMags, 416 Taylors, and 450 Ackleys). Their reputation in benchrest is great and that reputation spans decades. Ed Shilen entered the sport shortly after ground zero (ie, the late 40’s) and hasn’t let-up since. I hope to feature him later on. Tony Boyer, the all-time winningest point-blank shooter, used Shilens from 1988 up to the mid-2000s. When he moved away from Harts in ‘87 the question was why? Tony’s answer wasn’t too cataclysmic. Simply put, he found the odds of getting a hummer was higher with Shilen than other brands (and that’s saying something – Tony orders 10 barrels at a time and within 30 shots knows if they’re a keeper). Recently he switched to cut-rifled Bartleins, but the majority of his HOF points came behind Shilens. In truth, there’s no way to rank barrel producers. Any of the comp makers put you in a position to shoot well. We’ve used Harts, Schneiders, Kreigers, and Obermeyers on other benchrest guns and they’re tops. The same can be said of Bruxs, Liljas, Broughtons, and Spencers. After 30+ years of doing business with Shilen they’ve never given us cause to go elsewhere. Their product and service are hard to beat (plus it doesn’t hurt that they give us dealer discount). The contour. Since deciding to leap head-first into the benchrest maze, I’ve struggled with one question. What varmint class should I scale the gun for? Light varmint (LV) has a 10.5 lb limit whereas heavy varmint (HV) is 13.5 lbs. HV is still the dominant class. The guns are easier to manage and if you’re starting out, the extra three pounds is huge. That’s not to say LV guns can’t run alongside 13.5 pounders….they can and do in the hands of a proficient shooter. The other advantage to a LV rig is you can compete in both classes. That means you’re piercing twice as many primers per event. Even so, I decided to begin in heavy varmint. Dad and I have quite a few BR rifles in each configuration. After sitting behind both for many years I prefer the feel of an HV. They’re easier to track, easier to tune, and to a BR purest look “right”. But I am building the gun to where I could get to 10.5 in a snap. My McMillan edge stock is one of the lightest made and I’ll probably go light on the scope too (17 – 24 ounces). If I want to shoot LV it’ll involve nothing more than a thinner blank and a quick re-bed job. The dimensions of each contour are shown below, #17 and #18: 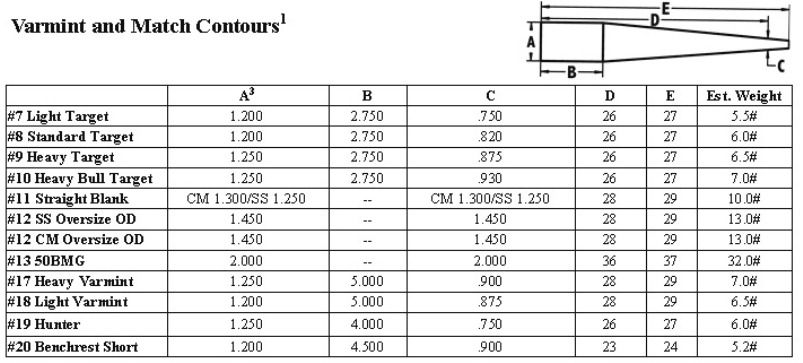 So I know the brand and the profile. What about the twist? Years ago PPC shooters all ordered 1:14”; it’s near perfect for a 62 – 68 grain bullet (7 – 9 ogive). Then manufacturers began offering 13.5” and even progressives. For example, Bartlein cuts 6mm’s that start out 1:14” at the breech and end around 13.25” at the muzzle. Supposedly the slower twist is “kinder” to bullets as they engage the rifling. They may also produce a small velocity advantage. Gain twist is relatively new in BR competition so only time will tell. Then there’s groove count, bore diameter, and land angle. 3, 4, 5, and 6 grooves are common, while land diameters in the PPC are either 0.236” or 0.237”. Clearly, there’s more to this than meets the eye. For now, I’ll stick with what Shilen catalogs in 6mm. First, their barrels are stainless and pull buttoned. Second, bore specs are 0.236”/0.243” and the PPC twists are 13.5” or 14”. The latter can be had in canted or square edged lands, while 13.5’s are conventional only. A half-inch faster twist is pretty minor, but mathematically the 13.5” wins. There’s a lot of talk about twist on this very forum and think it’s important for folks to understand the calculation. Before I continue though, let me set the record straight. At revolver speeds, twist is less relevant. I see guys argue the merits of 1:16” versus 1:18” versus 1:20” and find it odd no one ever provides the “why”. Hopefully this exercise will be enlightening to some. Twist and relative stability – when picking a twist rate for a given bullet and velocity, we need the gyroscopic stability factor (SG). Best accuracy is achieved through the minimal spin rate that will stabilize the bullet at a set distance. In competitive agg benchrest, that’s 100 and 200 yards. To arrive at this I’ll refer to Miller’s formula: T^2 = 30M/[SD^3*L(1 + L^2)] M= bullet mass in grains S = gyroscopic stability factor D = bullet diameter in inches L = bullet length in calibers T = twist in calibers per turn t = twist in inches per turn l = length of bullet in inches Where: T = t/d L = l/d S = 30M/[T^2 * D^3*L(1 + L^2)] I plan to shoot a 66 grain Bart’s Ultra at 3,300 – 3,400 fps. Now Miller’s formula makes an assumption that circumvents velocity. To incorporate speed we’d need to employ the Greenhill model which is much more involved. Luckily, Miller’s is set-up for velocities over 2,800 fps so we should be fine. Using the 66 grain Ultra: M = 66 l = 0.790” D = 0.243” t = 13.5” L = 0.790”/0.243” = 3.3744 T = 13.5”/0.243” = 55.555 S = 30*66/[55.555^2 * 0.243^3*3.2504*(1 + 3.2504^2)] = 1.18 And if we run that using a 14 twist, S = 1.10. There’s a slight advantage to the 13.5”, but one that rarely shows up on paper. Most who have shot both say they can’t tell a difference, assuming the barrels are of like quality. Remember, we don’t want to over-spin the bullet. For precision we’re after the twist that’ll JUST stabilize the bullet for the desired distance. According to the stability chart both of the twists are marginal. To completely stabilize a bullet, the model suggests a SG of 1.4 or higher (< 1.0 is unstable). Re-running the numbers, it would take a 12.2” to get to 1.4 with the 66 gr Ultra. So if BR shooters predominately use 65 – 68 grain flat base bullets, why is 13.5” – 14” twist considered ideal? That spin rate puts us at the fringe of stability. There’s no canned answer other than real world shooting supports 13” – 14”. A few have successfully used 1:15”, mostly with 62 grain pills. Others have experimented with less than 13” but the results are mixed. For some reason dispersion is more pronounced at 100 yards, even though theoretically the bullet is happier. Practical shooting suggests precision is higher when the bullet is: 1) Barely stabilized, and 2) Not over-spun. Personally, I believe in short range (200 yards or less), consistency is better when rotated just enough to make it stable. Move out and accuracy drops off fast. At farther distances, the twist should be matched to a SG of 1.5 or higher. Examine guns used for 600 yards and beyond and you’ll find twist and SG become chief. There’s one more component to twist derivations, namely atmospheric conditions. Air temperature and barometric pressure weigh heavily into bullet flight. Surprisingly, humidity is of little consequence. The quick rules of thumb: 1) A decrease in barometric pressure reduces the density of the air. 2) A decrease in temperature has the opposite effect, increasing air density. 3) Altitude rate change - the effect of altitude on density is greater than the effect of temp changes 4) Overall air density decreases with altitude under standard conditions 5) Bullets stabilize easier at lower air density Illustrated, let’s use the 66 grain Ultra. At 70 degrees and zero altitude, SG = 1.29 (13.5” twist, 3,350 fps). Now increase altitude to 3,000 feet and SG jumps to 1.44. Thinner air allows the bullet to stabilize faster. My order with Shilen – I called them in February and asked for two HV blanks in 13.5”. At the time they quoted 24 weeks to deliver. Apparently this is a busy time of the year for them. A bit disappointing, but that quickly changed when they arrived two weeks later. Talk about undersell and over deliver. In benchrest, barrels are pretty short-lived. < 1,000 rounds of competitive use is the norm so it’s always good to buy more than one at a time. It’ll probably take these two just to get tuned for the 66 gr Ultra and one powder. That sounds high, but many variables have to be tested. Once these burn-up, I’ll probably order four more; two 13.5” conventional, one 14” conventional, and a 14” ratchet cut. They list for $350 per ($285 our cost) so barrel expense climbs fast. Two Shilen, 13.5” HV match selects. These are button rifled, hand lapped, stressed relieved, and air-gauged to 0.0001” consistency end-to-end. 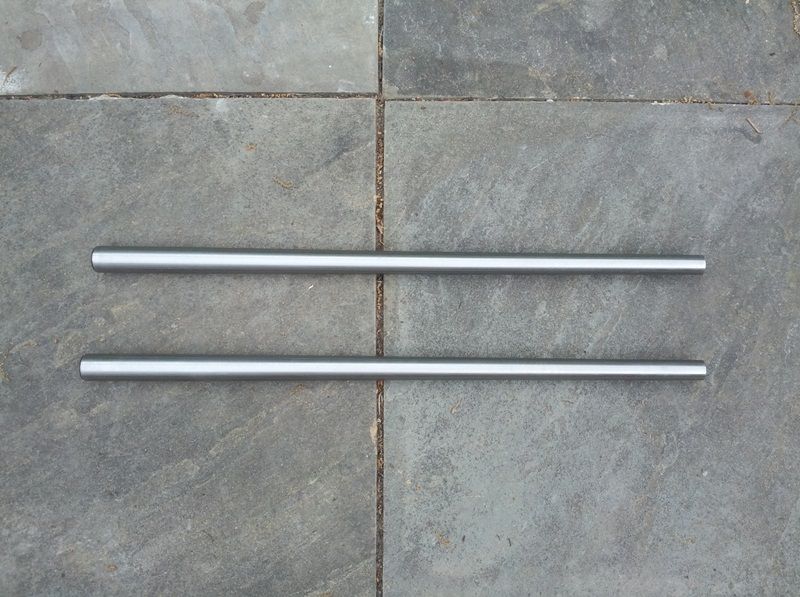 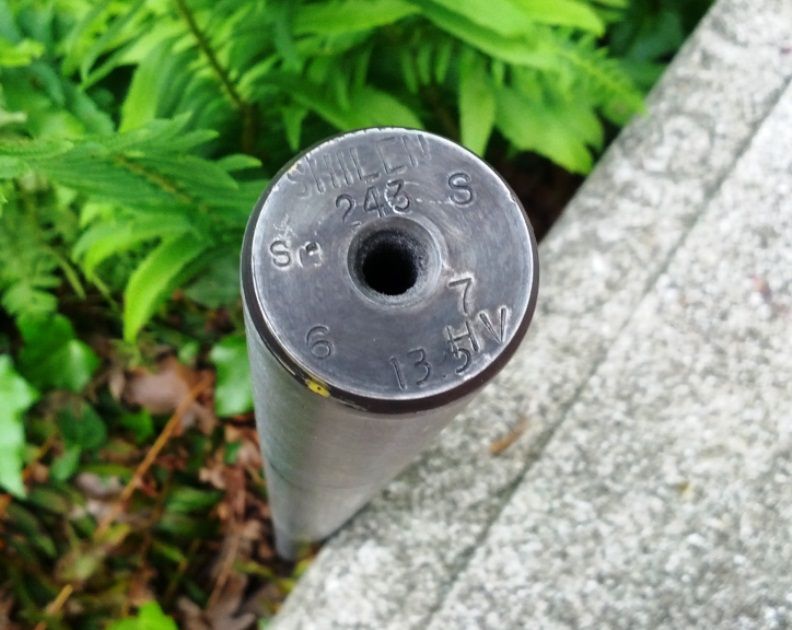 Shilen’s marking system defined: 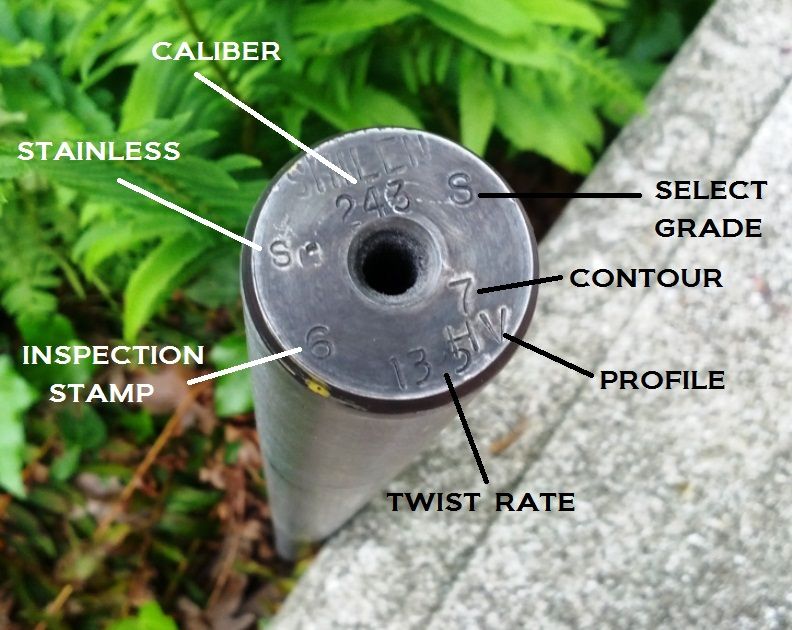 Next up is an explanation of barrel rigidity and deflection. -Lee www.singleactions.com"Building carpal tunnel one round at a time" |
|
|
|
Post by Markbo on May 16, 2014 10:21:42 GMT -5
"Why yes Sally...I am a Rocket Scientist"
|
|
|
|
Post by buckheart on May 29, 2014 20:01:51 GMT -5
Lee - Just wondering how this project is going??
|
|
|
|
Post by Lee Martin on May 30, 2014 15:15:52 GMT -5
Lee - Just wondering how this project is going?? Haven't made much progess this month. I've been traveling, drag racing season started, and I have two Ruger conversions going in parallel. Dad and I hope to get back to the action next week. -Lee www.singleactions.com"Building carpal tunnel one round at a time" |
|
|
|
Post by Lee Martin on Jun 10, 2014 19:52:07 GMT -5
Special Topics – Barrel Harmonics _____________________________________________ Talk accuracy and the avid reloader will cite favorite loads. Common to those discussions are comments like, “the gun really likes that combination”, “man does it shoot steady”, and “X bullet with Y grains of powder prints ragged holes”. That’s all fine and well, but why? Seldom do those conversations, or threads in the case of the internet, explore the reasons those loads perform. I’ll bubble it up to two principles and dissect them interdependently (note the prefix...I said “inter”, not “in”. They're conjoined). One, a strong load must ignite consistently. Two, it must drive repeatable barrel harmonics at the correct node. The points I’ll raise apply to any gun, not just benchrest rifles. I encourage you to think about these as they relate to handguns. BTW, what follows does not account for the shooter’s ability, or inability for that matter. It’s limited to the standalone firearm. In benchrest, you want 100% load density. Allowing the charge to sit or shift in the brass shot after shot kills precision. That powder should also have a burn rate that’ll achieve the highest velocity possible for a given bullet. It isn’t compulsory to drive them to peak, but you want the ability to run fast. Worth noting, some barrels will “node” at the highest speed attainable for that weight. Higher velocity also cuts barrel time and time of flight. Lowering the latter reduces the opportunity for wind impact. With the PPC, that range is 3,330 – 3,500 shooting 65 – 68 grainers. Repeatable combustion is what we're after and the coupling of charge density and burn rate is how we get there. Pressure curve variability, no matter how small, effects how the bullet leaves the barrel. There’s a lot to powder selection so I’ll save that write-up for later. But consider this. Typical PPC propellants like N-133, LT-32, 8208, H322, and 2015 fill the case, hold pressure to safe levels, and land in that magical 3,330 – 3,500 fps span. Drop to slightly slower powders like 4198 and you still can pour to 100%. The give is velocity won’t touch 3,000 fps and the tuning nodes narrow as SD’s increase. Go faster on burn and you’ll come off full volume. We’re riding a fine line here. The precision shooter wants a load that’ll put bullet exit at the calmest stage of barrel deflection. One quick callout before I continue. The last sentence began with the word “precision”, not “accuracy”. I’m guilty of interchanging the two, but there’s a difference. Accuracy defined is the ability to hit a prescribed point, like a bullseye. Precision is the degree of repeatability across a host of conditions. Benchrest is all about precision, accuracy is a distant second. Placing 5 shots in a 0.50” mothball will lose to a 0.10” group at the edge of the target. When powder ignites, pressure waves transverse the barrel. Even before that though, vibrational stress is set-up from the action forward. Firing pin movement and primer strike are one such influence. As the bullet unseats from the neck and engages the lands, these vibrations increase rapidly. At the same time sound waves are traveling down the barrel at a rate of 19,107 ft/sec. Knowing a 3,400 fps PPC bullet remains in the bore for 0.002 seconds, sound cycles 4.5 times before exit. Burning powder and the mechanical interaction of copper and steel adds more stress, but not synchronically. Basically, the barrel is vibrating all over the place, but one common movement is inherent to rifles. Since a stock’s centerline is below the thrust axis of the action, barrels recoil up and back. Vertical whipping follows because muzzle movement lags the rest of the tube during the pulse. So while vibration occurs across all axes, the dominant path is in a vertical plane. Picture the barrel as cantilevered rod. The action inlet provides rigid support; the pre-loaded end is the muzzle. Deflection, or vertical movement, is calculated by: D = (F*L^3)/3*E*I D = muzzle deflection in inches F = load applied to the muzzle end in pounds L = free length of the barrel in inches E = modulus of elasticity of steel I = moment of inertia Where I = 3.1416 x (D1^4 - D2^4)/64 D1 = outside diameter of the barrel D2 = barrel groove diameter Deriving “F” is difficult. Since we’ll view deflection as a comparative measure, we can set it to one pound (this is common within ballistic analysis). 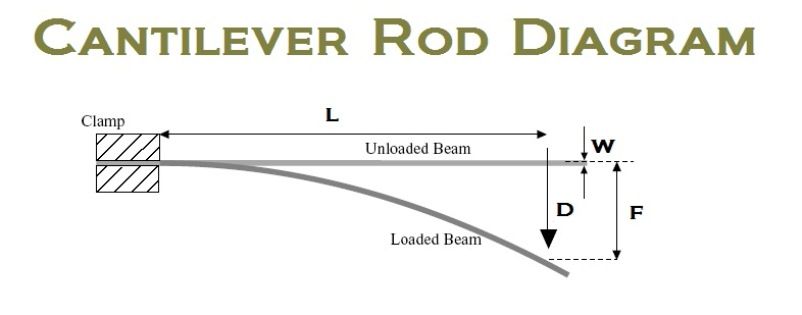 So why is deflection important? If you ever wondered why target barrels are thick and thin profiles are tagged “buggy-whip”, you’ll soon have the answer. At its core, the vertical movement of a tube can be represented with a sine wave: 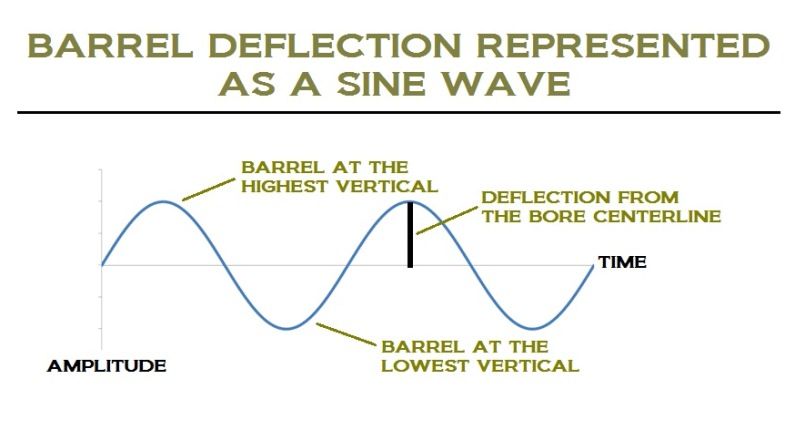 As the formula shows, the shorter and thicker the barrel, the lower amount of total deflection top to bottom. Just as important are the peaks and valleys of each node. At those points, barrel movement is the least as the wave ‘pauses’ to change direction. Movement at the bore centerline is the greatest. For that reason, we want to tune loads so the bullet exits at or around the node tips. Again, it doesn’t matter if it’s the upper or lower so long as barrel whip is slowed. Of course, we can’t visually tell when this happens. At best, we tune loads by adjusting the charge, jam or jump (ie, seating depth), neck tension, and a host of other factors. We know when we’ve achieved the right tune by the tale of the paper. Let’s see what happens when we apply math to real barrels. Take these three for example: 1) Heavy Varmint, 6mm cut to 22”, 1.05” at the muzzle 2) Light Sporter, 6mm cut to 26”, 0.70” at the muzzle 3) Straight cylinder blank, 6mm cut to 20”, 1.450” at the muzzle Plugging them into the deflection equation and setting the modulus of elasticity to 30 million PSI, we get: Heavy Varmint 22”, D = 0.0012” Light Sporter, 26”, D = 0.0138” Straight blank, 20”, D = 0.00041” Pretty telling, isn’t it? The heavy varmint, frequently used in benchrest competition, deflects eleven times less than your common hunting rifle. A non-tapered blank turned to the diameter of the action and shortened to 20”, deflects 33 times less. The lessons here are: • Short, fat barrels, reduce deflection • Caliber as a proportion of the muzzle area effects D, but less so than the outside diameter. In the HV example, increase the caliber to 0.338 and D moves to 0.00150”. Not terribly material, but mathematically relevant. If I ever complete this PPC, I’ll document load tuning in great detail. Underpinning those trials is this simple rule: Lowering deflection makes it easier to tune to node peaks and valleys. The more the barrel whips, the harder it is to time bullet exit with sine wave transition. -Lee www.singleactions.com"Building carpal tunnel one round at a time" |
|