|
|
Post by bradshaw on Jan 10, 2014 11:24:36 GMT -5
Lee.... helps to have great subject matter, which these gentlemen of benchrest represent, on top of which yours is a beautiful write-up.
David Bradshaw
|
|
|
|
Post by Lee Martin on Jan 16, 2014 15:19:53 GMT -5
Special Topics – Cryogenic Treatment ____________________________________________ As with the Legends of Benchrest, occasionally I’ll stray from the build to touch on special topics. One which fascinates me is the cryogenic treatment of barrels to alleviate stress. And I’m not talking about human anxiety but instead transforming steel’s austenite properties to martensite. Without delving too deep into metallurgy and thermodynamics, think of your gun barrel as a crystalline structure (which is exactly what carbon steel is). When the alloy is formed it’s done under intense heat. This is a common way for it to be drawn, but not a requisite. At temps of say 1,200 F, the carbon and iron molecules spawn a non-magnetic structure called austenite. Austenite is quite soft and ductile, properties that aid greatly when forging. Upon cooling austenite converts to a very hard, and very stable crystalline known as martensite. The ratio of martensite to austenite dictates the steel’s hardness. Moreover, the condition under which it cools governs the speed and completeness of the transformation. Rapid cooling promotes martensite, graduated nets pearlite. Martensite is a high stress structure that resists deformation whereas pearlite is layered or ‘annealed’. Cold treating steel is supposed to convert residual austenite to martensite. Harder, more consistent alloy is the goal. Cryogenic tempering induces a phase change in steel’s crystal lattice from body-centered cubic (BCC) to face-centered cubic (FCC). Face-centered cubic has less room available for interstitial defects and results in a stronger, more durable material. The red particle shown below is carbon: 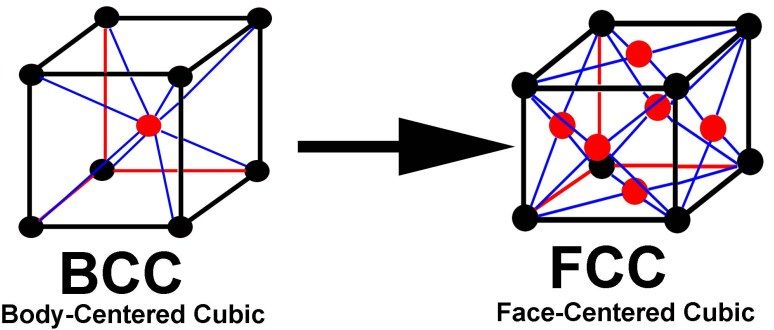 Why is any of this relevant to printing tiny little groups? When we shot benchrest throughout the 80’s and early 90’s, cyro was an emerging trend. Early articles were vague on the theory and only a bit more telling on results. Advocates of the treatment claimed: 1)Less copper fouling 2)Increased barrel life 3)Improved accuracy 4)Better machinability Before I continue, let me say I have no experience with cryogenic barrels. In fact, I’m somewhat skeptical of its purported benefits. Most competitors don’t freeze their blanks and top barrel makers haven’t adopted the practice. Either they’re in collusion so the product wears out faster or they see no quantifiable value. The exception to this is Krieger. They do cold treat and report lower friction as they cut rifle. No metion of improved accuracy but they infer more uniform dimensions. As with any new and unproven angle, confusion and misinformation run amuck. Cryogenically treated barrels aren't immune. I’d say the majority of questions revolve around the process. True cryo is performed in a vacuum insulated workstation. The barrel is positioned, sealed, and the machine uses heat exchangers and gas kinetics to cool the chamber. As nitrogen is introduced, a fan ducts air to the bottom where it then rises. This enables the temperature to be lowered at a stable clip. This constant air circulation also prevents the blank from being nitrogen shocked. Once cooled to the prescribed temp (usually -300F), the conditions are held for 20 hours. Vacuum insulated processor: 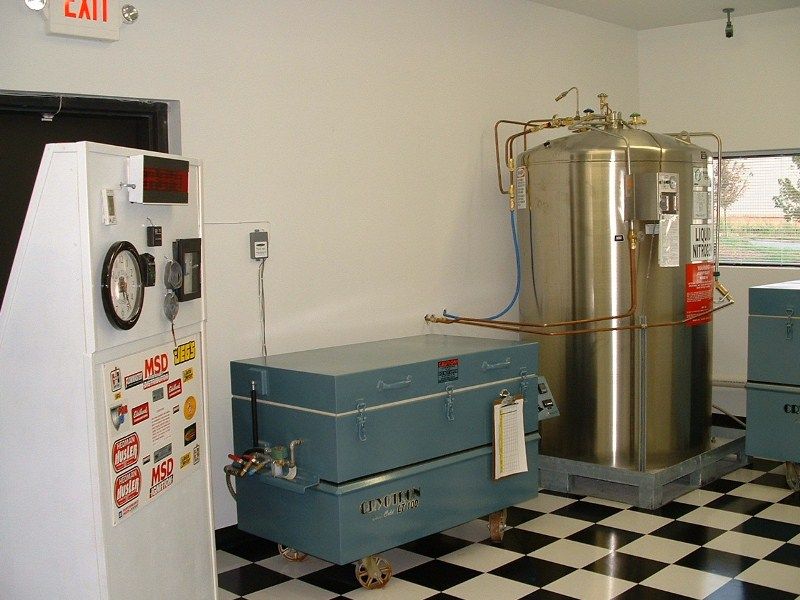 A few companies advertise barrel cryo services but they’re really cold treatments. Two such methods: 1) Spraying nitrogen through the bottom of the box without air circulation or vacuum. This is risky because the nitrogen may hit the part before it evaporates. Nitrogen shock follows. 2) Mechanical refrigeration – the apparatus draws the temp to a specific level before nitrogen is injected. Like #1, the part isn’t relieved in a consistent and even manner. Lab studies show austenite to martensite conversion is minimal to non-existent with these two. Benchrest shooters who subscribe to cryogenic treatment cite increased barrel life. Bore-scoping suggests, and I underscore ‘suggests’, it lowers erosion induced fire-cracking. Since many variables affect longevity it’s hard to pin it on stress relief alone. Another said benefit is less shot walking when the blank gets hot. Guys that run their records may send five downrange in less than 30 seconds. By the fourth or fifth pull high heat promotes wander. A simple test, but one I’ve yet seen published, is to single out a blank that walks during rapid fire. Maybe even measure the barrel temperature at a set point using an IR thermometer. Then have it cryo’d and repeat the string under similar conditions (re-recording barrel temp at the exact location). We may glean something from the experiment, maybe not. Wind, mirage, humidity, atmospheric pressure, and the shooter and are tough to duplicate at will. So what do the experts say? Two barrel makers who have investigated cryogenics are Ed Shilen and Dan Lilja. Shilen even used x-ray diffraction to measure the residual stress of 416 and 4140 before and after cyro. No perceivable difference was found. Dan Lilja offered this insight: “Claims for increased accuracy through stress relief are not founded in our opinion. When barrels are button rifled no material is removed, it is just displaced. This causes stresses to be formed in the steel. If these stresses are not removed problems will result. These negative conditions include warping of the barrel during other machining operations, an increase in the bore diameter towards the muzzle end of the barrel during the contouring phase, and in the extreme, lengthwise splitting of the barrel. Also, if there are stresses remaining in the barrel they can be slowly released as a barrel warms up during firing. This causes the barrel to actually move during the course of shooting, causing inaccuracy. “In our testing we have found that the only effective means to completely remove the types of stresses introduced during rifling are with conventional heat treating using elevated temperatures. The -300 degree treatment alone will not remove these stresses. We have been told by a knowledgeable metallurgist that the deep cold treatment will, at best, remove up to 6% of the remaining stresses in the type of steel used for rifle barrels. The key words here are remaining stresses. In other words if the barrel was not stress relieved conventionally, then only 6% of the original stress will be removed. If the barrel has been treated conventionally with heat and then brought through the -300 degree cycle, up to 6% of any remaining stresses could be removed by the cold treatment. We do know through our testing that the cold treatment alone will not remove any significant amount of stress and that the problems outlined above concerning stress will remain in the barrel.” “So, because of the very limited amount of stress that could be removed with the cold treatment (if the barrel has been properly stress relieved with heat as our barrels are) we do not believe that there can be much if any accuracy benefit to the -300 degree treatment of our barrels. It is for these reasons that we feel the cold process has very little potential for increasing the accuracy of our barrels. In our opinion, other than the removal of these stresses, there are no other mechanical factors involved that could benefit accuracy in a rifle barrel, resulting from a heat treating operation, either hot or cold.” Ed and Dan have forgotten more about barrels than I’ll ever know. I value their opinion, as do many within the sport. I’m not suggesting their stance makes cryogenic fringe, it doesn’t. But it should prompt us to ask “why and how” before we freeze steel. Economics - On average, treatments are $50 per barrel, $75 with shipping. Most premium/select blanks last for 800 competitive shots and cost $350. The longevity argument alone means cryo must stretch your barrel to 1,000+ to break even. Devoid of tests that categorically prove it can, I’m hesitant to take the plunge. Similarly, there’s no documented link between cold stress relief and improved accuracy. Conjecture yes, but not the sort of evidence that is swaying competitive shooters to embrace it. Cryogenics is a thought-provoking subject, one I’ve been eager to cover (my undergrad degree is in chemistry...the scientific, or geek side of me loves this stuff). Decades after being introduced, the impact on barrels is still contested throughout benchrest. The benefits are hard to prove, the mechanics equally tough to convey. I suspect the debate will continue and that isn’t necessarily bad. Thanks for the read and I hope some of you find this informative. -Lee www.singleactions.com"Building carpal tunnel one round at a time" |
|
|
|
Post by bradshaw on Jan 17, 2014 9:31:42 GMT -5
Lee loads the brain pan with meat for thought. As Lee plainly states, to create a valid test to evaluate an theory requires keeping many factors as identical as possible. The fervor surrounding cryogenic treatment of rifle barrels sounds similar to the excitement an "improved" forcing cone generates. In each case the proof is at the target. In the case of the bench rest rifle, the measure of improvement is so fine as to mandate identical shooting conditions. Unless, of course, the cryogenic barrel shoots .000", in which case the BR boys and girls will herd their barrels into the nearest refrigerator.
In speaking about various techniques for attacking cancer with a surgeon at Dartmouth Hitchcock some years ago, the subject of cryogenics came up. "We know how much heat it takes to kill cancer cells," he said. "What we don't know, is how much cold it takes to kill cancer cells."
The temperature alone is a factor. Perhaps cryogenics holds promise, but the refrigerators don't go cold enough, or the time applied needs adjustment.
Lee also mentions heat treatment of barrels. I thought that to prevent warpage, barrels are not heat treated. If some barrels are heat treated, while others are not, which barrels are heat treated? Years ago SAKO made some extraordinarily accurate rifle barrels by hammer forging. According to SAKO, the round stock was gun drilled, reamed, HONED & LAPPED before hammer forging. In other words, SAKO wanted the round hole perfect before passing on the rifling mandrel. I'm talking about hunting rifle barrels----not bench rest barrels. While he was employed at Remington, Bench Rest Hall of Fame's Jim Stekl told me he wanted to see a real hammer forged bench rest barrel. Whether a barrel is hooked, broached, buttoned, or forged matters less than how well the process is applied, said Stekl.
(Remington, which gained a great deal from Jim Stekl, dragged its feet horrible in introducing ammunition and components for the Bench Rest cartridges, which development owe greatly to Stekl.)
It is impressive to see the Lee Martins' approach to performance. Reminds me of great blues music----there is not one note that doesn't need to be there.
David Bradshaw
|
|
|
|
Post by Markbo on Jan 17, 2014 11:32:52 GMT -5
An awful lot of information there to take in and I appreciate the effort in just laying it all down. But this statement surprised me: ... Most premium/select blanks last for 800 competitive shots.... 800 rounds? That is the first time I have ever heard a number that low. Where does that number come from? Heck it could take me anywhere from 100 to 400 rounds of testing handloads to find "The" round for a typical hunting rifle. I know... apples and oranges and I suppose the Benchrest boys already have their loads narrowed down some, but still... that just seems awfully low to me from what I have read over the years. |
|
|
|
Post by Lee Martin on Jan 17, 2014 15:46:06 GMT -5
Rifle Barrels – Heat Treatment __________________________________________ Markbo – yep, 800 is the average. Some guys untwist them after 600, some make it to 1,000. But rarely will they hold a competitive edge past a grand. You have to realize, in benchrest the minute your barrel creeps from low-teen aggs to mid-2’s its fading. Take a look at any LV or HV results sheet. The top 10 spots are generally separated by a hundredth or two. In some cases the gap is a few thousandths. David - you’re correct. The barrels aren’t heat-treated in the traditional sense post-rifling (and by traditional I’m referring to oil quenching or single low temp precipitation hardening). Heating the blank is pointed at stress relief. Let me explain, and in doing so I’ll demarcate between button and cut rifling. I’ll save hammer forged for last. The barrel maker starts with pre-hardened round stock, normally 25 to 32 C scale. It has to be that hard to yield the universally accepted tensile strength of >=100,000 PSI. Button barrels are made by: 1) Drilling the pilot hole 2) Reaming the bore 3) Pulling, or pushing the button 4) Stress relieving the blank 5) Contouring 6) Lapping Stress relieving is mandatory on these. The amount of residual strain than remains after forcing a button is considerable. The process involves heating the barrel to 600 C, then allowing it to air cool. Hardness is relatively unchanged. You stress relieve before contouring because as you profile the strained steel is unlocked or sprung. Basically it's work hardened by the button and unstressed by contouring. Without relieving it the bore upsizes when lathed. And this is where the seesaw game comes into play. Heat treating and air-cooling causes shrinkage. Contouring without stress relief causes the bore to rebound. But you can’t do both simultaneously. So again, most heat threat before contouring and then lap the bore. This lapping is done for dimension and finish. I’m aware of a few barrel makers that double stress relieve, meaning before and after contouring. The verdict is still out on that approach. I’ll cover the pros and cons later in the thread. Cut rifling follows the same process but the relief strategy can vary (of course the key difference is the grooves are ‘scraped’ one at a time with a drag bit). Unlike buttons where you’re displacing steel, cut removes ~75% of the original surface. A single-point bit making multiple, shallow passes puts little strain on the blank. Some manufacturers also heat treat to alleviate stress created by contouring. Like the button boys, they hand lap but only for finish. The lapping process is equally critical in reaching match-quality. First, molten lead is poured into the bore and secured on a rod. After it cools, the spud is laced with abrasive compound and cycled through the blank. Often, two or three casts are needed to complete the process. Mic’ing, bullet slugging, and air-gauging confirm the results. Hammer forging as introduced by the Germans in 1939 - Manufacturers love the practice because it’s less timing consuming and in turn lower cost. It also has some inherent benefits. One, they tend to be more uniform than button barrels on land and groove; that is if the button blank isn’t hand lapped (rarely found in mass produced guns). Second, hammer forged barrels are supposedly more durable and hence last longer (hard to confirm and the longevity claim is widely disputed). Accuracy potential is also quite good with mandrel imprinted. As David mentioned, Remington and Sako hammer forge and their out-of-box accuracy is stellar. 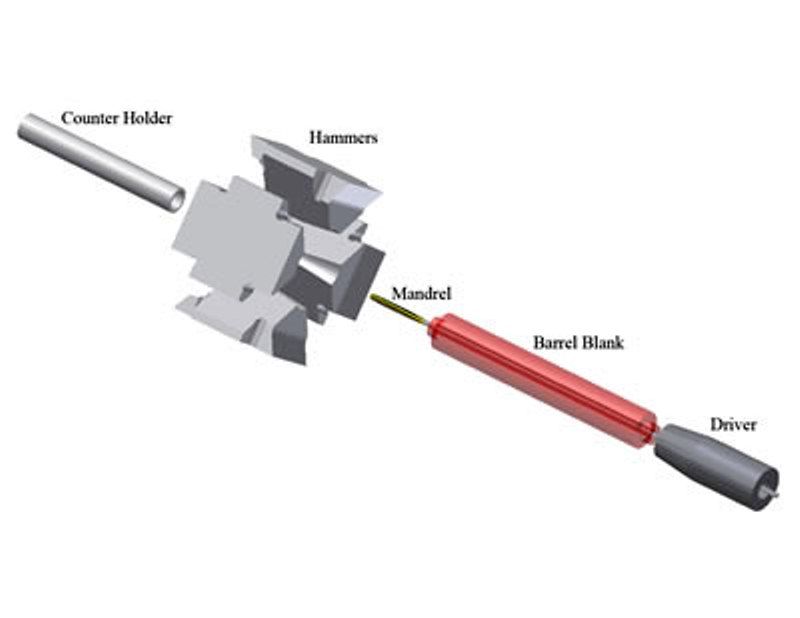 Hammer forging illustrated: 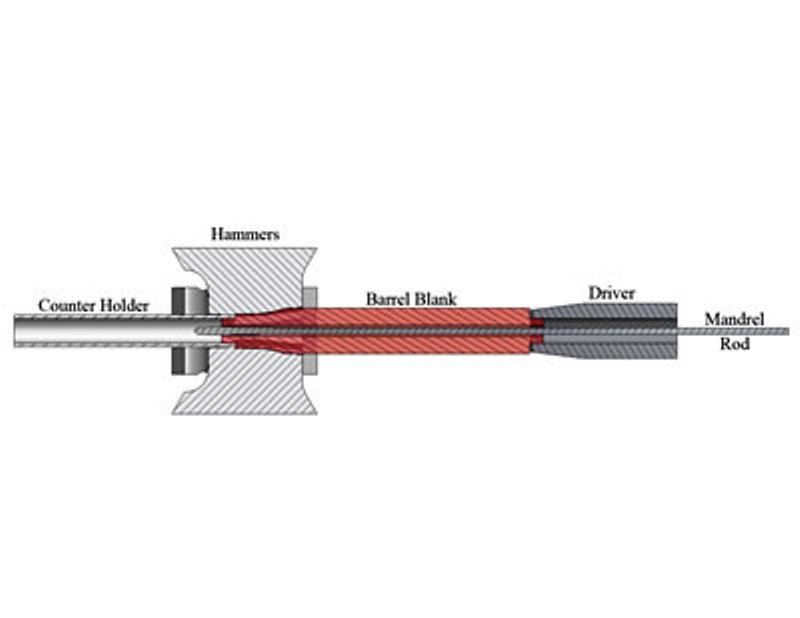 Nevertheless, the benchrest crowd hasn’t warmed to the hammers. The knock is the radial stresses are so high they can never be eliminated. I believe Merrill Martin tried mandrel forged blanks in competition and couldn’t get satisfactory results. Premium barrel makers today are almost all button or cut. The two reasons why: 1) The cost of the hammer forging machines is prohibitively high 2) They believe more uniform dimensions can be achieved through hand-lapping Here’s my take on hammer forged. If you’re comparing them to un-lapped, non-stress relieved button barrels they’re better on uniformity. But rifle with the sort of TLC that Hart, Shilen, and Schneider apply and the button wins. The same holds for cut. Perhaps if those steps were extended to the hammers we’d have a three-way tie. Who knows. Ultimately it pays to study what the benchrest crowd buys. No doubt in my mind factory hammer forged barrels are capable of sub 1/2 MOA. The real question is can those barrels be made to consistently shoot ones or zeros? So far none have on scale. One side-note and something the Ruger crowd may appreciate. Back in the 90’s a couple of barrel makers looked to Carpenter Technology Corp’s 465 stainless. It was thought to be less susceptible to residual stress than say 416 or 17-4. To my knowledge none have been brought to market but it was an interesting idea. Of course Ruger latched onto the alloy for their 454 SRHs (Carpenter Corp. introduced 465 for the aerospace industry. Patent #5,681,528, Sept. 1995). Long-winded answer, but hopefully it’ll prompt more discussion. -Lee www.singleactions.com"Building carpal tunnel one round at a time" |
|
|
|
Post by curmudgeon on Jan 17, 2014 23:12:35 GMT -5
I don't know the difference between Carpenter 465 and 455. I do know the first bolts for the Auto Mag were 455 Carpenter and never broke, they later went to 416 PH for cost purposes. And eventually the 416 PH would break after 1500 rds in the 50K CUP range. I had a 357 AM I hauled around the worlds game fields, taking everything from Alaskan Moose to Steinbok. This particular AM had probably 20K or better rounds thru it all rounds being in the 48-52K C.U.P. range, never broke a part, lucky? Maybe, quality parts proper tuned and well fit. FWIW dept. Have used many Dan Lilja bbls for LR precision varmint rifles.Top notch
|
|
|
|
Post by Lee Martin on Jan 23, 2014 16:07:06 GMT -5
Step 22 – Drilling the Firing Pin Hole __________________________________________ With the bolt bored out, it was now time to drill the firing pin hole. This is done from the recessed end. After we centered it in our lathe a small mark was made. This not only indicates the location but prevents the tiny drill bit from walking: 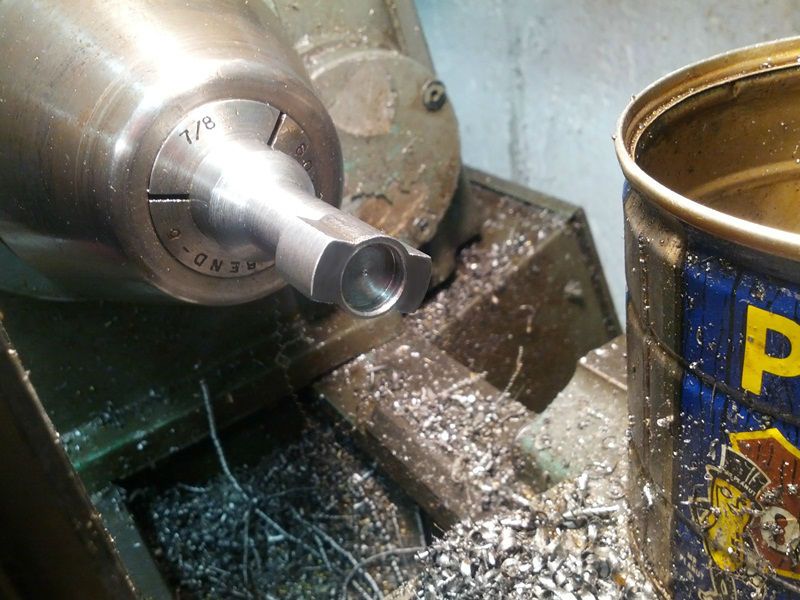 A 0.073” (#49) bit was used: 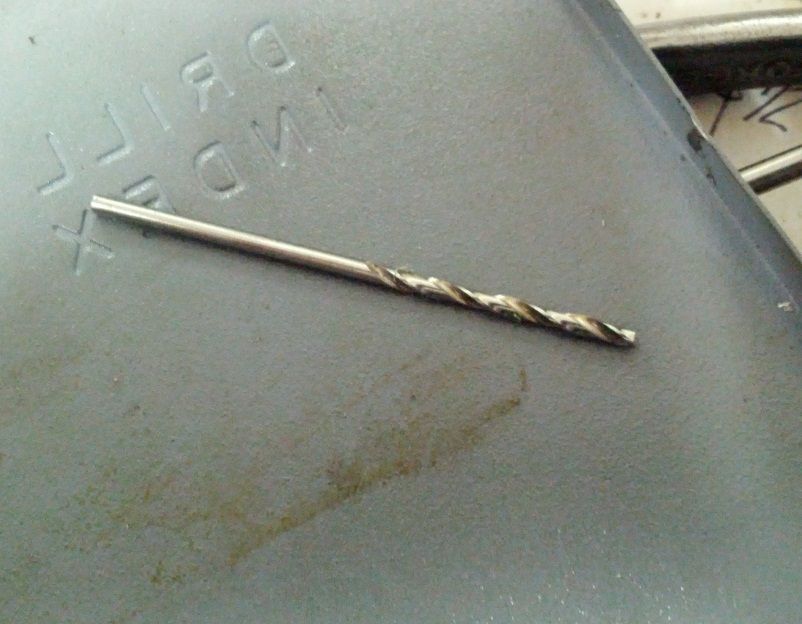 The 3/16” step extends half-way through the lug so the firing pin hole is only 0.300” long. 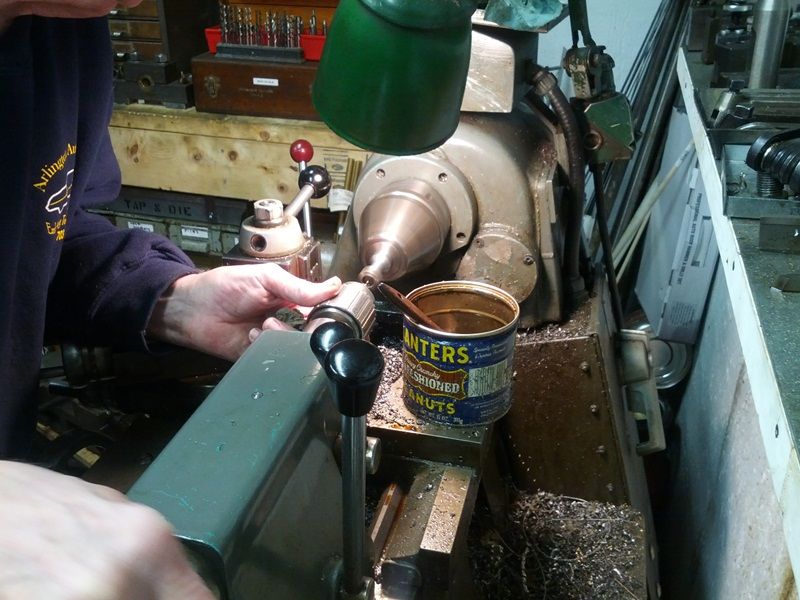 There are two approaches to firing pin size, and in turn weight. Both must be tied to the spring pressure. Light pin, light spring and vibrations are reduced. The trade-off is longer lock time. Heavy pins and heavy springs do just the opposite. Vibration increases but lock-time decreases. Spring pressure also directly effects bolt lift. 17 – 18 pounds is the mild side of the spring spectrum while 28 lbs is heavy. Many competitors split the difference with a 20 to 23 lb coil. The other variable is the pin diameter. 0.060” is light yet still offers consistent ignition at 20+ pounds. However, lowering tension too much with a 0.060” is iffy on hard cup primers like BR-4’s. For that reason the thinner Federal 205M’s are popular. 0.075” is the practical upper limit on pins and rarely do they require more than 20 pounds. Our actions are fit with a 0.071” through a 0.073” opening. 0.002”, or one-thou per side, is tight but not enough to cause bind. Ahead of a 22 lb spring and we have the best of both worlds. I’ll discuss lock-time and primers in their own post. But for now it’s important to know why we went with 0.071”. Bolt head recessed and drilled. The face still needs to be polished with a brass lap: 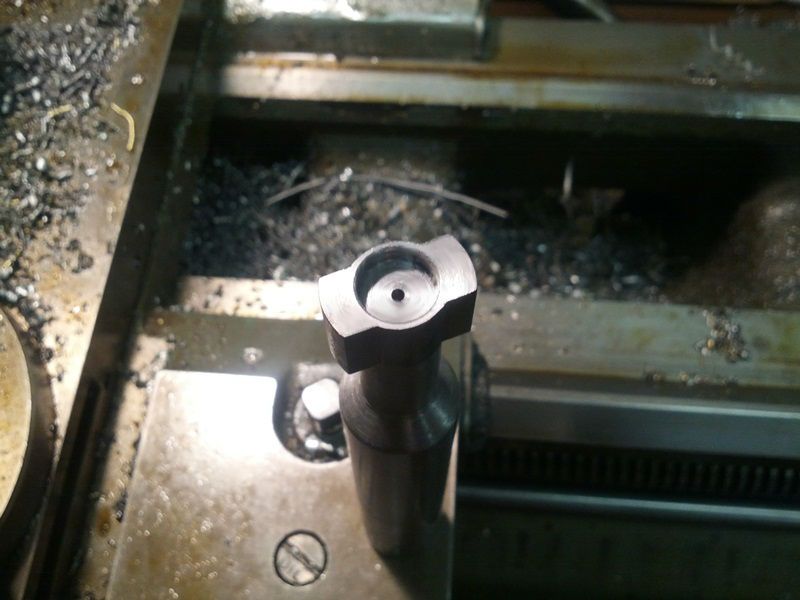 The back of the bolt was then threaded for the cocking piece: 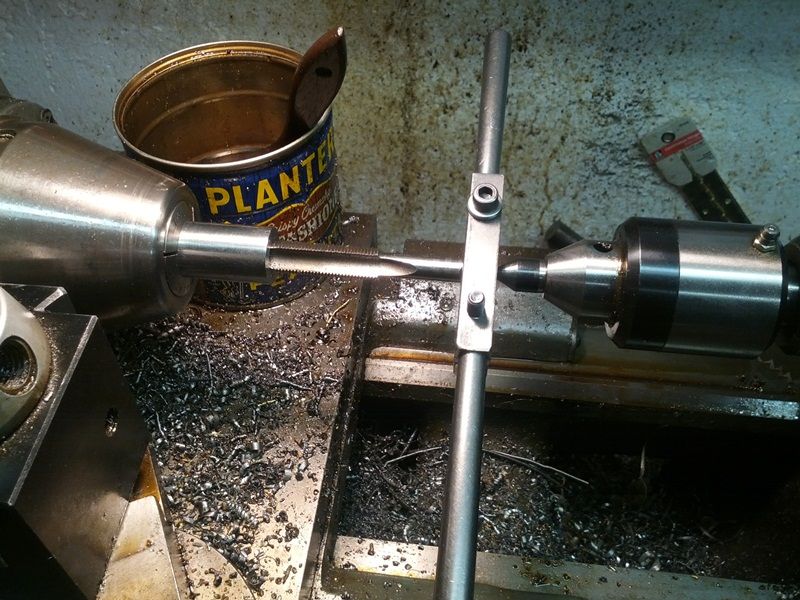 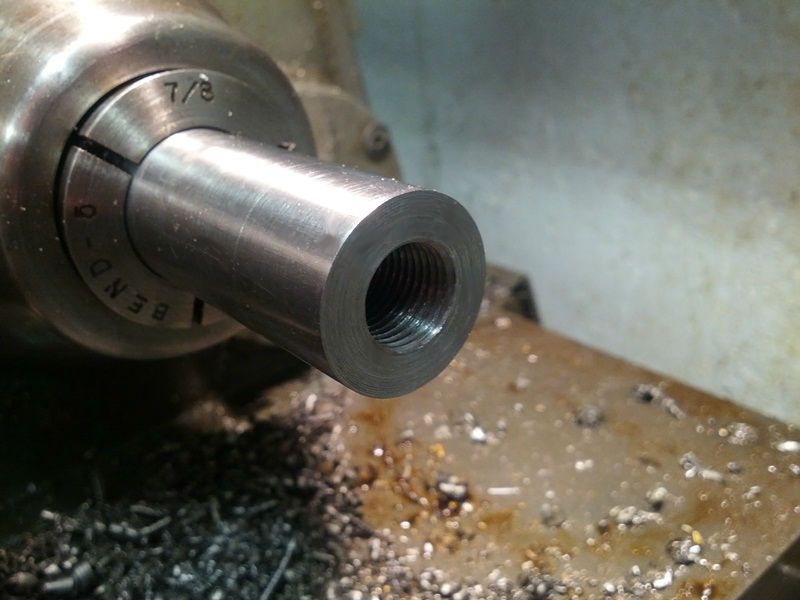 Years ago dad made a T-rod that fit into the bolt. It allowed us to actuate the lugs in the receiver without a handle. Somehow we misplaced the tool so another was machined. The rod was threaded with a geometric die-head: 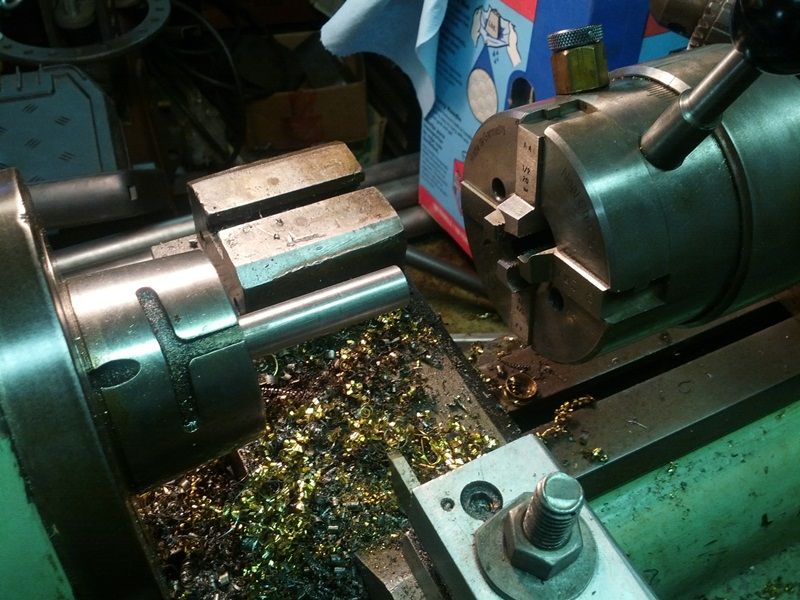 Video of the die-head in action (there’s no better way to thread round stock): Once finished we screwed it into the bolt and checked the camming. A dial indicator measured the retraction or “cam” as the bolt was lifted (remember the lug ramps we cut in Step 13?). I was pleased. The bolt was smooth going into and out of battery; resistance was firm but not excessive. In short, our transitions worked as planned. Checking the lug timing with a dial indicator: 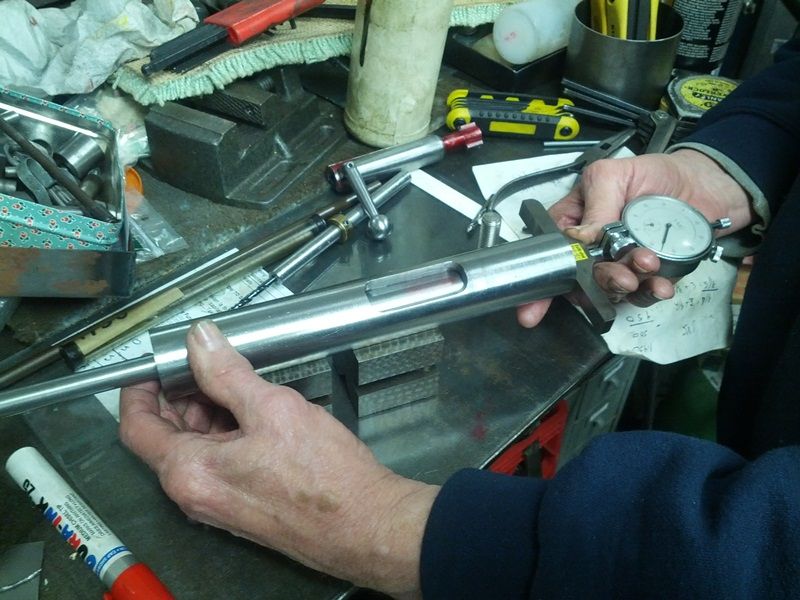 -Lee www.singleactions.com"Building carpal tunnel one round at a time" |
|
|
|
Post by bradshaw on Jan 24, 2014 8:44:21 GMT -5
Lee.... great text. Please continue.
Never, and it now seems strange, discussed firing pins and lock time with Jim Stekl. The Wichita vied with the Remington XP-100 as the premier Unlimited action in handgun silhouette, and while shooting steel is loin cloth rough compared with bench rest, no one ever complained of too much accuracy, and I had this lock time discussion with Wichita's Nolan Jackson. Like Remington's XP-100, which is based on the 40-X, the Whichita has a tubular, solid bottom receiver. Jackson explained that the light, very hard striker, in conjunction with heavy mainspring, is subject to fracture under dry fire. On the other hand, the Remington Mike Walker action, with a faster lock time than the Winchester Model 70, and much faster than the 98 Mauser, may be dry fired forever.
Leeds to this question: do bench rest shooters dry fire? And if so, is the practice on a once fired case only?
David Bradshaw
|
|
|
|
Post by Lee Martin on Jan 24, 2014 12:05:25 GMT -5
David – Nolan Jackson is right and the benchrest crowd encountered the same. To be exact, light pins plus big push can equal pierced primers and busted tips (I’ll define “light” as 0.060” or less and “heavy” spring tension as >= 26 lbs). Compounding this is the PPC’s high operating pressure. Dry firing is pretty common within the sport. The goal is to check cross-hair movement through lock-time. A spent round is chambered to lessen the blow but this won’t replicate live shooting. Crush a primer and the firing pin no longer falls on a soft cup. The resulting vibration is increased. I’ll do a write-up on lock-time and the associated theories. I will say most folks don’t evaluate lock-time in its totality. Articles tend to measure the interval from when the cocking piece is tripped to primer impact. They fail to include the trigger movement (most BR triggers are 30 - 100 milliseconds in internal travel alone). How’s that compare to straight lock-time defined by trip-to-impact? Fast lock times are around 2 milliseconds while 4 is languorous. You can see why it’s important to view it all-in. BTW, human reaction ranges from 150 – 300 milliseconds. Lot’s at play here and hopefully we can explore it in length later in the thread. -Lee www.singleactions.com"Building carpal tunnel one round at a time" |
|
|
|
Post by Lee Martin on Jan 27, 2014 11:47:33 GMT -5
Step 23 – Lapping the Bolt Face ________________________________________ To properly smooth the bolt face requires a brass lap. The fit must be exact so there’s even purchase across the diameter. Ours measures 0.445” x 0.120” deep. Lathing the rod to those dimensions: 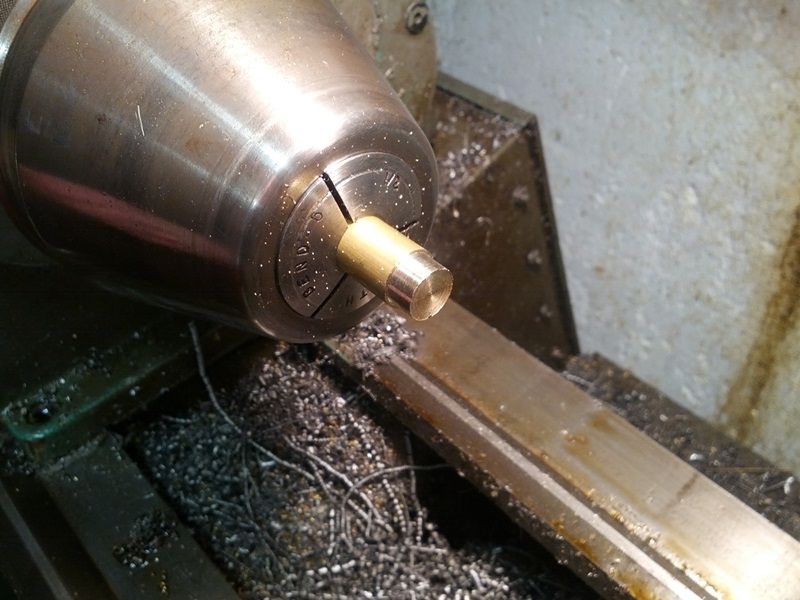 After cut to ~2.0” it’s placed in a floating collar: 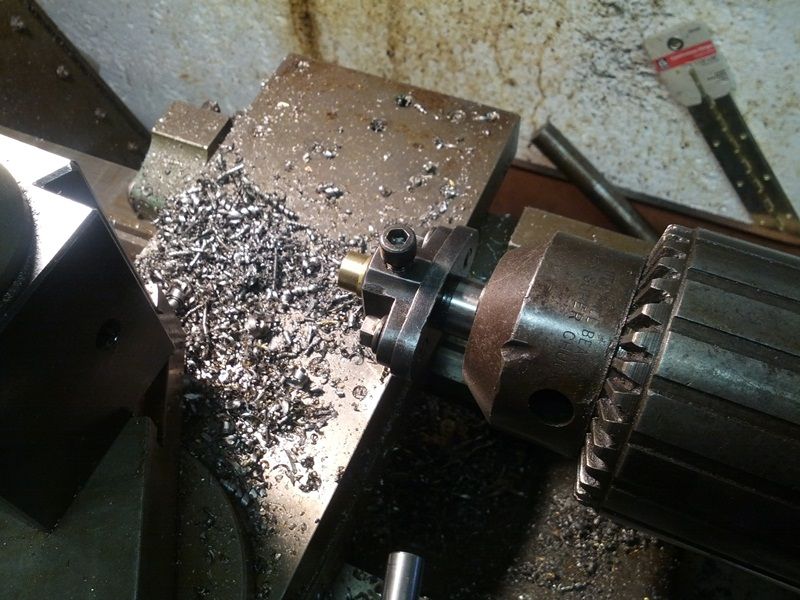 Lapping compound is generously applied to the tip. We start with 280 grit Clover and end with Simichrome polish: 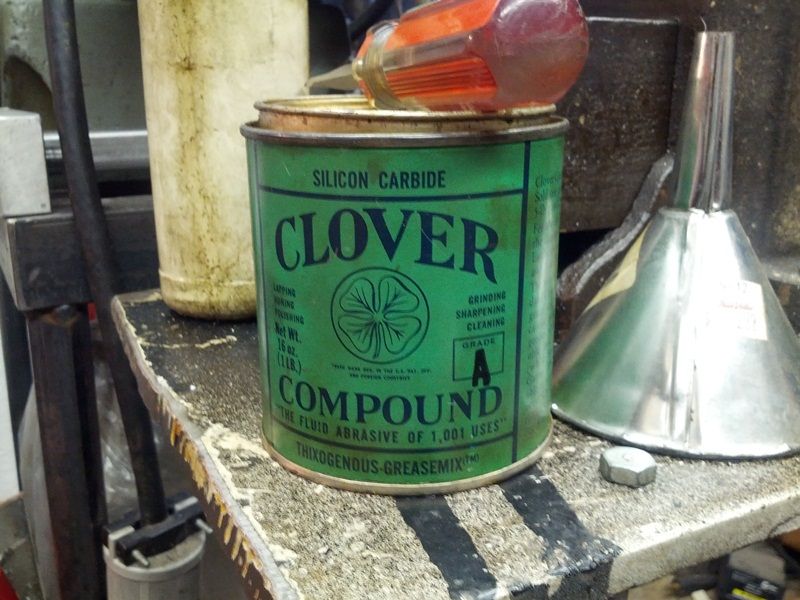 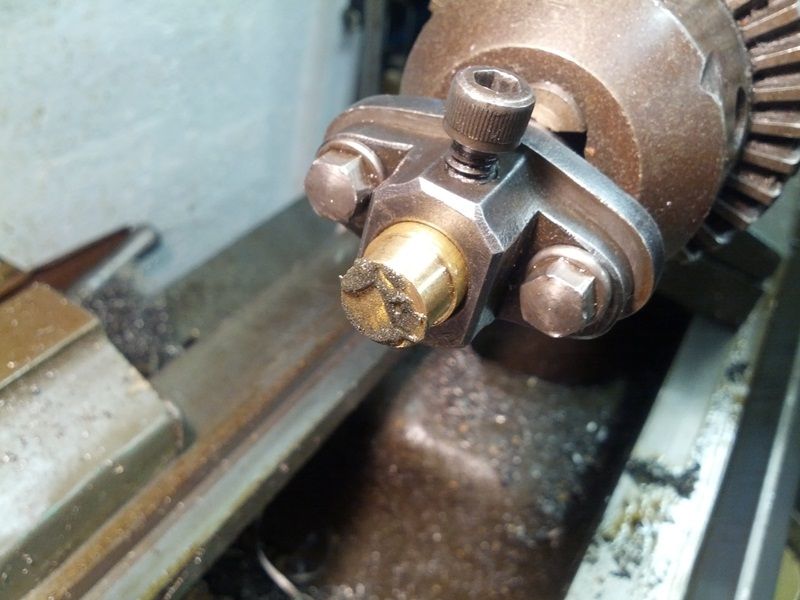 The tailstock is positioned and dialed into the bolt head. Mild pressure is applied as the lap is bumped against the face. This is done 20 times, compound is re-applied, and another 20 feeds are made. Clover 280 is good at removing very faint bit lines. Simichrome or Flitz is last and achieves a buffed finish. 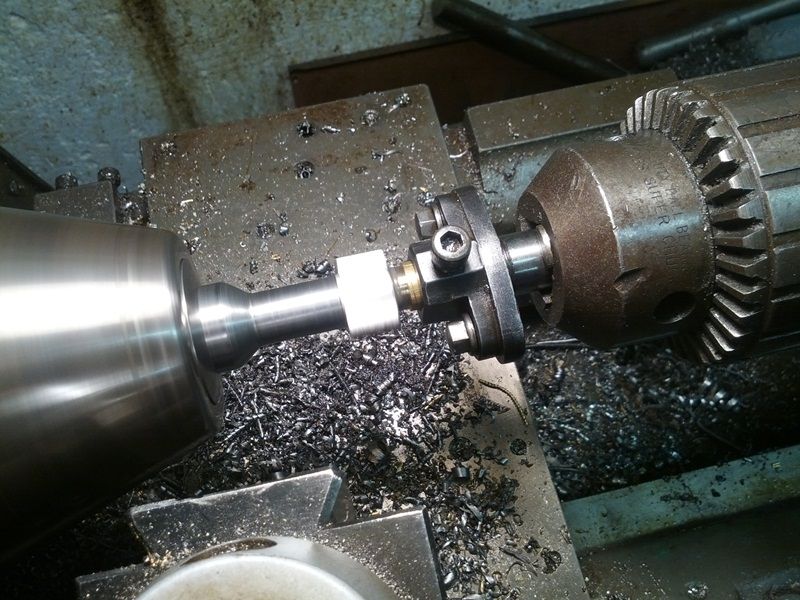 -Lee www.singleactions.com"Building carpal tunnel one round at a time" |
|
|
|
Post by Lee Martin on Jan 27, 2014 14:58:16 GMT -5
Step 24 – Fitting the Extractor __________________________________________ I’ll discuss the type of extractor we use along with the reasoning in a few. Meanwhile this’ll illustrate how the bolt head is machined. The body is locked in a large indexing head: 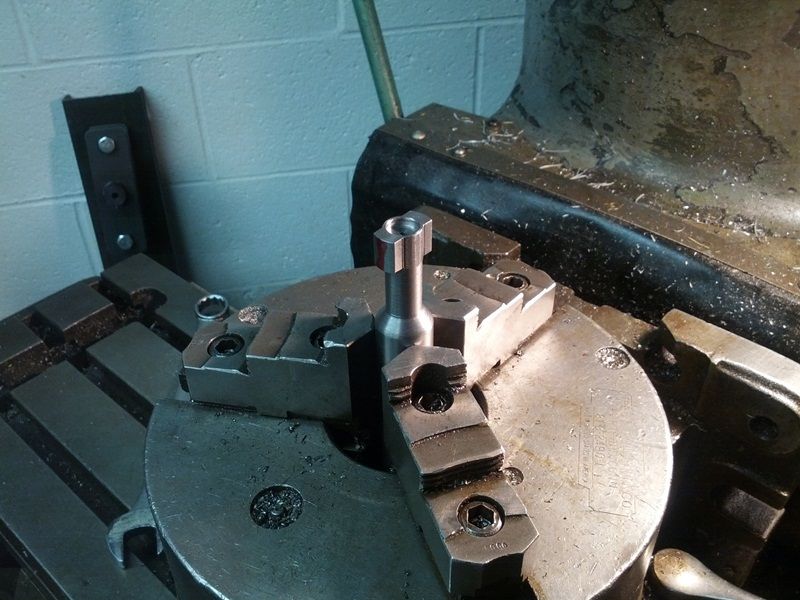 A dial indicator aligns it at 90 degrees to the table: 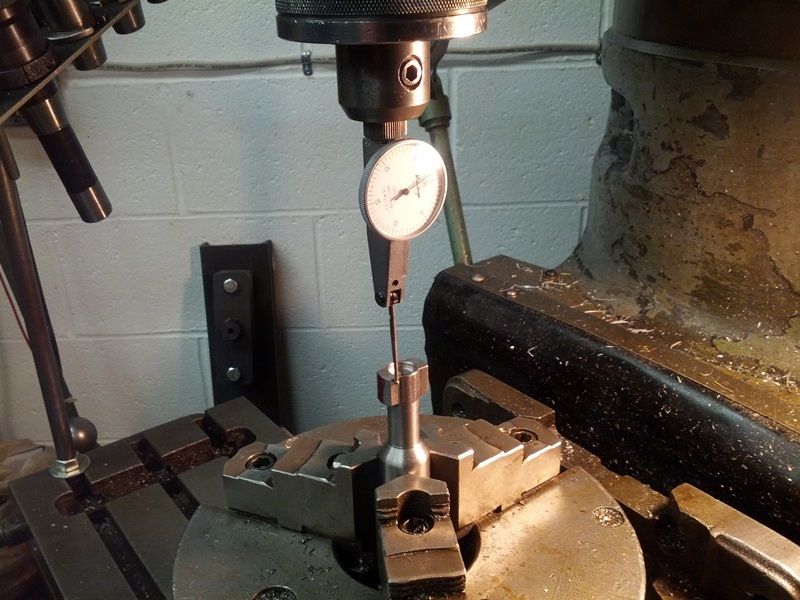 The crosscut is made with a 3/16” end-mill. Depth is 0.125”: 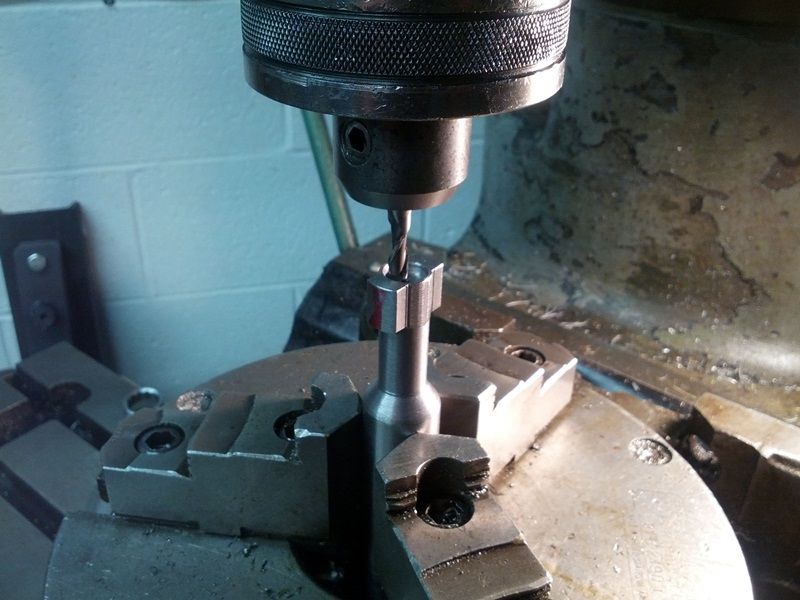 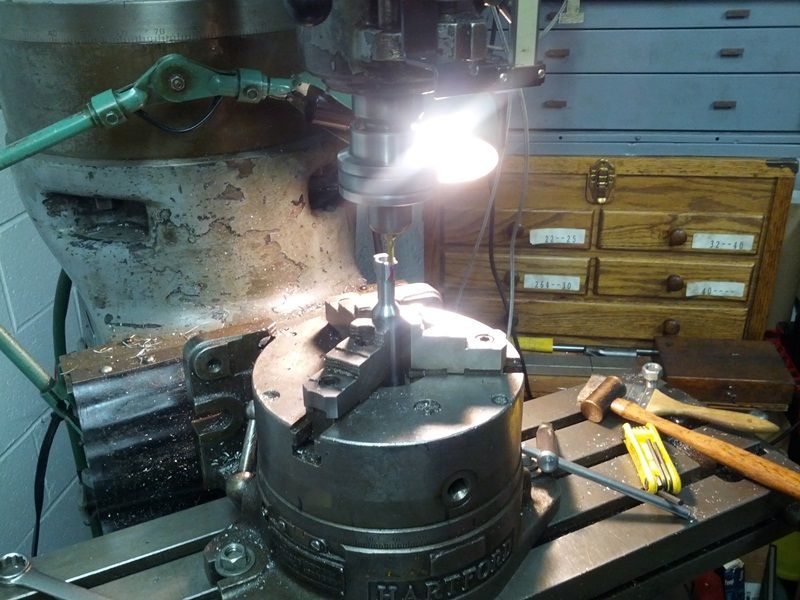 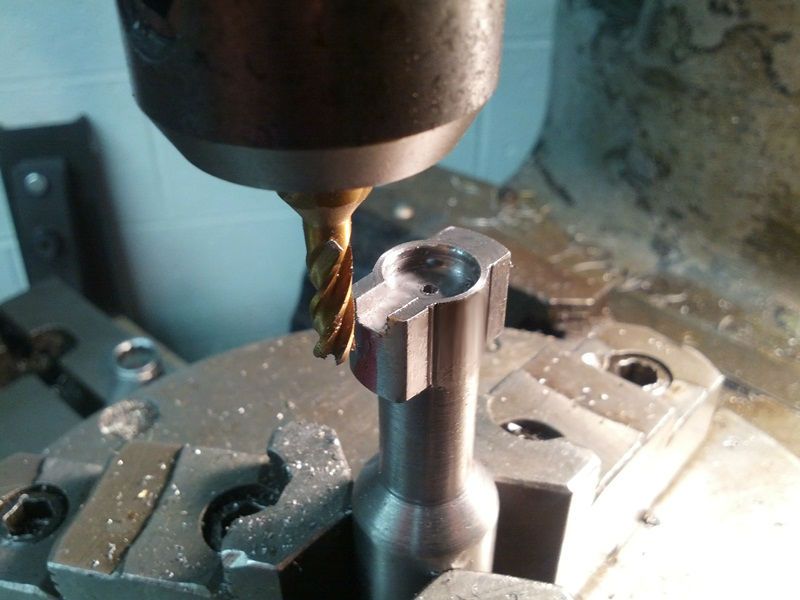 The retainer-slot is done with a small wheel cutter: 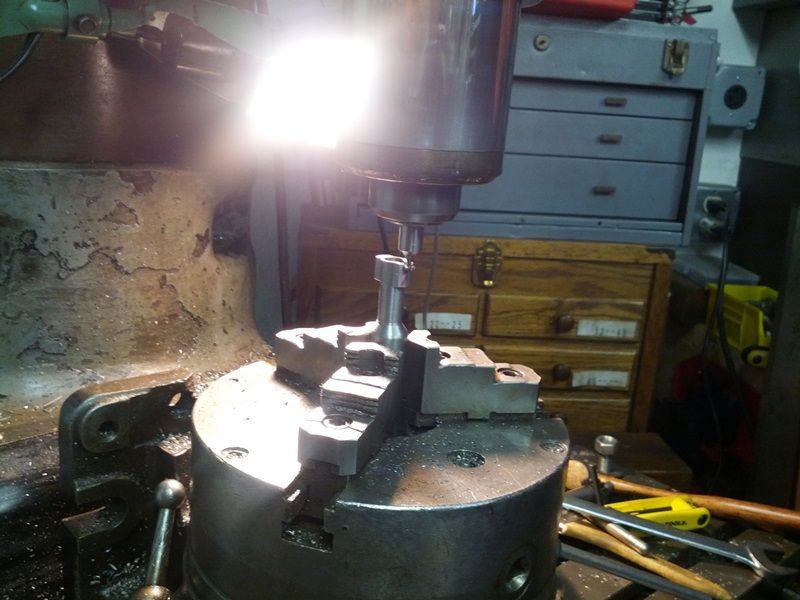 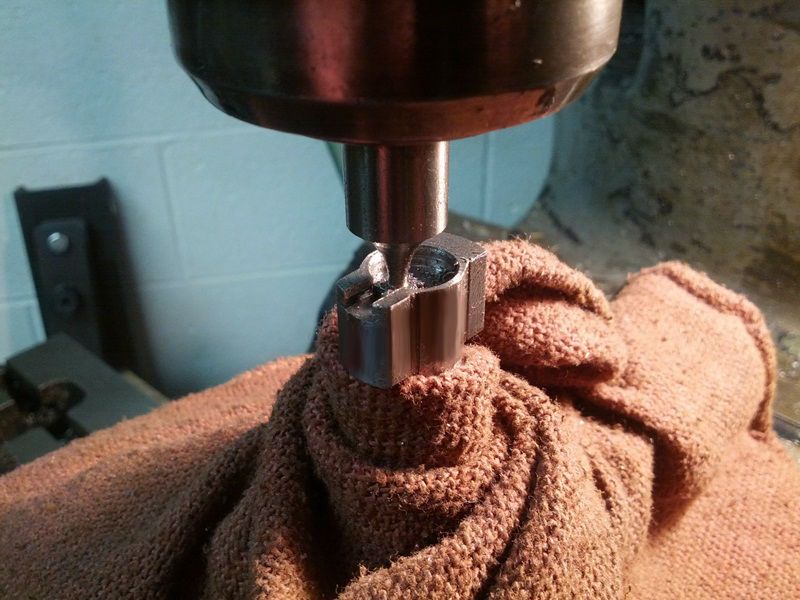 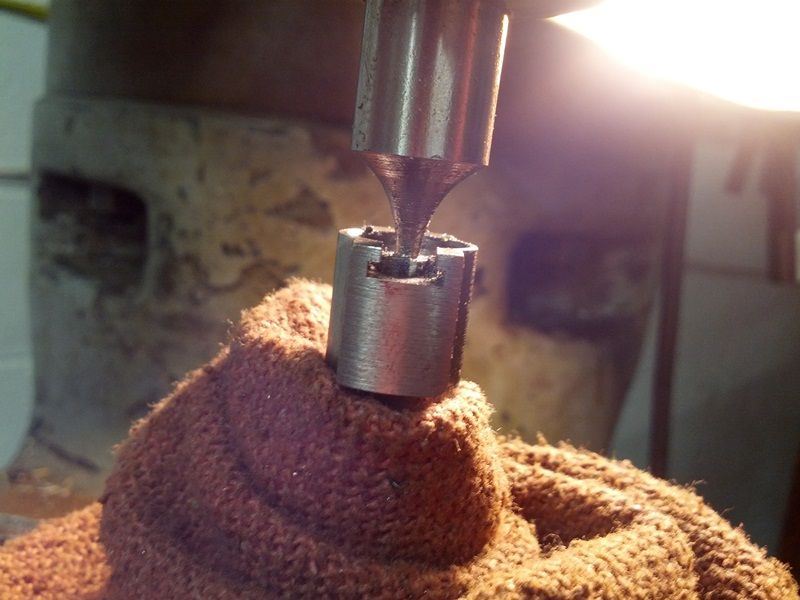 At this stage the extractor is test fit and positioned on the rim. The tricky part is determining the location of the hole for the spring and ball detent. If you make it too close to the inner edge it’ll over-pinch the case. Drill it too far out and you’ll lose grab, thus compromising extraction. 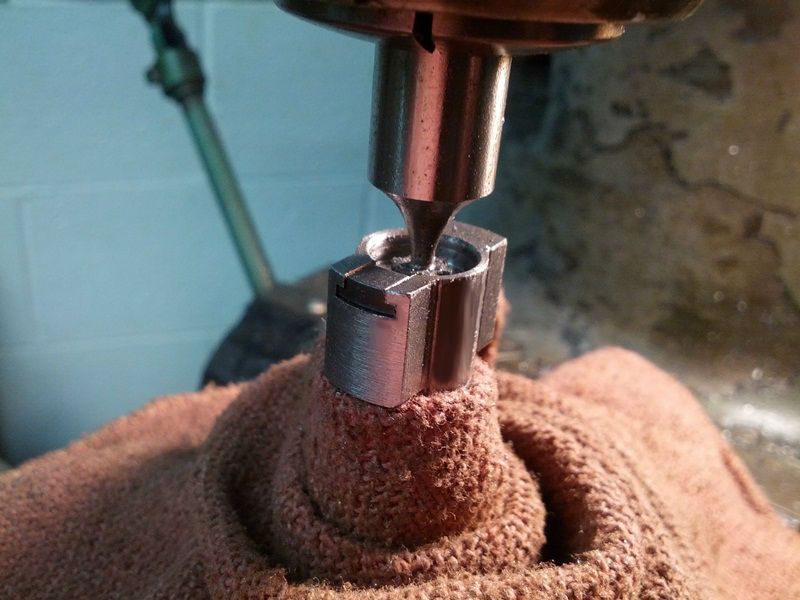 The extractor is installed and firmly pressed against a PPC. Knowing the relationship of the detent notch on the underside to the outer edge we can indicate it in a mill. The spud is butted to the extractor and the digital readout is zeroed. Since the center of the notch is 0.160” in, the table is fed by that amount. We went another 0.020” to play it safe. The spud is swapped out for a drill: 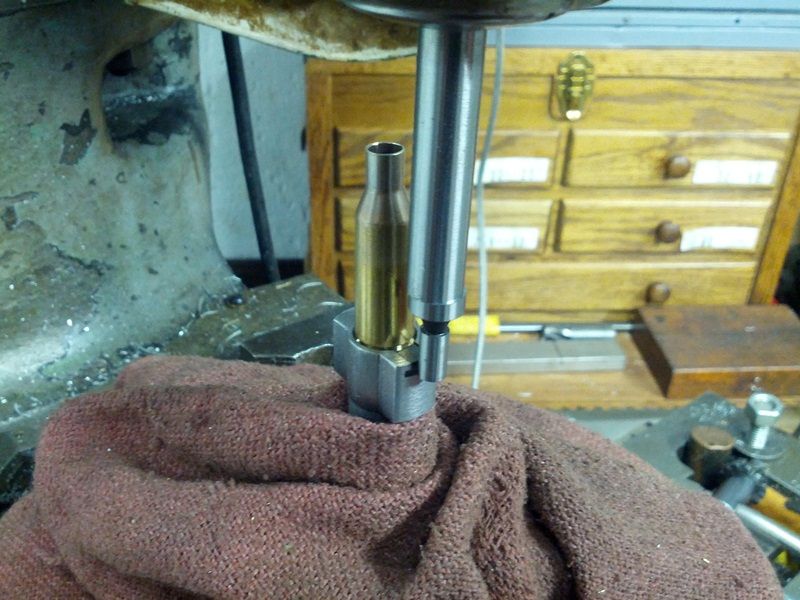 Drilling the 1/8” hole, 0.200” deep: 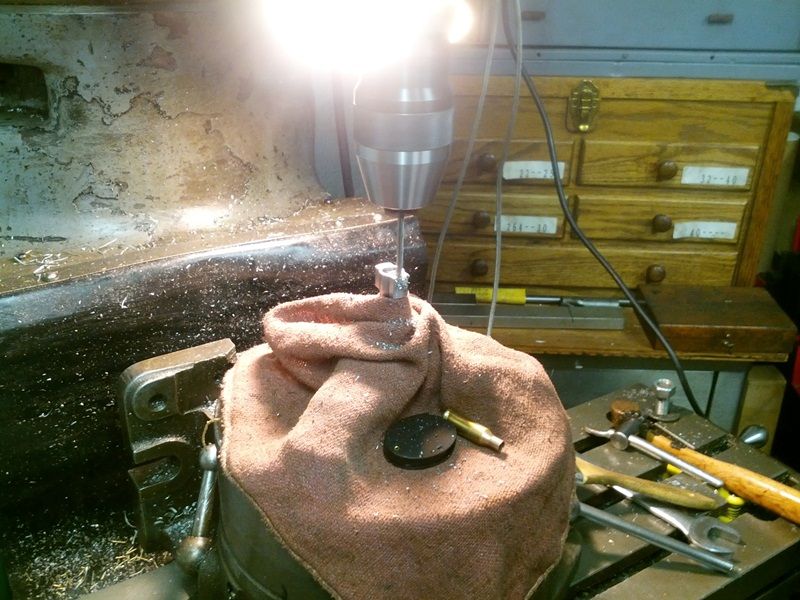 The bolt waiting for the extractor to be installed: 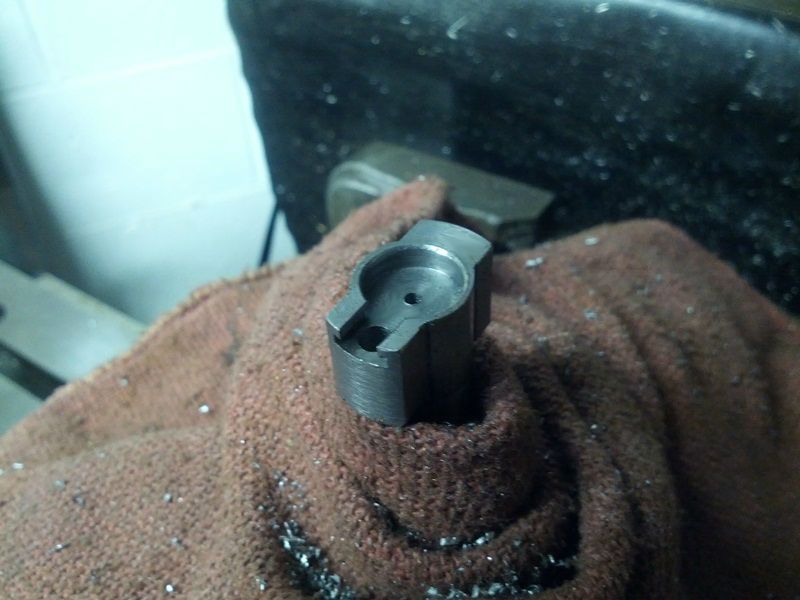 -Lee www.singleactions.com"Building carpal tunnel one round at a time" |
|
|
|
Post by Lee Martin on Jan 30, 2014 14:15:49 GMT -5
Step 25 – The Cocking Cam _____________________________________ The last intricate piece of the bolt body is the cocking cam. Outlined in red, this’ll show the profile (note – the marked line is just a rough sketch). 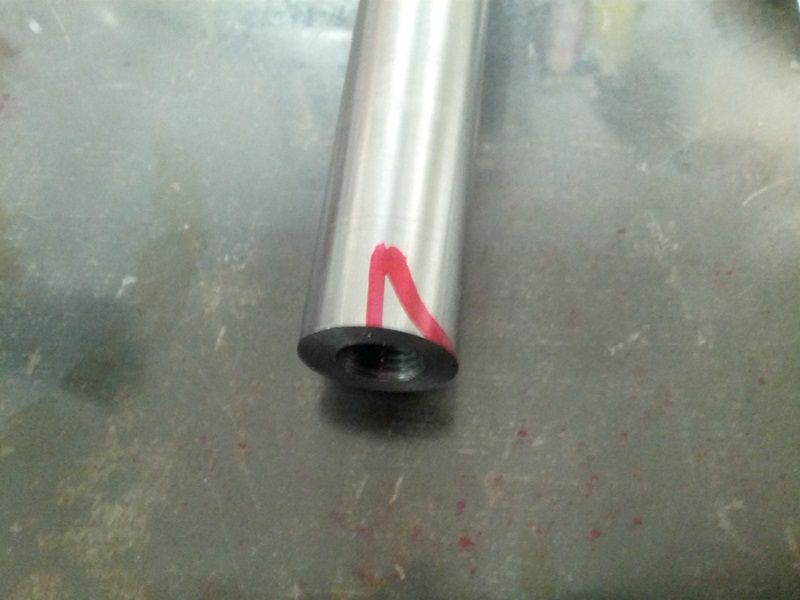 We tabled a vice to hold the bolt in a vertical mill. 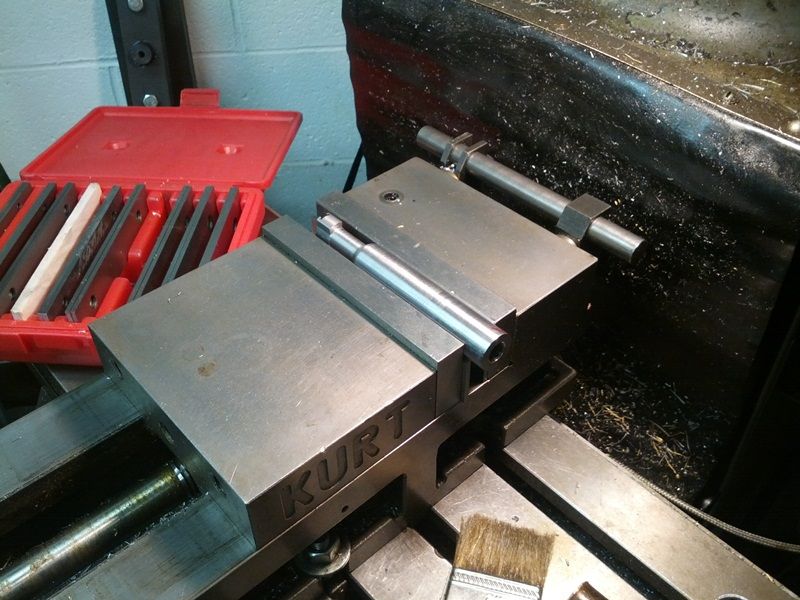 TDC is found and a 3/16” end-mill makes the in-cut: 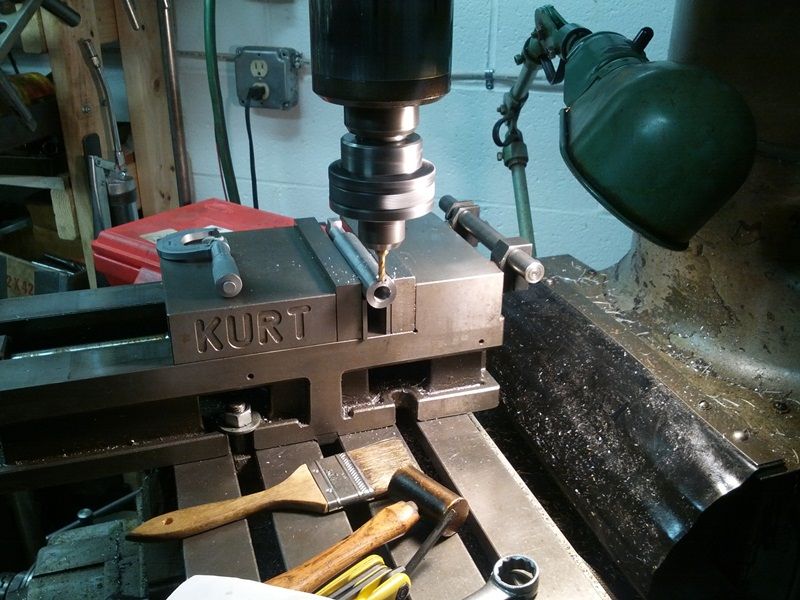 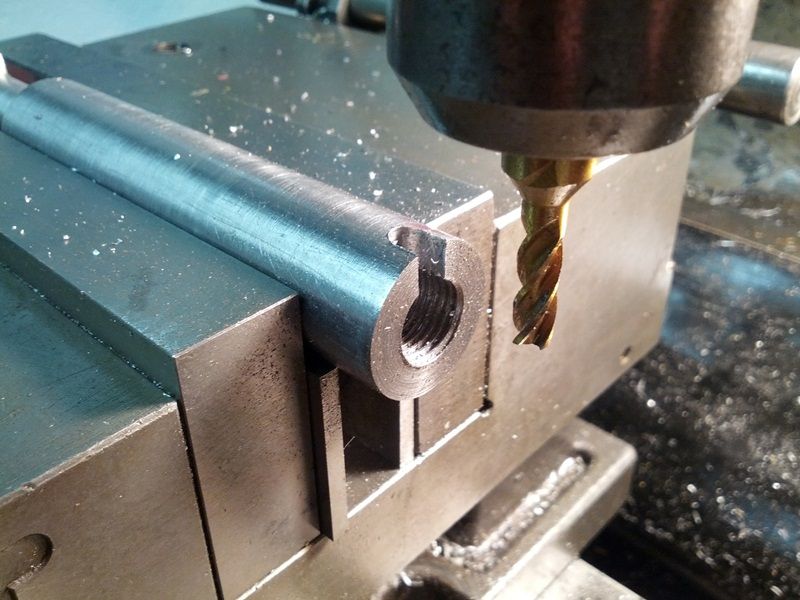 One of my favorite parts of action making is milling the cam. A Spindex jig creates the curve using an aluminum pattern. My dad made the insert when we began fabricating receivers in the 80’s. 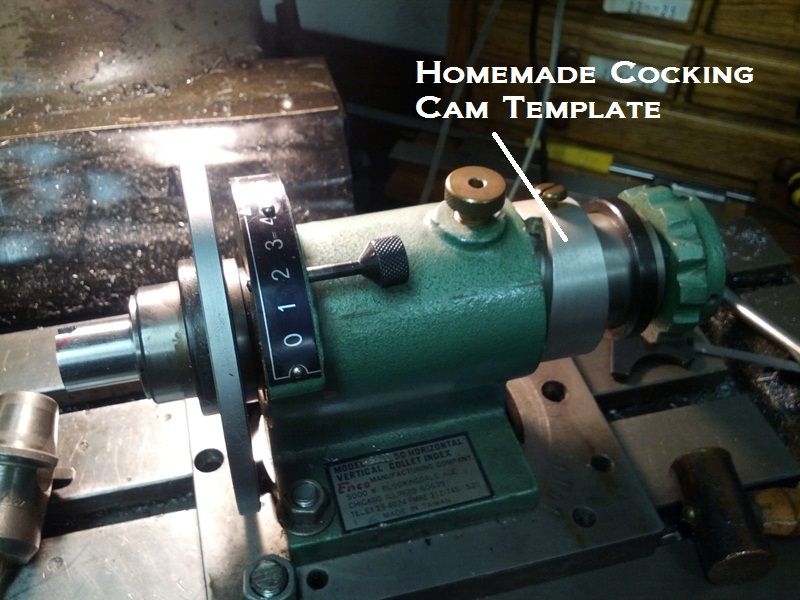 Notice how the collar mimics an up-scaled bolt ramp? This acts as the template. With the body secured in a collet, our end-mill is bottomed in the lead and the Spindex is turned. Passes are 0.020” deep and the rotating head profiles the cam. 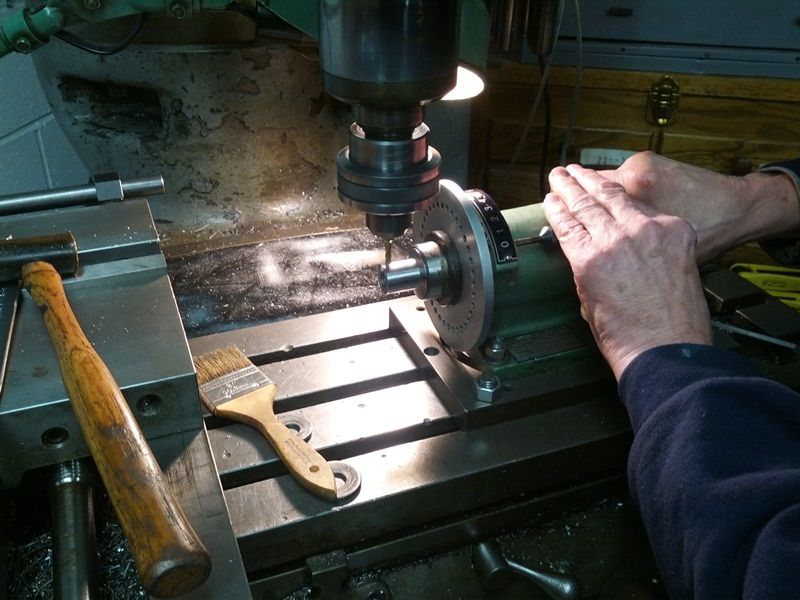 Video of the jig at work: We removed some thread so re-tapping is done to clean-up the inlet: 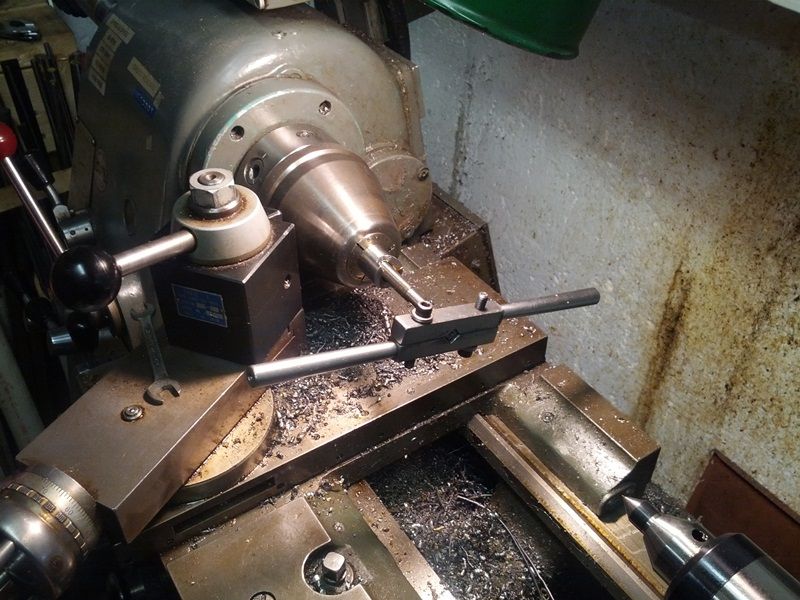 Photos of the finished cam: 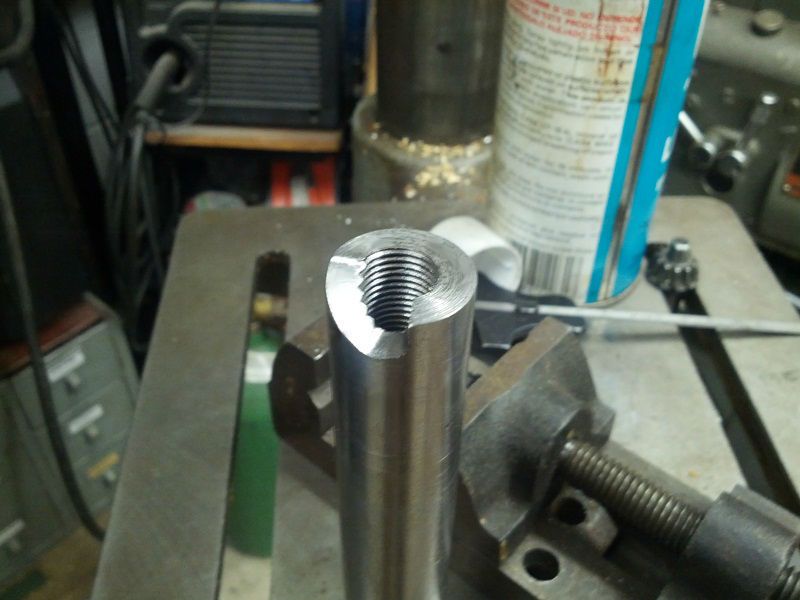 Like most bolt actions ours is cock-on-opening. The cocking piece rests in the bottom of the crevice once fired. Lifting the bolt cams the tab back and the spring is compressed. When we make the pin assembly I’ll post a sequential diagram. -Lee www.singleactions.com"Building carpal tunnel one round at a time" |
|
|
|
Post by maxcactus on Jan 31, 2014 3:30:20 GMT -5
I'm actually at a loss for words, other than to say "Thank you!" and your father, Lee! These threads are fascinating and a great learning experience. Again, tremendous thanks for the detailed pictures and explanation!
|
|
|
|
Post by bradshaw on Jan 31, 2014 11:54:59 GMT -5
+1
David Bradshaw
|
|
|
|
Post by Lee Martin on Feb 4, 2014 16:19:06 GMT -5
Step 26 – Installing the Extractor ___________________________________________ There isn’t much to show here, the process is relatively simple. First the spring is placed in the hole, a 1/8” ball bearing is added, and the extractor is clipped in. I would like to cover the styles used in competition rigs. Extractor installed and tested on a PPC: 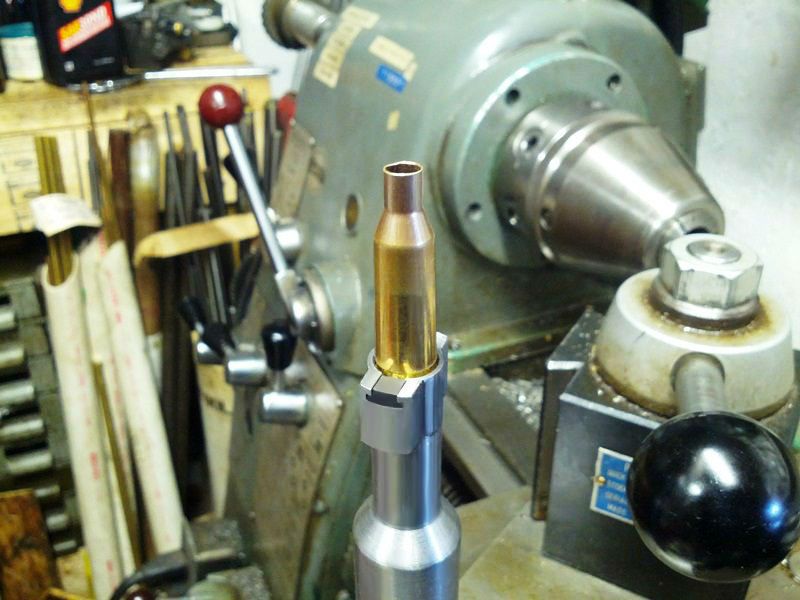 Remington extractors – 722s, 700s, and 40Xs graced the line for decades so these were widespread. Be that as it may, I’m no fan of the Remington “burr”. They work and have yanked some of the biggest magnums but in my opinion they’re thin. No custom action maker who fabricates bolts uses them. In addition, the most common extractor upgrade is the Sako-swap on 700s. My aversion to these began in 1997 with the very rare 7mm STW BDL. I shot one round, regained my hearing from the brake, and extracted air. The clip rode right over the rim. I knocked the brass out and tried another. Same result. Mic’ing proved correct base thickness and diameter. So back to the factory it went, returning 30 days later. Remington’s findings: “Extractor and bolt face checked out. Chamber was polished to remove roughness. The gun functioned in test firing”. It extracted better but still failed 5 – 10% of the time. If a coarse chamber causes the extractor to flop I want no part of that design. My 700 now sports a Sako. 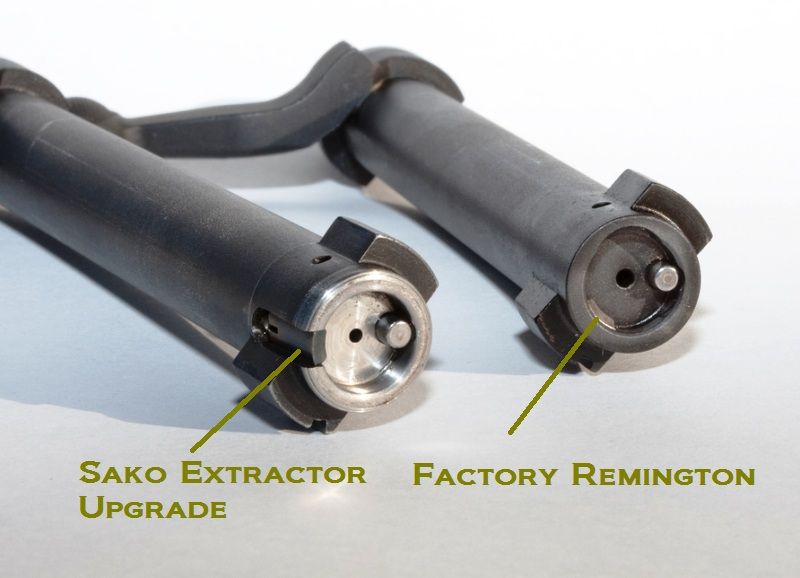 In benchrest, most exposed lug actions use Sakos. Positioned at a lug edge, they take one milled slot and two drilled holes. Here’s the diagram: 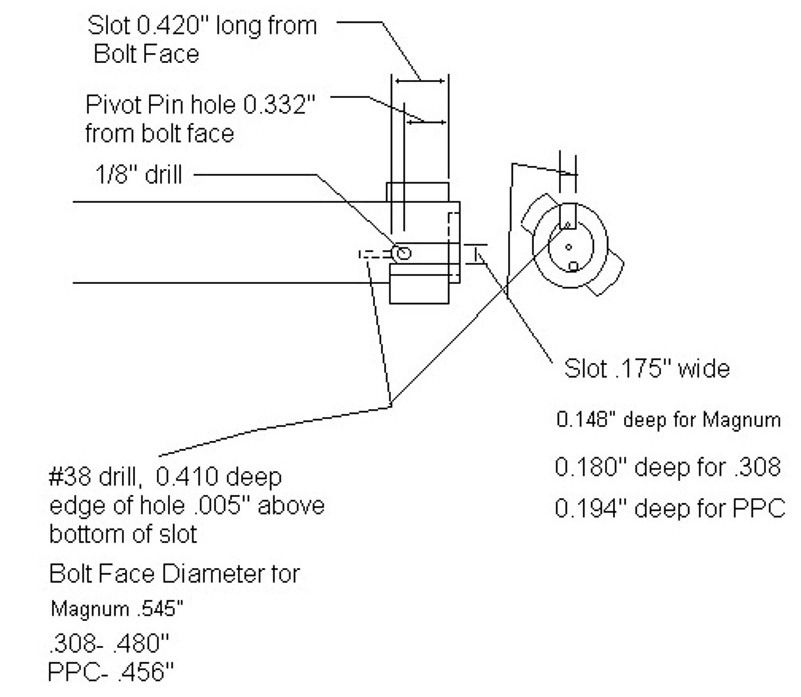 Sako extractors offer positive pull, smooth ride on and off the rim, and are straightforward to install. My only rub is they consume bolt body and require a pivot hole that approaches the firing pin. But none of that has ever been shown to degrade accuracy. Sako extractor parts: 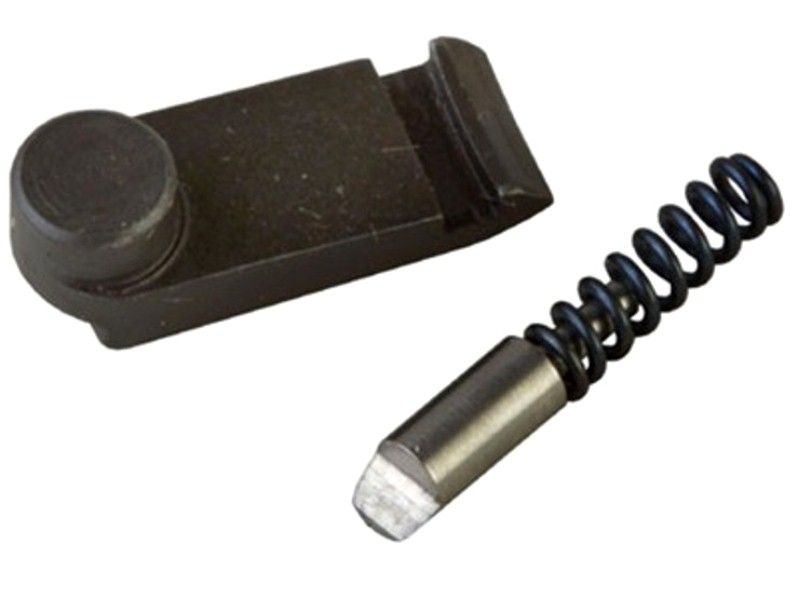 Sako style extractor in a Borden: 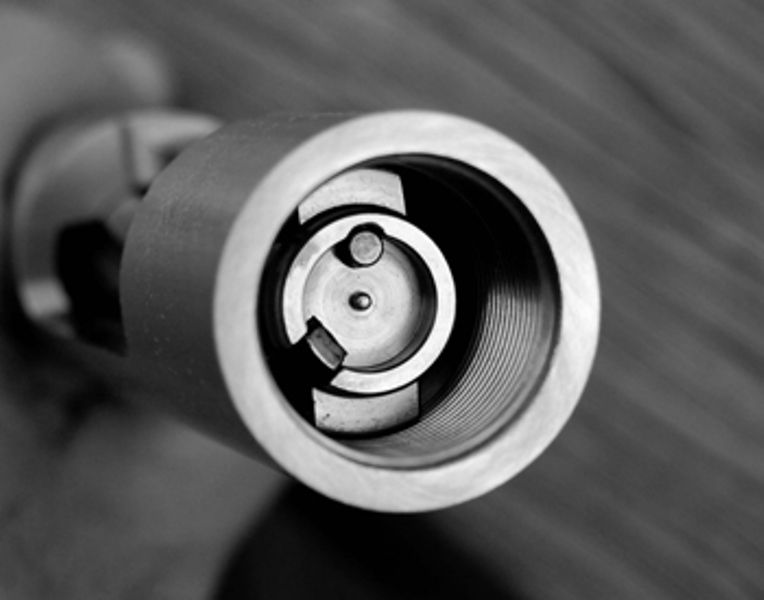 The Hall action, which ours most resembles, wore post-64 Winchester extractors. When dad started making the Martin BR in the 80’s he used the same. They were abundant, easy to fit, and durable. Then Winchester returned to the claw (a move most applauded) and post-64 parts became limited. Luckily, the Savage design works off the same principle. The extractor tab slides in a lug notch and is held by spring loading. I reviewed each for this build and went with the Savage. My reasons for doing so: 1) Savage will sell you the parts direct. The extractor, ball, and spring cost $10.00. 2) Unlike the Winchester, which has a nipple and extractor hole, Savage is ball detent. They also incorporate a shorter spring. Therefore, you don’t have to drill as deep and lug is preserved. 3) Savage’s spring is heavier than Winchester’s 4) The Savage is a hair quicker to replace The three types I considered: Left to Right: Sako L461 , Winchester post-’64, and Savage 110 standard 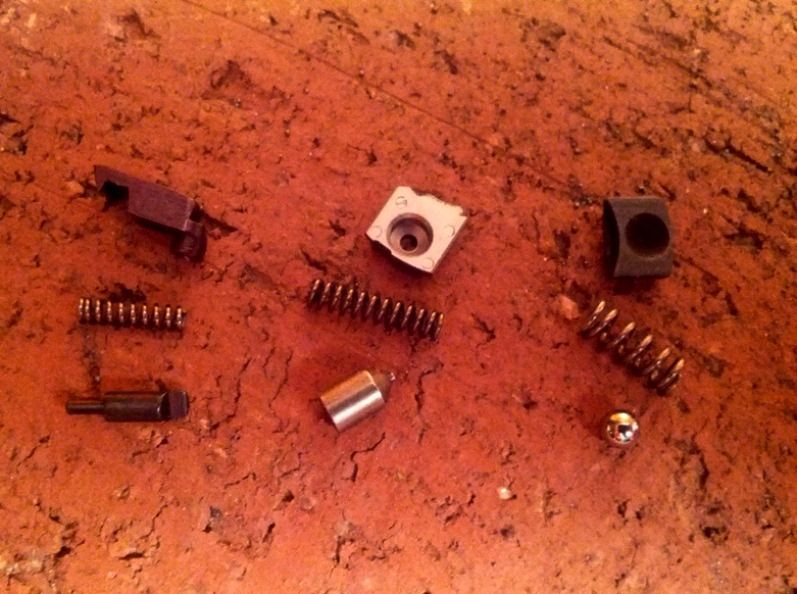 You’ll notice we did not mount an ejector. They were seldom used in old benchrest actions, the cases were removed by hand. The fear was ejected brass could hit the ground thus dinging necks. Mildly sprung buttons have reduced the risk and many competitors now order them. I tend to “pick” shots instead of “running” strings. Cycling speed isn’t high on my list of must haves. My shooting rhythm also entails pulling spents from the port. I guess old habits are hard to break. -Lee www.singleactions.com"Building carpal tunnel one round at a time" |
|