pacecars
.401 Bobcat
  
Posts: 2,881
Member is Online
|
Post by pacecars on Dec 5, 2017 22:44:09 GMT -5
What basic equipment would be needed to make custom pistol grips?
|
|
|
|
Post by dougphillips on Dec 5, 2017 23:29:04 GMT -5
Sandpaper and patience.  |
|
|
|
Post by 2 Dogs on Dec 6, 2017 14:19:53 GMT -5
That would depend on what you are starting out with. For example, if you are starting with a set of semi-inletted blanks, you could probably get by with a rasp, a coarse and yet a not so coarse file, you will need the different shapes as in flat, half round and round, and last the various grits of sandpaper from 120 to 600 grit. A dremel tool could come in handy and of course a sharp pencil.
If you have never done sixgun stocks, you might better check and see what utube videos are available, no telling what tips you might be able to pick up. Wood work of this nature isn't for everybody either because it does require a great deal of patience. I would start out with semi inletted set rather than a set of blanks.
A set of blanks will require everything from a chisel set up to a milling machine or even a duplicator and a good deal of care only to cut that away that does not look like pistola stocks. Last, there is the finish work. You need a CLEAN place to do this. It should also be dry and dust free.
Good luck!
|
|
|
|
Post by blacktailslayer on Dec 6, 2017 14:49:07 GMT -5
I have made exactly one set from scratch and they came-out OK. I watched a few YouTube vids which were helpful. Go slow and limit your use of power tools, you can get in trouble quickly. Remember that you can always take more off, however the tree is dead and will not grow more if you take too much off.
Don D.
|
|
|
|
Post by 2 Dogs on Dec 6, 2017 15:05:38 GMT -5
Pacecars, what sixgun in particular are you referring to?
|
|
|
|
Post by potatojudge on Dec 6, 2017 15:39:35 GMT -5
Unless you're a woodworker already or have a special bit of lumber you'd like to start with, then make life easy and find some well dried flat blanks or stabilized blanks.
You'll still need a sander or sandpaper to flatten one side, a drill press (preferably) to drill the screw hole/estucheon hole, scroll or small band saw to cut the rough outline, and sander/file/dremel or whatever shaping tool you'd like. A bench oscillating belt sander, disk sander, and 1 inch belt sander are nice additions to speed up shaping and help get precise straight edges/bevels.
If you're starting with a log add large band saw, jointer, and planer to that list. Make sure your wood is good and dry before you start.
|
|
jsh
.327 Meteor
 
Posts: 884
|
Post by jsh on Dec 6, 2017 16:35:03 GMT -5
I need a pet beaver.
|
|
caryc
.375 Atomic
  
Posts: 1,055
|
Post by caryc on Dec 6, 2017 17:37:02 GMT -5
Well...you can start out with a nice piece of wood and hack away at it and wind up throwing the whole mess in the trash. Or, if you want to make it easy on yourself, you can purchase some power tools. I made and sold custom Ruger grips for over ten years. The following basic tools would make your efforts a lot easier and maybe even profitable.
1. A band saw. At least a 9". I have a 9" and a 14" saw.
2. A four inch belt sander with a disc sander on the side of it.
3. An oscillating spindle sander.
4. A one inch belt sander.
5. A table top drill press.
6. A dust collector system.
7. A table saw.
8. A planer.
When I made my first set of grips all I had was #5. I also used a hand drill motor and various sanding drums on the drill press. I made a couple sets for myself and learned how to do it. They started coming out so nice that I decided to start selling them. I then purchased #1, #2, #3, and #4.
Then I started advertising on Ebay. I started making money and then purchsed #6, #7, and #8. These power tools made the difference in taking all day to make a set of grips and taking about 3 hours to make a completed set.
The first piece of advice I can give you is "take your time". Do not try to rush the job. You'll only screw up the job and get discouraged. Good Luck To You.
One more thing. Make sure the wood you use is dry. You want it down to at least 6% moisture content. Most dealers are reputable and will tell you if the wood is dry. Preferably kiln dried. You don't want to make a set of grips and then have them split or crack or shrink on the gun.
|
|
|
|
Post by dougphillips on Dec 6, 2017 22:20:39 GMT -5
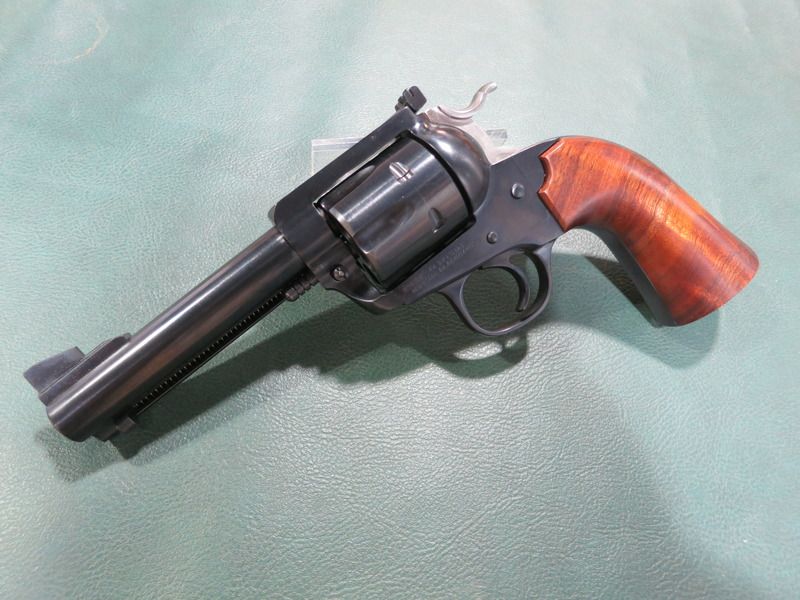
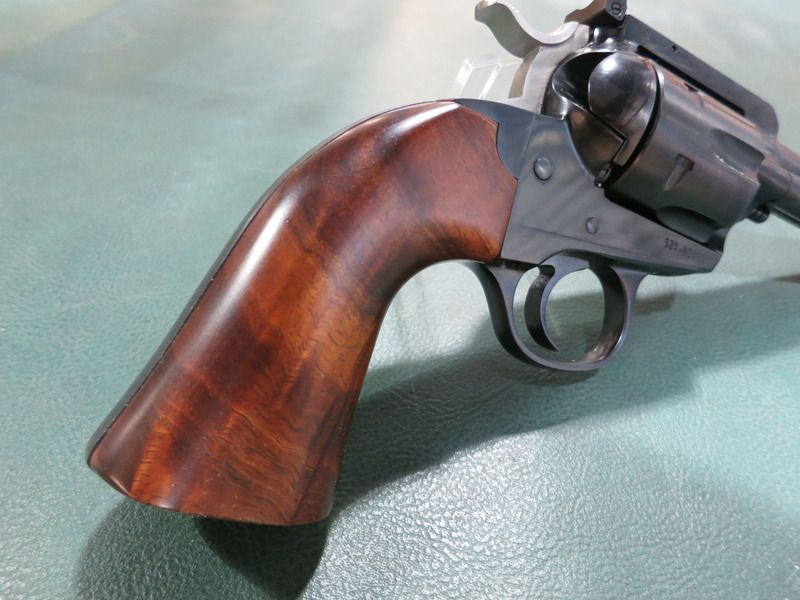
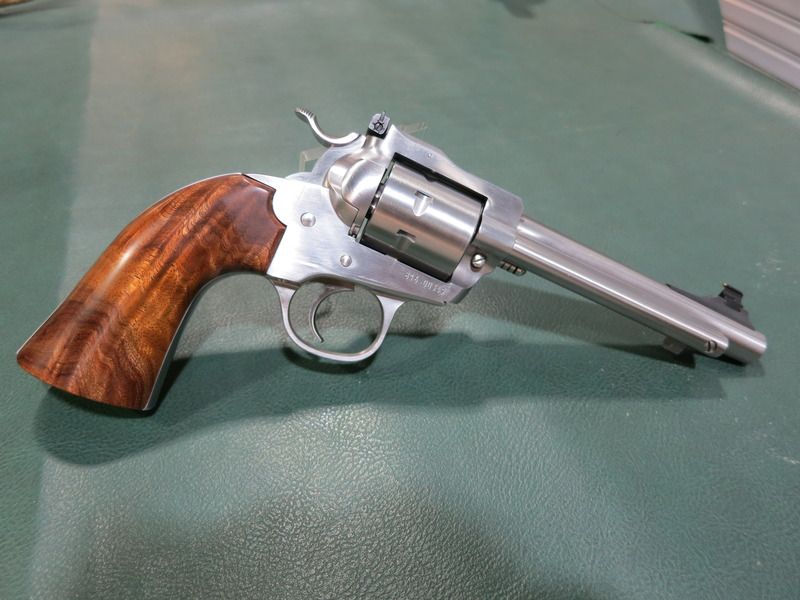
+1 what the other guys said. (Except the part about the beaver) I was being somewhat facetious in my previous post. I've made exactly two sets of grips so far, so I am fellow newbie to grip making. I was fortunate enough to have a drill press and band saw at my disposal and I had a Dremel and a few files. I also had a "Panavise", which is a small vise which can be tilted and rotated to various positions, and a bunch of sandpaper. The band saw definitely made it easier to cut out the basic shape of the grips. The Dremel was useful for hogging out the majority of excess material, and getting them into the basic shape of grips, and was very helpful in shaping the semi-circular "scallop" in the top of the grips where they fit to the grip frame just behind/under the hammer. All that being said, though, probably about eighty percent of the time it took to make them was spent sanding. (Hence my post about sandpaper and patience...) Caryc's list of tools would have definitely made things go faster, and although I made them in my spare time over the course of several days, his estimate of it taking a whole day to make a set of grips is pretty accurate, as I've probably got about eight or ten hours in each set I've made. Bear in mind though, that although power tools can make things go quicker, they can also screw things up quicker. It might take you ten minutes of sanding with a piece of sandpaper to remove a sixteenth of an inch of material, you can do that in about two seconds with a belt sander. When you are just learning, sometimes it's better to just take it slow. It all started when I purchased a Ruger Single Seven. I liked it a lot, but having fairly large hands, I've always found the Bisley grip to fit my hand better, so I decided to convert it to a Bisley grip frame. During the course of that project, I decided I wanted to try making my own grips as well. (I like to know how to do things...) I was worried about what Caryc mentioned- "start(ing) out with a nice piece of wood and hack away at it and wind up throwing the whole mess in the trash.", so for my first "practice" set of grips, I used one of my less fancy pieces of wood. After they turned out OK, I decided to try a second set out of fancier wood. The wood I used was Koa wood, from Hawaii. I'm pretty happy with how they turned out. The first (Practice) set currently lives on my Bisley Flattop 44Spl. :   ![]() The second set is on my Single Seven :   My advice? Give it a try! I wouldn't start out with my fanciest piece of wood. Take your time, go slow, you can always take more off, but you can't put it back on. When you think about it, it's pretty simple, really. Kinda' like 2 Dogs said. Just take a piece of wood and cut away everything that isn't grips...  Hope it helps. Doug |
|
|
|
Post by potatojudge on Dec 6, 2017 22:38:29 GMT -5
Doug, those both look REALLY nice!
I might add start out on a stainless gun if you can (the best makers leave the finish intact, others sand the grips on the grip frame and refinish blued frames), and the radius on a Bisley can be tricky so decide if you wanna tackle that right off.
|
|
|
|
Post by dougphillips on Dec 6, 2017 22:53:59 GMT -5
Thanks!! Since I was fitting the stainless Bisley gripframe to my Single Seven, I sanded both sets of grips on the frame and wasn't worried about scratching the frame. Had it been a blued gripframe, that would have DEFINITELY complicated things..
|
|
pacecars
.401 Bobcat
  
Posts: 2,881
Member is Online
|
Post by pacecars on Dec 6, 2017 23:20:24 GMT -5
Thanks guys! Great advice and help! Getting close to retiring and looking for something to keep me busy. My planned projects are some stainless Rugers. I figure I would start getting the tools to do it right and plan to go very slow with some cheaper woods first. Might even start out with knife handles first.
|
|
|
|
Post by 2 Dogs on Dec 7, 2017 1:34:43 GMT -5
Thanks!! Since I was fitting the stainless Bisley gripframe to my Single Seven, I sanded both sets of grips on the frame and wasn't worried about scratching the frame. Had it been a blued gripframe, that would have DEFINITELY complicated things.. I gotta flash my "GREAT WORK" card too Doug. The Bisley grip frame can be stocked in a number of different ways. Some guys like thinner stocks some guys like them a little more hand filling. Some want them to be rounder, that is, more of a continuous radius all around and others like definitive lines. I like what you did there. You picked your theme and stayed with it and carried it out nicely. Very clean execution. Here is a set I just did with the goal of getting them finish sanded as quickly as I could. You might note I did take these right to the metal on the frame. The style is a bit different, but it works for me. For Pacecars, I began with a set of oversize semi inletted stocks from Dick Sixshot Thompson. They fit pretty closely so I rough shaped them with a rasp and then went to a single cut file. Once I got them shaped where I wanted them I went through the sandpaper progression. From this point they are ready to be finished and sometimes we do a bit of glass bedding especially on the hard kickers so the metal can't get a running start at the wood and crack your custom sixgun stocks.  |
|
dhd
.327 Meteor
 
Posts: 941 
|
Post by dhd on Dec 7, 2017 10:54:13 GMT -5
Fermin, is that maple? Decent figure and I like the light color. Hope you are just clearing them.
I love seeing what people can do with a will to do it. I also really enjoy seeing what the professionals turn out. The effort to run the wood/material up to the metal really sets a revolver off.
The thing that I'm expert at is being able to box the frame up and mail it off somewhere. I work really hard and some weeks later, the box magically comes back with grips fitted expertly to the frame. Close to a miracle I know, but I do what I do.
|
|
|
|
Post by 2 Dogs on Dec 7, 2017 11:43:26 GMT -5
Fermin, is that maple? Decent figure and I like the light color. Hope you are just clearing them. I love seeing what people can do with a will to do it. I also really enjoy seeing what the professionals turn out. The effort to run the wood/material up to the metal really sets a revolver off. The thing that I'm expert at is being able to box the frame up and mail it off somewhere. I work really hard and some weeks later, the box magically comes back with grips fitted expertly to the frame. Close to a miracle I know, but I do what I do. Ok, that cracked me up right there. I almost fell out of my crocs and spilled my good coffee too!!! It’s true that some guys are indeed seriously “Post Office Challenged” which is a condition akin to “Male Refrigerator Blindness”!! For example I’ve got a book I’ve been mailing to Glenn for at least 5 years or so. I played 9 kinds of Hell here lately getting one of my buddies to mail a gripframe to Zane Thompson so I could gift him some Micarta stocks. Speaking of which I just got a set back from Zane, maybe he can let us know how working with Micarta is different than wood.... |
|