


David Bradshaw Photos Vol. LXXVI - DWA M44, Part 2
Jun 1, 2015 19:13:26 GMT -5
alukban and lscg like this
Post by Lee Martin on Jun 1, 2015 19:13:26 GMT -5
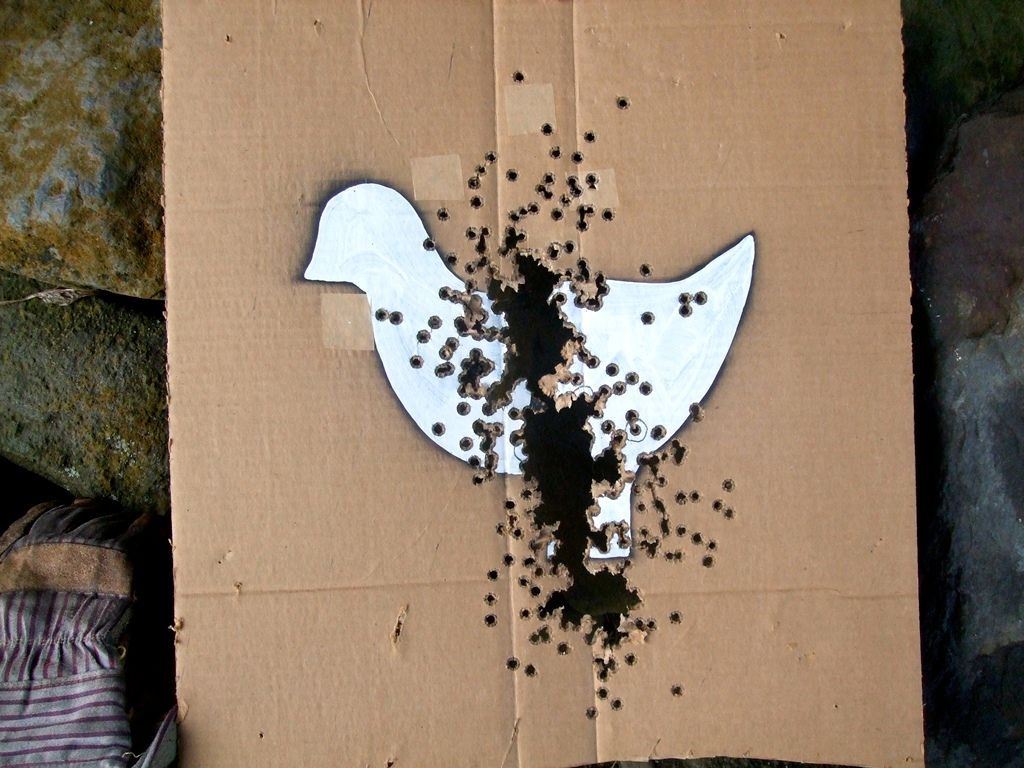
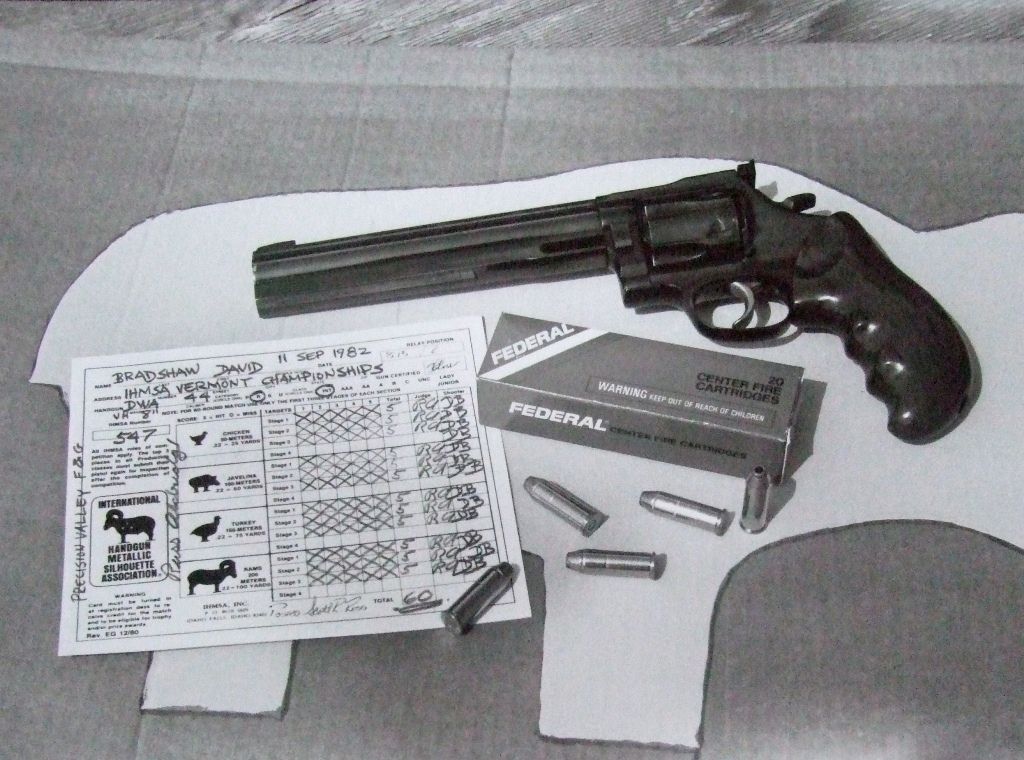
700 rounds from Dan Wesson Arms Model 44 Vent Heavy 8-inch. DWA Combat grip. Fired from 50 yards on 21 May 1985. Position: Creedmoor, sandbag, offhand. Federal .44 Mag 44A 240 JHP. No malfunctions of any kind.
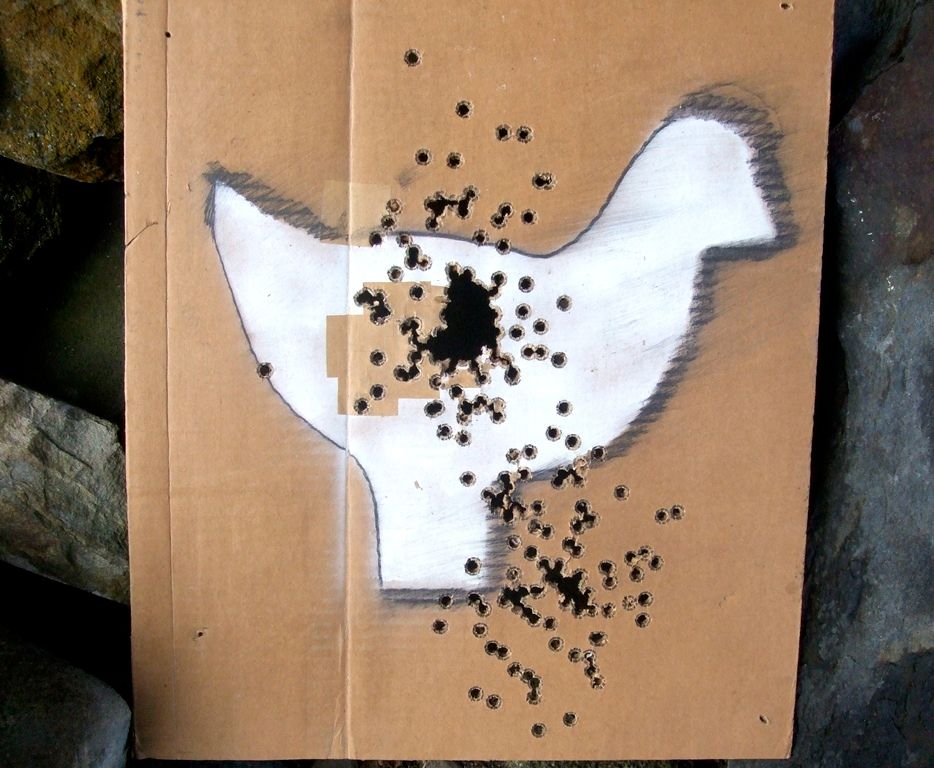
250 rounds fired from 50 yards with M44 VH8, 22 May 1985. DWA Combat grip. Creedmoor, sandbag, with some of it offhand.
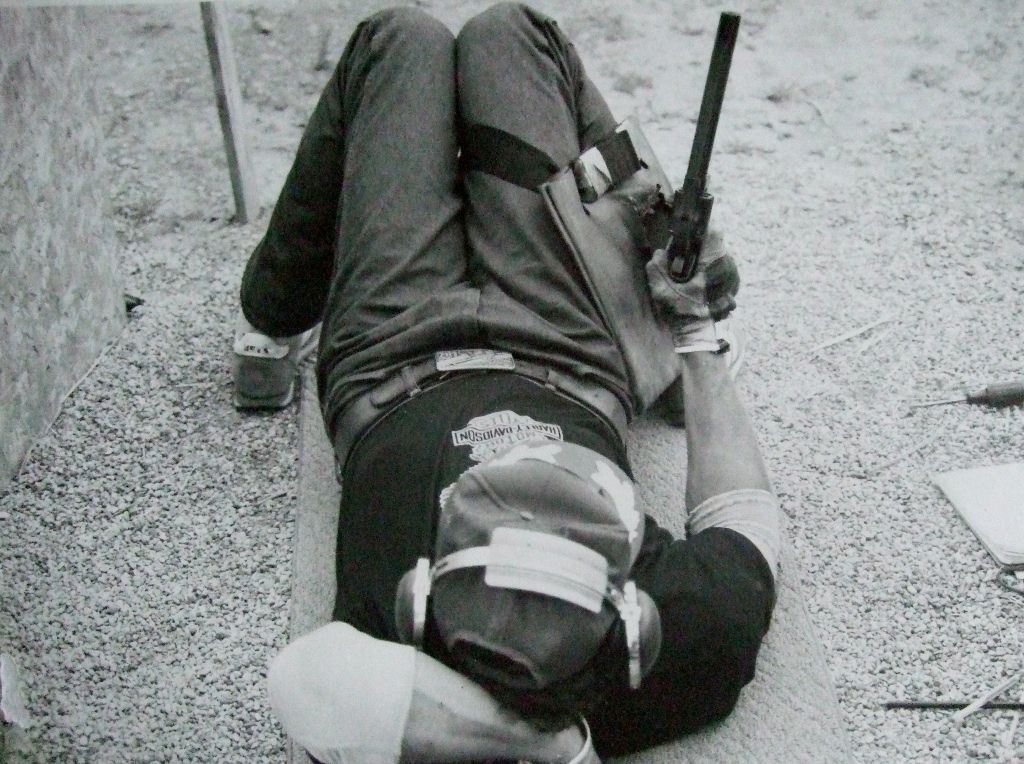
All of the rounds shown on the preceding targets, were fired in two days from the DWA M-44 VH8 shown here. Shooting divided between sandbag, Creedmoor, and offhand.
DWA factory grips:
1) Combat (bird head)----CREEDMOOR and offhand.
2) Target (square butt)----sandbag.
CREEDMOOR for handguns:
1) Body reclines, oriented to target. Remember, adjust body to target, not gun.
2) Knees drawn up with feet spread
3) Knees lean into each other, held by gravity.
4) Support hand reaches tightly behind head to touch ground at back of neck, between shoulder blades.
5) Head rests----as erect as possible----against triangle formed by support arm. Head held by gravity without neck tension.
6) Elbow of gun hand rests on ground----outboard of torso.
7) Gun hand pivots into hip, barrel resting against leg above ankle.
8) If gun doesn't line up on target, adjust position.
M-44 .44 Mag Vent Heavy 8" at full recoil. Creedmoor is a free-recoil position. To protect one's hip from high pressure gas and particulate escaping barrel/cylinder gap a blast shield is a must. David conceived the Kevlar blast shield, which became standard in handgun silhouette. Multiple layers of leather and industrial nylon belting also work.
Muzzle must extend beyond leg.
Elbow protection is a must against any hard surface. The more padding, the better. Nerve and cartilage damage await those who think elbow protection is a joke. (Rule applies as well to shooting from a bench.)
Dan Wesson Arms M-44 with VH8 barrel & shroud comes in just under 4-pound IHMSA limit for Production and Production Revolver categories. Some denser factory walnut puts weight over.
Pachmayr grip definitely puts the VH8 over.
Once a barrel/shroud configuration is settled upon for continued shooting, barrel threads should be set with BLUE Loctite. (Heat must be used to soften Loctite before removal is attempted.)
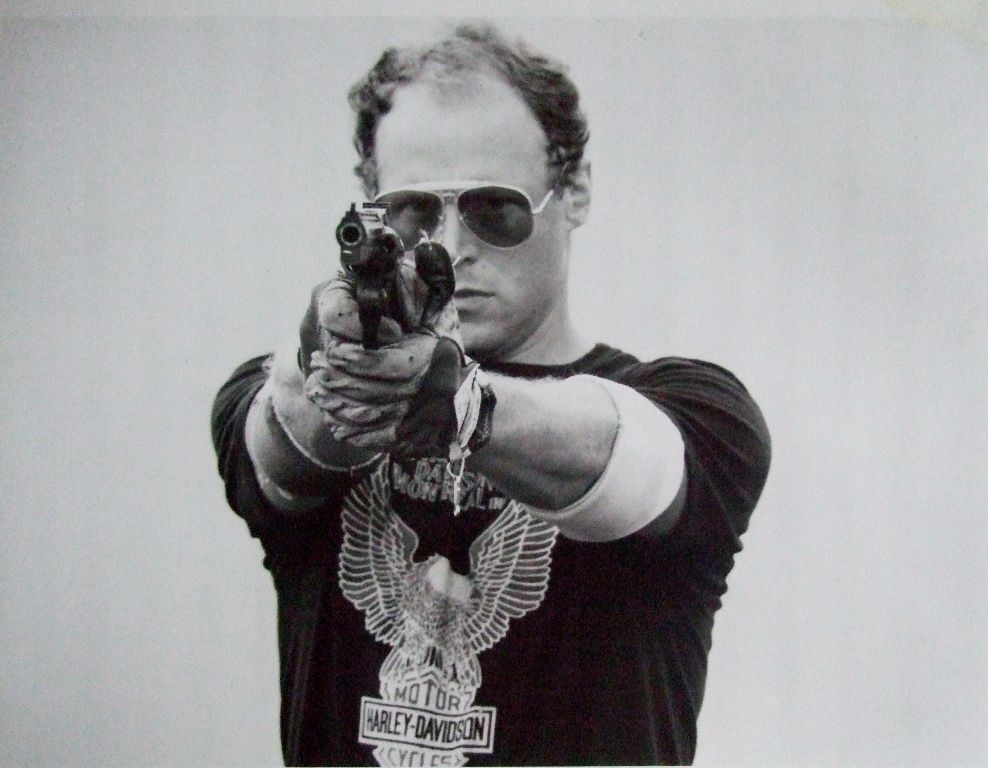
Standing, or offhand, with the M44 VH8. Isosceles stance affords maximum eye relief, import to long strings of fire. To know isosceles and a boxing, or modified Weaver, stance is a good thing. The individual determines through practice which he or she will use. Doctrine is crap when performance doesn't back it up.
Isosceles requires more muscle tone than modified Weaver to steady a heavy handgun. Again, results are final arbiter of technique.
While elbows are extended in this isosceles stance, they are exactly locked. A detail especially important for riding serious recoil, or when shooting over a rest.
-Lee
www.singleactions.com
"Building carpal tunnel one round at a time"

250 rounds fired from 50 yards with M44 VH8, 22 May 1985. DWA Combat grip. Creedmoor, sandbag, with some of it offhand.

All of the rounds shown on the preceding targets, were fired in two days from the DWA M-44 VH8 shown here. Shooting divided between sandbag, Creedmoor, and offhand.
DWA factory grips:
1) Combat (bird head)----CREEDMOOR and offhand.
2) Target (square butt)----sandbag.
CREEDMOOR for handguns:
1) Body reclines, oriented to target. Remember, adjust body to target, not gun.
2) Knees drawn up with feet spread
3) Knees lean into each other, held by gravity.
4) Support hand reaches tightly behind head to touch ground at back of neck, between shoulder blades.
5) Head rests----as erect as possible----against triangle formed by support arm. Head held by gravity without neck tension.
6) Elbow of gun hand rests on ground----outboard of torso.
7) Gun hand pivots into hip, barrel resting against leg above ankle.
8) If gun doesn't line up on target, adjust position.

M-44 .44 Mag Vent Heavy 8" at full recoil. Creedmoor is a free-recoil position. To protect one's hip from high pressure gas and particulate escaping barrel/cylinder gap a blast shield is a must. David conceived the Kevlar blast shield, which became standard in handgun silhouette. Multiple layers of leather and industrial nylon belting also work.
Muzzle must extend beyond leg.
Elbow protection is a must against any hard surface. The more padding, the better. Nerve and cartilage damage await those who think elbow protection is a joke. (Rule applies as well to shooting from a bench.)

Dan Wesson Arms M-44 with VH8 barrel & shroud comes in just under 4-pound IHMSA limit for Production and Production Revolver categories. Some denser factory walnut puts weight over.
Pachmayr grip definitely puts the VH8 over.
Once a barrel/shroud configuration is settled upon for continued shooting, barrel threads should be set with BLUE Loctite. (Heat must be used to soften Loctite before removal is attempted.)

Standing, or offhand, with the M44 VH8. Isosceles stance affords maximum eye relief, import to long strings of fire. To know isosceles and a boxing, or modified Weaver, stance is a good thing. The individual determines through practice which he or she will use. Doctrine is crap when performance doesn't back it up.
Isosceles requires more muscle tone than modified Weaver to steady a heavy handgun. Again, results are final arbiter of technique.
While elbows are extended in this isosceles stance, they are exactly locked. A detail especially important for riding serious recoil, or when shooting over a rest.

-Lee
www.singleactions.com
"Building carpal tunnel one round at a time"


